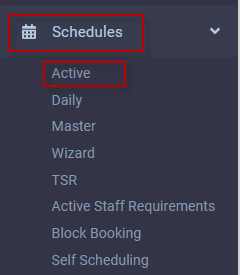
The schedules are used to maintain the daily and weekly complement of shifts needed in your facility. The Master Schedule consists of lines created and assigned to the employees, which are then used to populate the Active Schedules with daily shifts.
If Employee Self Service is activated, allowing employees to log in and view their schedules, managers have the ability to restrict how far out (by date) the schedules are visible using the Posted Date feature.
The Active Schedule should be used for temporary, day to day changes only. Permanent changes should be made to the employee's Master Schedule line. |

|
The Active Schedule has two different filter options: 1.The filter found in the Employee Panel. This filter selection will be based on the employee, not the schedule. For example, if I filter to only the PSW class, I will see employees assigned as PSWs in Personnel. In this case, if a dietary aide employee (home class in Personnel) is assigned to a shift as a PSW, I will not see this employee. 2.The schedule filter (funnel icon at the top of the Active Schedule) is used to filter by scheduled shifts, not by employee. For example if I filter my Active Schedule to see only the PSW class, I will see every employee who worked in the PSW class, regardless of the employee's home class. Using the above example, in this case the employee whose home class was dietary, but who worked a PSW shift, would be visible in my filtered selection.
Active Schedule display options which are unique to this menu and not described in the Employee Panel section, are described below.
Selecting All Employees Click the Show All Employees icon to select all employee within your filtered selection(s). The image below displays this option in blue, indicating that it has been activated. Click again on this icon to deselect all employees. It will now appear in dark grey.
Selecting Some Employees To select only certain employees: ▪Click on the Show All Employees icon to deactivate as described above. ▪Open your Employee Panel (shown docked to the right below). ▪Click on the Action drop-down menu and select Deselect All to clear any previous selections (shown below). ▪Tick the box beside the employee names of the employees you wish to display. You may use the search function of your Employee Panel to locate employees not visible in your current view. ▪Your Active Schedule should immediately refresh with your selections. You may also manually refresh by clicking the green Refresh icon.
Selecting One Employee ▪Click on the Show All Employees icon to deactivate as described above. ▪Open your Employee Panel (shown docked to the right below). ▪Click on the Action drop-down menu and select Deselect All to clear any previous selections (shown below). ▪From your Employee Panel select the employee you wish to view by clicking anywhere on the row to highlight it red. You do not need to check the box beside the employee name.
|
On the Active Schedule are features for configuring how the schedules are displayed.
Functions
A - Click in the employee name window to open the Employee Panel to filter / group your employe list.
B - Click in the date window to open the calendar. Select a date for your Active Schedule view.
C - Use the forward / backwards arrows to change the schedule view according to the date and interval (see D) that you have set.
D - Click on the drop-down arrow and select the date-range view you would like displayed on the Active Schedule.
E - Click on the Preview Level drop-down arrow to choose how much detail is shown. The detail included in each level is determined by the configuration on the Options window. See Schedule Setting & Options.
Toolbar Icons
1 - Schedule Filter Click on the funnel icon to filter what shifts you would like to see. Please see the Selecting Employees section above for further information. Note: the schedule filter is not applied when viewing in Calendar mode.
2 - Options See Schedule Setting & Options.
3 - Print/Preview Click this option to open a printable version of the Active Schedule.
4 - Show All Employees Please see the Selecting Employees section above for further information.
5 - Refresh Click to refresh your screen.
6 - Update From Master Schedule This option will update the employee's Active Schedule from the Master Schedule. This feature works for assigned master lines, not shift rotations.
7 - Actions menu Click on the Actions icon to open a drop-down list of actions for modifying the Active Schedule. For a description of the functions see Adding, Removing & Editing Shifts.
|


