The schedules are used to maintain the daily and weekly complement of shifts needed in your facility. The Master Schedule consists of lines created and assigned to the employees, which in turn are used to populate the Active Schedules with daily shifts.
Accessing the Active Schedule
▪Select the Schedules menu.
▪Select the Active or Daily menu.

To configure how the Active Schedule is displayed or to access the different schedule options, select the Options icon.

The options menu will be displayed.
The tabs of the Options menu contain selection items which determine the performance and visual settings for the following menus:
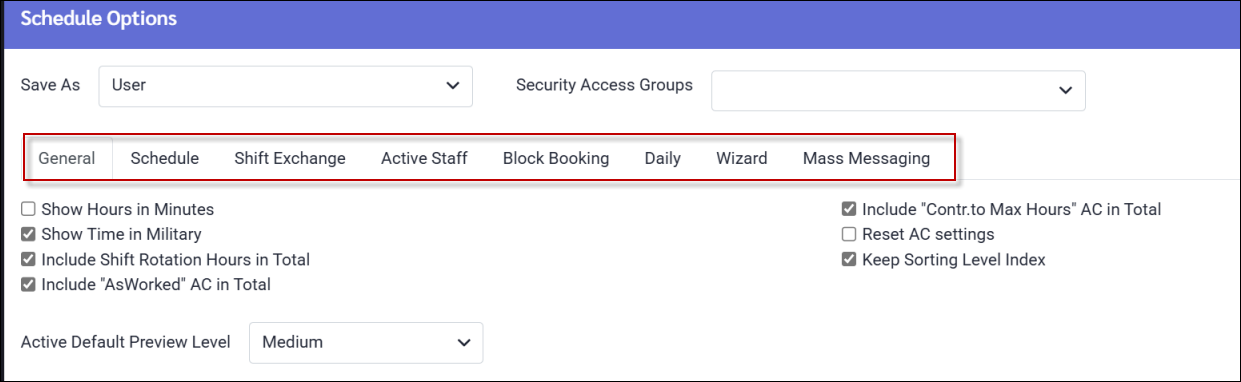
The General tab will determine how the schedule will look (time), how the values of the schedule (hours) will accumulate, and whether or not the default values are assigned.
Show Hours in Minutes Show Time in Military Include Shift Rotation Hours in Total Include As Worked Attendance Hours in Total Include Contribute to Max Hours AC in Total Include the hours from any Attendance Codes flagged as Contribute to Schedule Hours in the time frame, into the schedule totals. Reset AC Settings When ticked, the system will store the last Attendance Code that has been added so that it will appear the next time Add Attendance is selected. Keep Sorting Level Index When ticked, the Daily Schedule sorting level for call in order will be saved the next time you log in or re-enter the page. |

▪Select the Options icon from either the Active Schedules or the Daily Schedules menu.
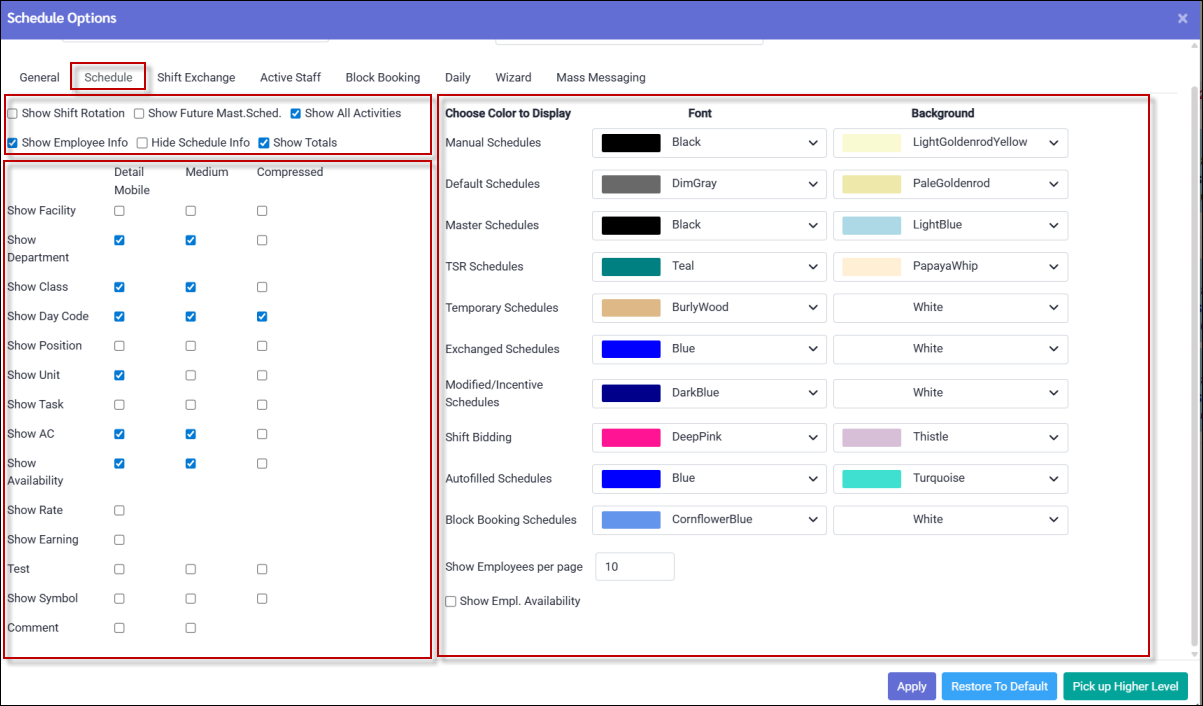
The tabs of the Options menu contain selection items which determine the performance and visual settings of the Active Schedules and Daily Schedules. The Schedule tab determines what you will see on your Active Schedule. These options are user definable and may vary from user-to-user depending on preference. ▪Click on the Schedule tab.
Active Schedule View Tick the options you wish to see on the Active Schedule as part of the shift detail information e.g., the Department, Class, Position, Day Code and Task.
Employee Detail Information You may select the information shown on the Employee Detail section by selecting or deselecting the options, Show Employee Info, Hide Schedule Info and Show Totals. For this example, Show Employee Info and Show Totals is not ticked but Hide Schedule Info is ticked.
Show Future Master Schedules The option Show Future Master Schedules will display the Master Schedules on the Active Schedule calendar for any time period past the last Update from Master. The colour you configure for Default Schedules will be the future master schedule display colour (grey above). This option will also display any Attendance Codes added to the Master Schedule, which will appear italicized to distinguish them from current Attendance Codes.
Show Shift Rotation The option Show Shift Rotation will display schedules created using the Shift Rotation configuration, instead of the Master Schedule configuration.
Other Schedule Options On this menu, you may define your colour selections for schedules updated from the master schedule and schedule modifications i.e. shift exchanges, temporary shift replacements etc..
Under Choose Colour to Display you may click on the drop-down arrow to have the colour palette menu appear and select a colour. You may apply the colour to the font or the background as shown.
On your main Active Schedule menu, you may access the three visual options you defined on the menu above i.e. Detail, Medium and Compressed views, which may be selected from the drop-down menu.
You may also set up your page requirements for the Employee Panel in relation to the Active Schedule. |


▪Select the Options icon from either the Active Schedules or the Daily Schedules menu.
The Options menu will appear. The tabs of the Options menu contain selection items which determine the performance and visual settings of the Active and Daily Schedule.
Please see Daily Schedule Options for further information.
|
