The Employee Panel will appear on many of the main menus in StaffScheduleCare. The Employee Panel will allow you to navigate through your list of employees for scheduling, personnel, and time-tracking purposes. You will be able to filter and group your list of employees and complete functions relating to one or more employees based on your filter and grouping selections.

To access the Employee Panel, click in the name window.

The default setting for the Employee Panel is a pop-up menu. You may, however, "dock" your Employee Panel on most menus, either at the top or to the right-hand side of your current menu.
Standard Docking
▪Click on the Action icon. If the option Employee Panel Placement is listed you may select a location to place the Employee Panel. ▪Click on Employee Panel Placement option.
The Undocked option will leave the Employee Panel in the default position, as a pop-up menu, selectable by clicking anywhere within the box containing the current employee name.
Docking to the Right
Selecting Docked to the Right will place the Employee Panel, open and usable, on the right side of your menu.
Docking at Top
A third docking option is available on menus such as the Time Card. This option will locate the Employee Panel at the top of your menu. On the Time Card, the Employee Panel Placement option is found on the Options list as shown below.
▪Click on the Employee Panel Placement option. ▪Click on Dock to the Top option.
The Employee Panel will be positioned above the Time Card Hours section. To adjust the size of your menu panels, click and hold the grey horizontal bar. Drag the bar up or down to adjust the size of each section.
|


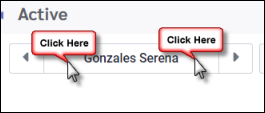


To access the Employee Panel, click in the name window.
Below is a description of the different areas of the Employee Panel.
1.The name of the employee you select on the list will appear as shown above. 2.The filter option allows you to filter your employee list by facility, department, class etc. 3.The grouping option allows you to apply multi-level grouping to your list of employees. 4.To search for a specific employee, select the search option from your drop-down list. 5.Once you have selected your search option to the left (#4), specify the detail of this search e.g. employee badge number if you are searching by badge. 6.This is the Employee Panel Actions menu containing functions such as add, delete or modify etc. 7.Click the tick box(es) to select employees or tick the column heading tick box to select all. 8.Click on any column heading to sort your employee list by this option.
Use the scroll bars located on the right to move the list up and down. Use the bottom scroll bar to move the window left or right.The employee currently in focus will appear in red.
|


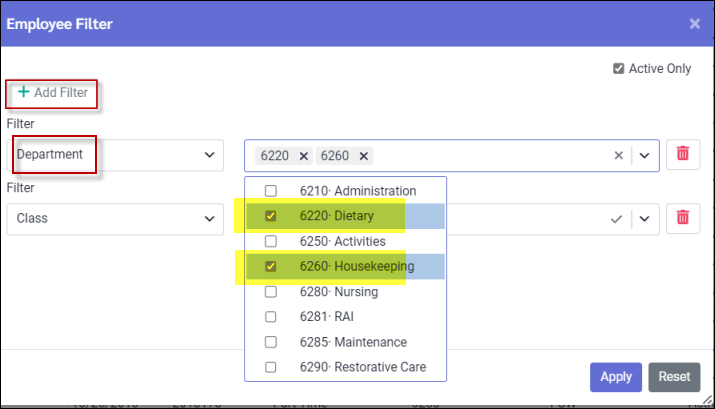
Click on the Filter icon (funnel) to perform a filter of your employee data. The icon will be blue when a filter has been set and grey if no filter has been applied.
Click on the Add Filter option.
Tick the data your would like to include (Dietary and Housekeeping) based on your filter selection (by Department above).
Other Filter Options ▪To view inactive employees untick the default Active Only option in the top right corner. ▪To remove individual filters simply click on the trash can icon. ▪To remove all filters tick Reset and then Apply .
|


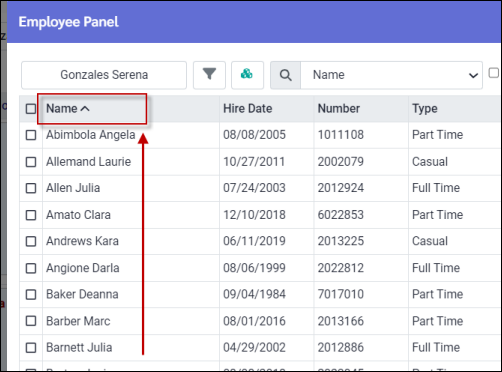
Easy Sorting of your Employee List
Sorting your Employee Panel may be done simply by clicking on any column heading. An arrow will be visible showing which field is sorted and in what direction. In the example below the sort is by employee name. The direction of the arrow is upward, indicating alphabetical order. Click the column heading again for reverse alphabetical order. In this case the arrow will be pointing downward.
Multilevel Grouping
The Employee Panel may be sorted using a multilevel grouping, for example by department and class.
▪Click on the Grouping icon (three blocks).
This grouping option will allow for a total of three different levels.
▪Click on the drop-down arrow. ▪Select your grouping level(s). ▪Click Apply to save.
In this example the Employee Panel will be sorted by Department, then Class.
The screen is refreshed and displayed using the selected grouping levels.
Click on the arrows in the far left column to expand the groups and sub groups. Arrows pointing down are expanded levels. To close a level, click on the arrow. See the example below displaying the department and class grouping.
To select employee(s), tick the box(es) beside the employee name. Two employees are selected (below) on the Employee Panel and may now both be displayed on the Active Schedule, for example, depending on the display configuration of this menu.
|


Click on the Action icon of the Employee Panel toolbar for a drop-down list of functions.
Field Visibility For detailed instructions on Field Visibility please see Column/Grid Heading Configuration.
Add Employee For detailed instructions on adding employees please see Adding & Editing Employee.
Delete Employee For detailed instructions on deleting employees please see Adding & Editing Employee
Refresh Clicking on the green Refresh option, will update the screen.
Employee Alteration Click this option to open the window to change the number, badge and status. To modify status, click on the drop-down arrow and select the new status.
Need Information The system will check all employee information to ensure there is no required information missing. This might occur when the employees are first uploaded into the database.
Seniority Representation Use this function to set how the seniority column is displayed.
Deselect All Will deselect the currently selected employees.
|


