The schedules are used to maintain the daily and weekly complement of shifts needed in your facility. The Master Schedule consists of lines created and assigned to the employees, which in turn are used to populate the Active and Daily schedules.
Once the Active Schedule is updated from the Master Schedule, it becomes part of your working schedule period. Many shifts will now become unfilled due to employee illness, vacation time requested, stat holiday time taken etc. There may also be shifts that are part of your regular schedule lines, that are unassigned and will need to be filled during the current scheduling period, in priority sequence, based on employee seniority, availability etc.
Before the Autofill may be used: ❖Autofill Sorting Levels rules must be configured. ❖TSR configuration must be up-to-date. ❖Master lines must be up-to-date. ❖An Update from Master MUST BE RUN. ❖All Time Off Requests for the scheduling period should be fully processed. |

▪Select the Schedules Tools menu. ▪Select Autofill Schedules.
The Autofill Schedules menu will appear:
|
The Update From Master process may be filtered by clicking on the filter (funnel) icon. You may filter by departments, class etc. or by individual employee(s).
We suggest that you use the same filer criteria you used when you updated from the Master Schedule and that the scheduling period you are updating coincides logically with the pay period. For example, if your pay period is July 1-14, you should not run Autofill from July 7 - 21.
|
Order Schedule (by)
You have the option of configuring up to three levels when running Autofill. You may select only one level or choose all three levels, which will be prioritized in the order they are configured. If no order is selected for any level i.e. None, None & None, the system will fill shifts in random order for the selected schedule period.
Day: The system will fill all shifts for the selected schedule period, one day at a time, not moving to the next day until all possible shifts for the current day are filled.
Shift Type: The system will fill shifts in the following order: ▪All M (morning) shifts. ▪All A (afternoon) shifts. ▪All E (evening) shifts. ▪All N (night) shifts.
Shift Start Time The system will fill shifts for the selected schedule period, starting with shifts having the earliest start time, and finishing with shifts having the latest start time.
Shift Length The system will fill shifts for the selected schedule period, starting with the shortest shifts first and finishing with longest shifts (e.g., a 3-hour shift will be filled before an 8-hour shift).
Shift Length DESC The system will fill shifts for the selected schedule period, starting with the longest shifts and finishing with shortest shifts (e.g., 8-hour shift will be filled before a 4-hour shift).
Other Options
Days of Week You have the option of only filling certain days of the week by ticking the applicable boxes.
Show Filled Schedules Tick this option if you would like your filled schedules displayed after Autofill is run.
Show Unfilled Schedules Tick this option if you would like your unfilled schedules displayed after Autofill is run.
Book Schedules This default action will book the schedules as per the rules previously defined, as part of the Autofill processing.
Notify Employees You may choose to notify employees of filled shifts (text and email configuration is required).
|
Enter the start and end dates for the update (May 6th to May 19th below).
▪Verify your Filter selection(s). ▪Verify your output setup (see Autofill example for the PSW class below):
▪Click Process.
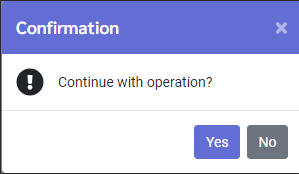
You will get the following confirmation request.
▪Click Yes. While Autofill is running, you will see a progress bar and the processing bell indicator:
Once the process is complete, a report similar to one in the example below will appear:
If not all the shifts were filled during this process, and you ticked the option Show Unfilled Schedules, your report will include the remaining unfilled shifts for your reference.
Schedule Result - Daily Schedule
In the image below we see the Autofill results on the Daily Schedule. Notice the icon associated with autofilled shifts (yellow below).
Schedule Result - Active Schedule In the image below we see the Autofill result on the Active Schedule. You will notice the same Autofill icon
The colour of the shifts will appear the same as the Master Schedule colour, since these shifts were originally Master shifts not assigned to anyone, or Master shifts unfilled due to employee attendance events.
The red phone icon will not appear for auto filled shifts. If a shift was previously called through Mass Messaging or the Wizard, causing the phone icon to appear, and then the shift is auto filled, the red phone will disappear.
|


