The Sorting Levels menu allows you to configure the rules which determine the order in which employees are called in to fill shifts. The levels may be configured to validate all aspects of the employees Schedule Rules, Availability and Seniority, one level at a time, based on the configuration options described in this section.
These levels tell the system the sequence and which employee and/or group of employees you would like for call in.
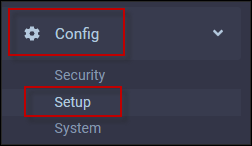
▪Select the Config menu.
▪Select the Setup menu.
▪Select System Rules.
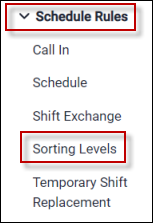
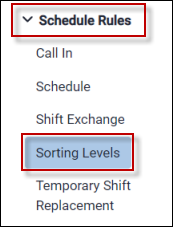
▪Select Schedule Rules.
▪Select Sorting Levels.
Sorting levels are setup for the Wizard, Autofill, Block Booking, the Time Off Planner and Mass Messaging.
▪Click on the module drop-down arrow. ▪Click on the module you would like to create sorting levels for.
New Line
To add a new line, click on the Plus icon. ▪A new line will be opened at the bottom of the grid. ▪Populate the Level field with the level number. The number you assign will determine where in the level sequence this line will be processed. ▪Add a description in the Description field. ▪Populate the fields you require to define the level. ▪Click Save.
Columns
Level The number you assign will determine in where in the level sequence this line will be processed. Levels are processed lowest number to highest number.
Description Enter a description of the level.
Disabled A level that is ticked disabled will not appear within the levels display / selection for the module selected. Please see Disable Sorting Levels for more information.
Apply Employee's Availability Tick this option if you want the system to validate employees availability settings.
Employee Type Click in the field and select the employee types to be included in this level.
Use Only Response A level is to look only at those with the specified call response. By default, it is not clicked which effectively acts like a comma in rev 5 in that it will include all those that have other call responses or have not been called at all.
Use Last Response This going to include only those that have a last response record of the specified call response.
Example: if call response is SKIP, Use Only is not ticked, and last call response is ticked, it will call out those that have not received a call and those that have SKIP as last call response. If person that had had SKIP recorded is called and the person says no, they will no longer be called for this shift.
Exclude Empls with Att. Codes Click in the field and from the drop-down list select the Attendance Codes to be used to exclude employees.
Ignore Att. Codes Click in the field and from the drop-down list select the Attendance Codes to be ignored.
Use Shadow Employees If an employee has a Shadow employee assigned, then use the shadow employee in place of the employee.
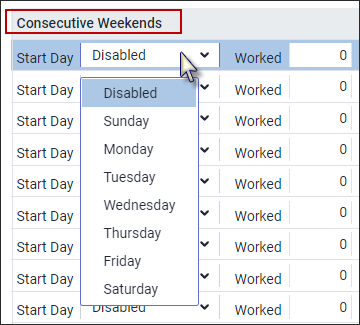
Consecutive Weekends Both weekend days must be worked days to be counted as a worked weekend.
Start Day - Identifies what day of the week is the 1st day used to calculate the 6th or 7th day or the weekend days. If Monday is the Start Day, then Saturday and Sunday would be the weekend days. Click in the Start Day field and select the day that will be the start of the week.
Worked The number of consecutive weekends before an employee cannot be booked into a weekend.
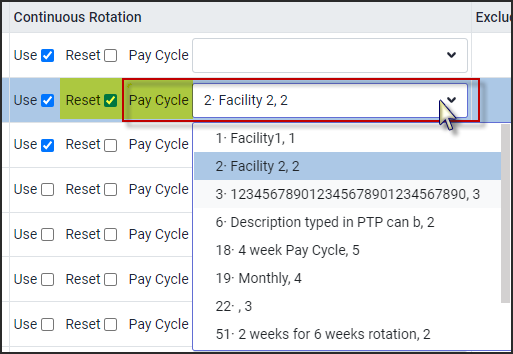
Continuous Rotation This option will cause the list of employees to rotate based on a combination of Type (full-time, part-time, casual etc.) and Class (PSW, Dietary Aide etc.) configuration. The system will maintain a continuous list order that may span multiple levels consisting of this same type / class combination, to include employees who may not have appeared on one list (because they may have already been scheduled for the same shift, for example), on the next shift call-in list. Each time an employee is called, regardless of the call response, he / she will move to the bottom of the list until the list has fully rotated bringing the employee back to the top of the list.
Use Rotation will not be reset even if new pay period starts.
Reset Rotation will be reset on the 1st date of the new pay period. If you select a particulate pay cycle from the drop-down list, resetting will apply for this pay cycle.
Max Hours in 24-Hour Period Type ▪Apply General will use the company default value configured with the Schedule Rules. ▪Apply Custom will use the value in the Max Hours in 24-Hour period as the threshold for that sorting level.
Max Hours in 24-Hour Period ▪Enter the maximum hours in a 24-hour period an employee can work.
|
Sorting levels may be disabled for Mass Messaging, the Daily Schedule, the Wizard and the Time Off Planner. If a level needs to be ignored, it can be disabled on the Sorting Level grid.
To disable a sorting level: ▪Select the Config menu. ▪Select the Setup menu.
▪Select System Rules. ▪Select Schedule Rules. ▪Select Sorting Levels.
To disable a sorting level:
▪Click on the level to select it (should be highlighted blue). ▪Scroll to the right to the column Disable. ▪Click on the Disabled check box.
The disabled Level(s) now display in red text. Disabled levels do not appear in the drop-down list in the Daily, Wizard or Time Off Planner. The disabled levels are still visible in the System Rules / Sorting Levels menu. The manager can uncheck the Disabled check box to enable the level.
|


