StaffScheduleCare provides a manager with the tools to track the training required for their staff. You may send out enrollment notices, notify employees of all training details, set up refresher courses and track training completion.

Before beginning the process of scheduling training courses for your employees you must ensure that the Training Code assignment lists are defined along with the configuration rules that will govern notification of upcoming training courses. The setup on this menu will determine how far in advance an employee will be notified of enrollment and whether start notification will be sent as a reminder to the employee. The manager will be able to monitor employee training from the Welcome menu using the Training widget.
Please note that access to the configuration menu is based on your system security access rights.
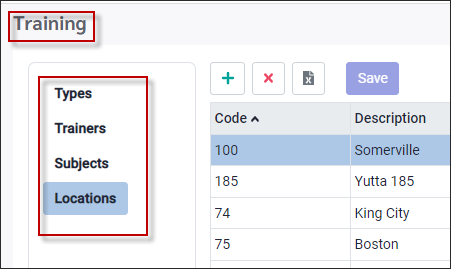
Defining Code Assignment Lists
The drop-down options you may wish to configure are Training Type, Subject, Location, Skill and Trainer.
To access the main configuration menu, navigate to:
▪Config ▪Setup (for Skills and Training):
On the Skills menu you may define the skills found in your facility that require tracking. For further details see Skills Setup.
On the Training menu you may configure type, trainers, subjects, and locations. For further details See Training Setup.
To create, edit or modify codes related to training:
▪Select the plus symbol (+) to add a new record. ▪Complete the applicable fields. ▪Click Delete to remove a record. ▪Click Cancel to cancel your changes before saving. ▪To edit an existing record, highlight the text and edit as required. ▪Click Save. Modifications will now appear on the drop-down lists.
Continue adding codes for Training Types, Skills, Locations, Subject, and Trainers until all needed codes have been added. Your code lists are now ready to be used when booking training and/or adding skills to the HR Information section of an employee’s Personnel menu.
|


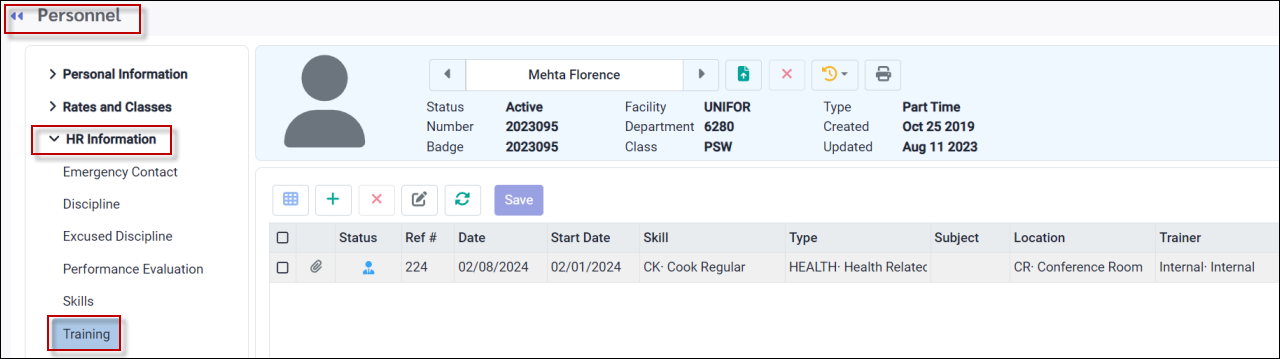
▪Select the Personnel menu. ▪Select HR Information. ▪Select Training. You may also add training to employees in the HR Tools / Manage Training module.
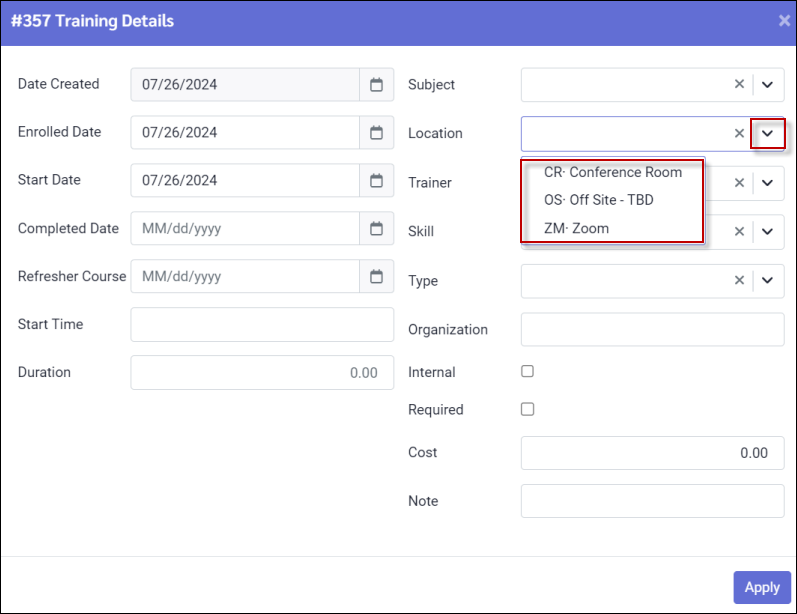
▪Click on the plus symbol (+). A new blank line will appear at the bottom of the grid. Once the new record is added it will become part of the Employee Training history list. The historical list keeps track of the status of training courses, from the time they are added to the time of completion. ▪Complete the date and duration of the training and any notes. ▪Click in the fields to select from the previously defined options. (Skill, Type, Subject, Location, and Trainer) ▪Click on the paperclip icon to upload any attachments. For further details on Attachments see Attachments and Printer Icon.
You may also add the cost of the course (if applicable), the start time of the course, if it is a required course, if it’s an internal course, if the course has a refresher date and any attachments if applicable.
To add this additional information:
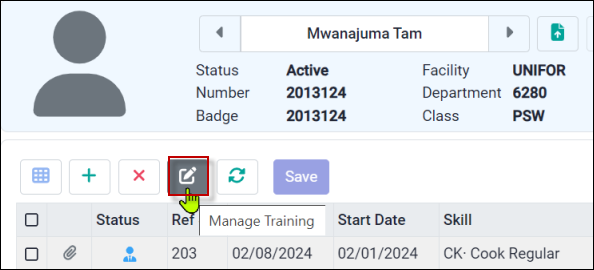
▪Click Manage Training.
▪The Manage Training menu will appear including all the current training events for all employees, based on the filter you have selected (please see Options of the Manage Training menu below).
▪Click on the Show me icon ▪Click on the drop-down arrows to make your selection(s). ▪Click Apply to save.
|


When a new training record is added, it will apply only to the employee whom you have selected. You may also set up training courses for groups of employees by following these steps:
▪Select the HR Tools menu. ▪Select Manage Training menu.
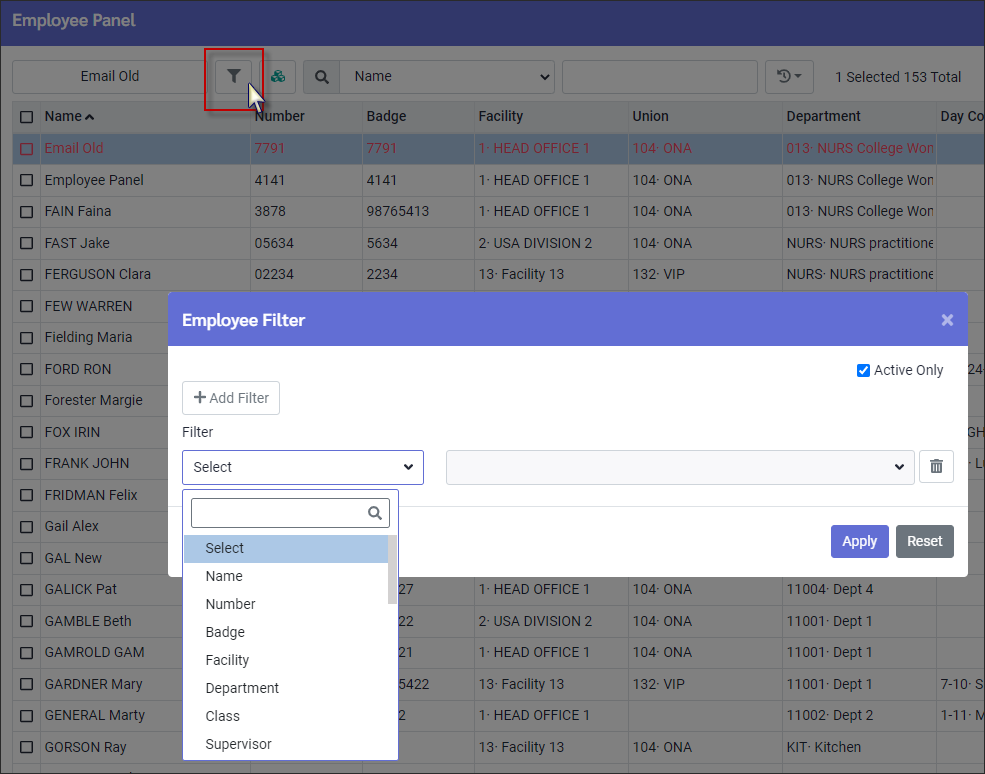
▪Open your Employee Panel. ▪Filter your list to include only the employees required to participate in the training, by using either of the following two options:
1.Selecting a Group of Employees
▪Use the filter option to filter your list to a specific group of employees.
▪Tick the top check box to select all employees appearing on your filtered list.
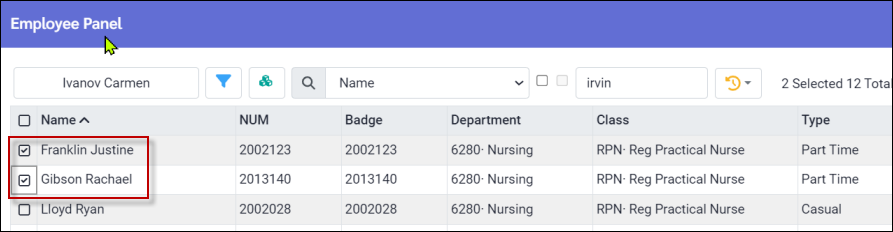
2.Selecting Individual Employees
▪Tick the box to the left of the employee's name to select individual employees. The Manage Training menu will appear.
▪Click on the plus symbol (+) to Add. The two employees we selected each now have a new line.
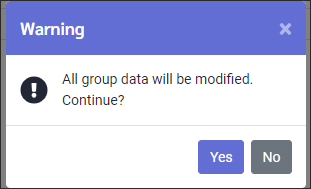
All the employees selected will now appear with a new blank line beside their names. When the new lines appear, they will automatically be highlighted in blue. While the names are still highlighted, click on the Actions icon, and select Modify Group.
The following message will appear:
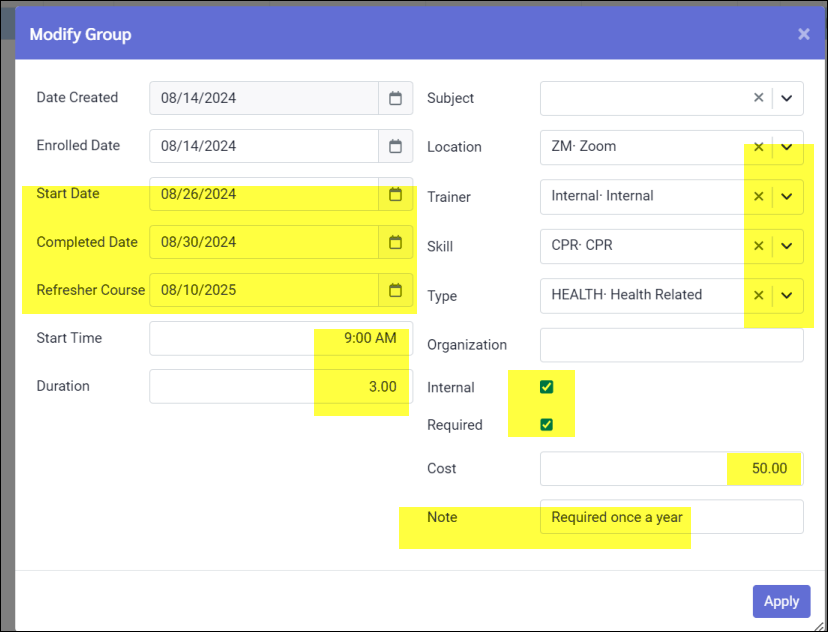
▪Click Yes and the Modify Group pop-up menu will appear:
▪Complete the required fields and click Apply. The new data will now appear for all the employees in your new group.
Completing or Committing Training Records for Groups of Employees
You may complete or commit training records for groups of employees at the same time as follows:
▪Click the check box on the employee's line. ▪Click the drop-down arrow beside the Today icon. ▪Choose either Complete or Commit.
▪Click Apply.
|