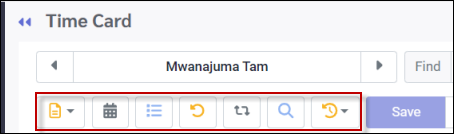
The Actions menu and toolbar options of the Time Card contain functions to assist in your configuration (look) of the Time Card menu, and the generation of net hours for payroll.


How To Select Employee(s)
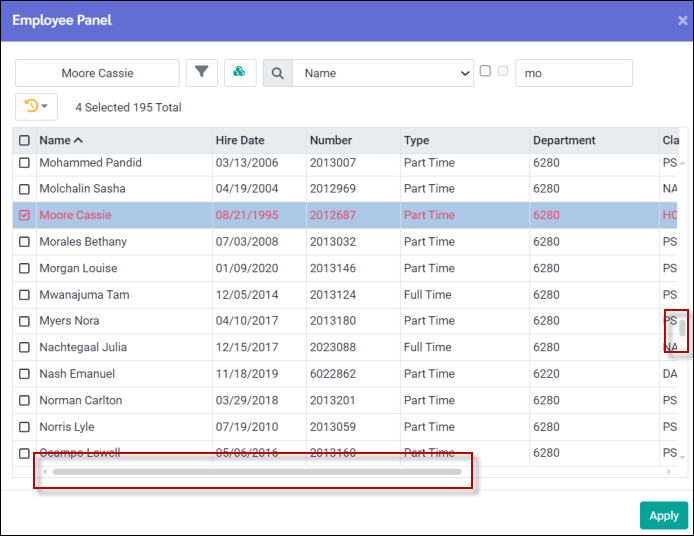
You may choose where on the screen the Employee Panel is placed. See Employee Panel for placement options on the Time Card.
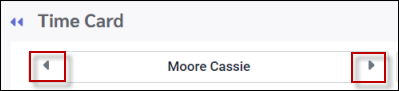
Clicking on the arrow on either side of the employee name window will move to the next or previous employee based on your filter / sorting configuration.
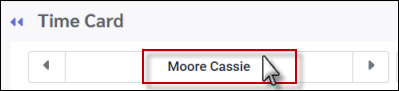
Employee Panel To access the "undocked" Employee Panel, click in the name window.
Use the scroll bars located on the right to move the list up and down or the bottom scroll bar to move the window left or right. The employee currently in focus will appear in red.
Please see the Employee Panel for information on searching, sorting and filtering your employee
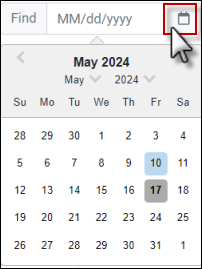
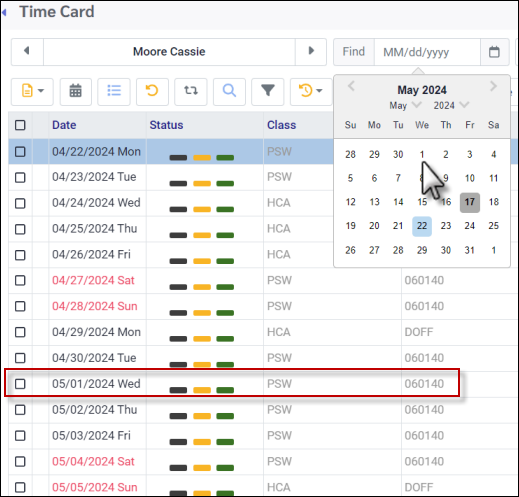
Date Search
To open a specific date on the Time Card. ▪Click on the calendar icon in the date window. ▪Click on the required date.
In this example May 1st was selected and will now appear according to your date period configuration (by pay period in this case).
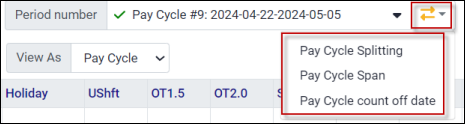
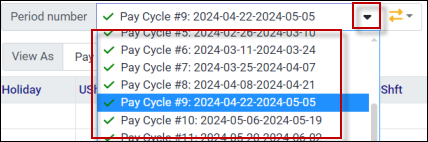
Pay Cycle Configuration
To select the pay period view, click on the yellow arrows as shown, in the Period number window. Click on the down arrow and select the Pay Cycle view from the list.
Pay Cycle Splitting This option will allow you to split your pay cycle at the end of a calendar year if needed. This may be beneficial in cases where the last pay cycle of the year may run into the new year, for example a pay cycle from December 22nd to January 4th.
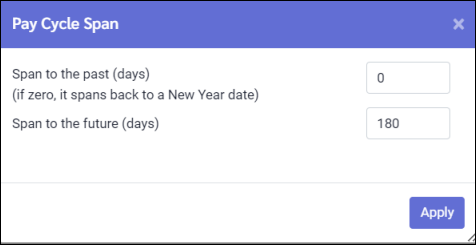
Pay Cycle Span This option is used to determine how far into the past and future you may select pay cycles on the Time Card.
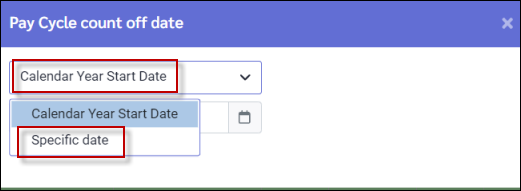
Pay Cycle Count off Date Setting the Count Off date to the Calendar Year Start Date means the system will consider whichever period includes January 1st as Pay Cycle 1. If you choose Specific Date, whichever period includes that date would be considered Pay Cycle 1.
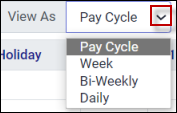
Date Period Configuration
This option allows you to set your date period view on the Time Card. ▪Click on the down arrow and select the period. ▪Click Apply.
In this example Pay Cycle was selected. The pay cycle periods now appear in the drop down selection field.
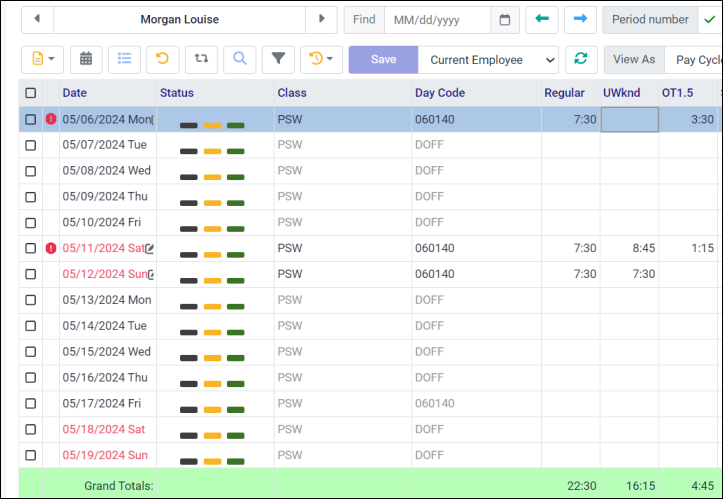
The Time Card now displays the hours by pay period.
|

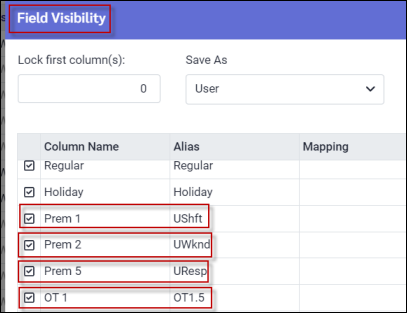
Field Visibility
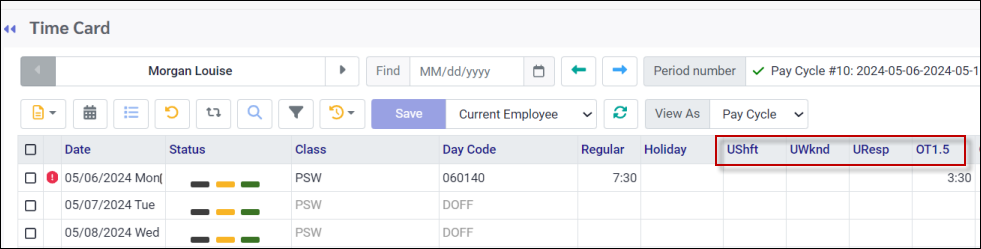
The main hours section of the Time Card should be customized to reflect your unique configuration rules. Please see Field Visibility for information on customizing column headings and visibility on this menu.
The image below displays an example of a customized Time Card column headings to match the system configuration for a few premiums and overtime examples:
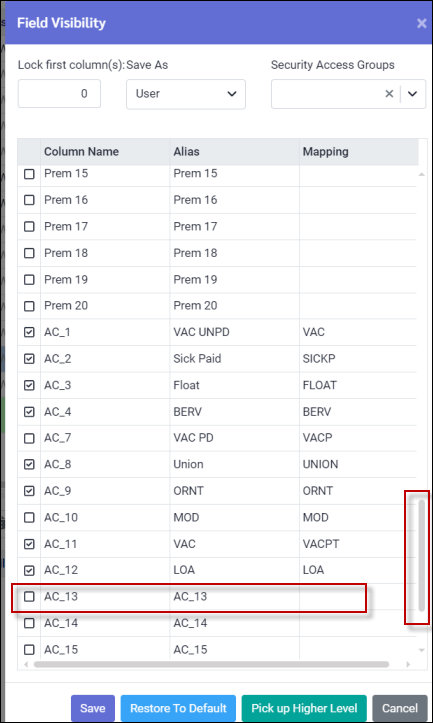
Mapping Attendance Codes
One Field Visibility option unique to the Time Card menu is the customization of certain columns by mapping them to specific Attendance Codes:
▪Using the scroll bar, scroll through the available columns to the AC columns. ▪Click on the column's mapping field. ▪From the drop-down window scroll to the desired code. ▪Click on the code to select it. ▪Enter new heading in the Alias column. ▪Click Save.
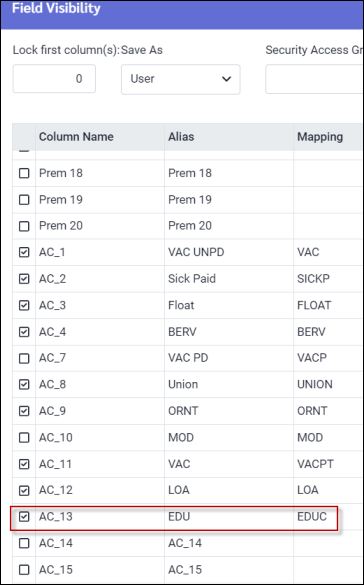
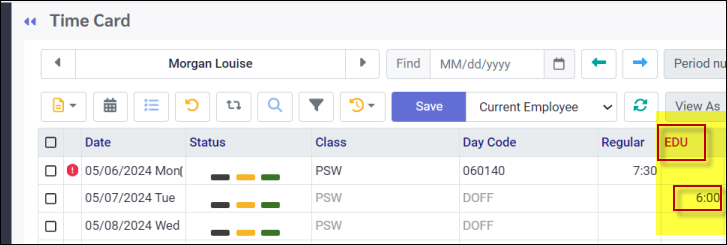
In the example below AC_13 has been configured to pick up any hours associated with the EDUC code and display them under the "Alias" heading EDU as shown.
|
The menu toolbar functions are described below.
Options Please see Time Card Options menu for a description of each function.
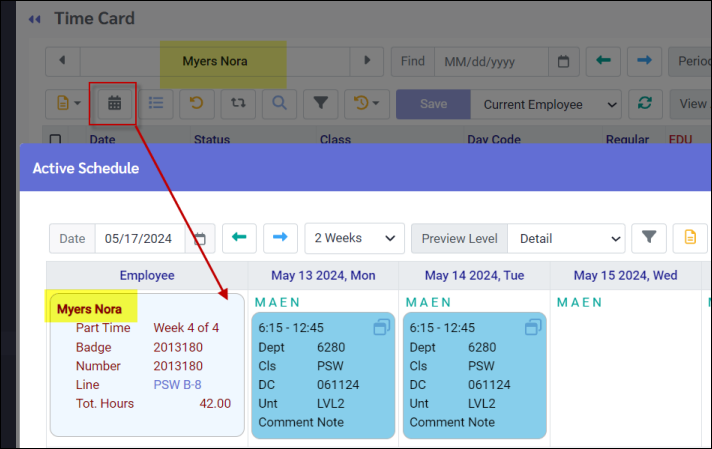
Schedules This option links directly to the employee's Active Schedule.
While on this menu, you may book, unbook, and modify shifts. You may also add, modify, and delete attendance events for this one employee. Simply select the date, click on the Actions icon, and select the option you wish to perform.
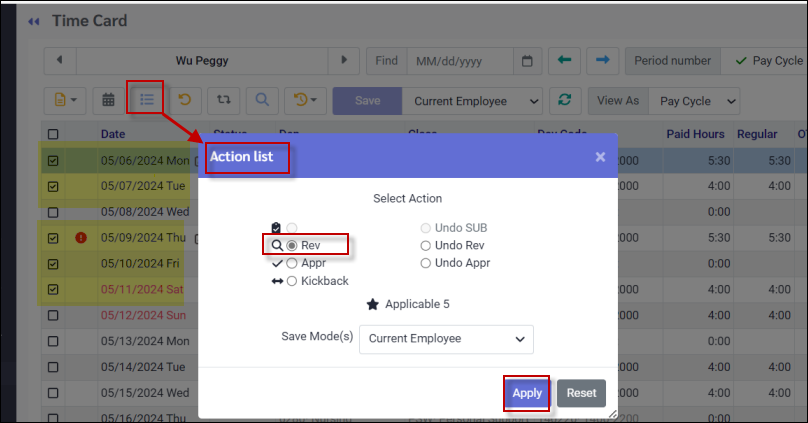
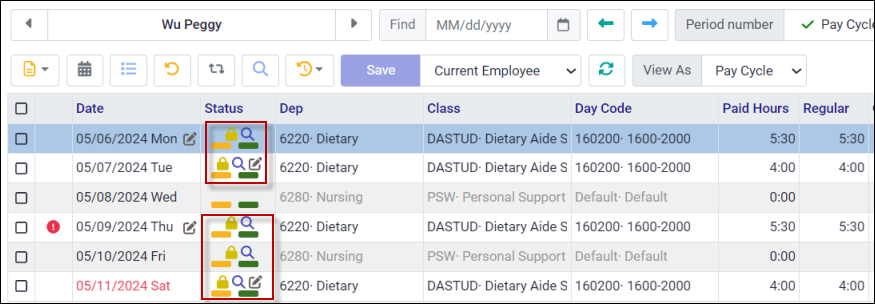
Action List This feature allows you to perform multiple actions related to time card approval at once, instead of one day / action at a time. The example below displays a review (Rev) process for five (5) selected days at once i.e. May 6,7,9,10 & 11.
▪Click the tick boxes corresponding with each line you would like to select.
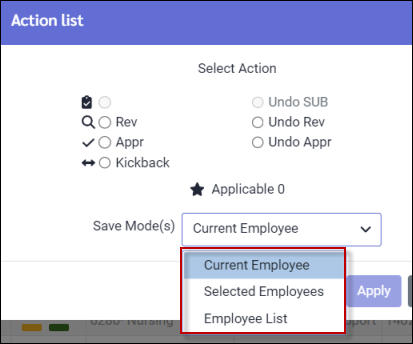
▪Click on the Actions icon. ▪In the pop-up window tick on the action to be performed. In this example, review (Rev) is selected. The Applicable section shows that five lines have been selected. The Save Mode window shows this is for the Current Employee only. You may also apply this action to multiple employees on your Employee Panel or just selected employees.
▪Click Apply. All five days have been updated as reviewed (magnifying glass).
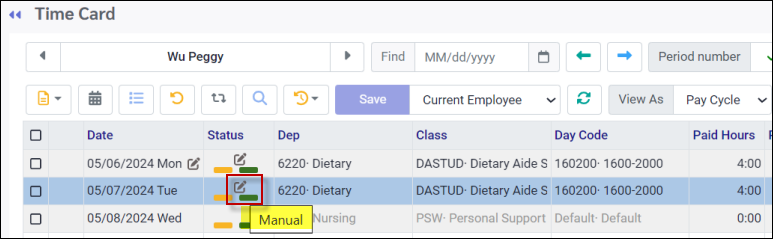
Reset Manual When hours are added, deleted, or edited, a pencil icon will appear on the edited line. Hover over this icon and the Manual tool tip will appear as shown, indicating that the hours have been manually adjusted:
The Reset Manual option is used to undo any manual changes and recalculate the hours. This option is normally used to recalculate hours following any changes to configuration. For example if a premium was added to this shift (Day Code) after the hours appeared on the time card, Reset Manual would recalculate the hours to include the new premium . The system will calculate the hours by comparing the punches to the employee's schedule, then adding the applicable regular, overtime and premium hours according to configuration.
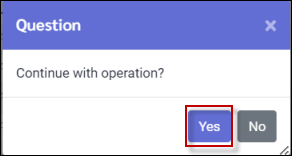
To perform this process: ▪Select the row (day) you wish to reset by clicking on it, so it is highlighted. ▪Select the Reset Manual icon. ▪Click Yes to continue to reset the manual change(s).
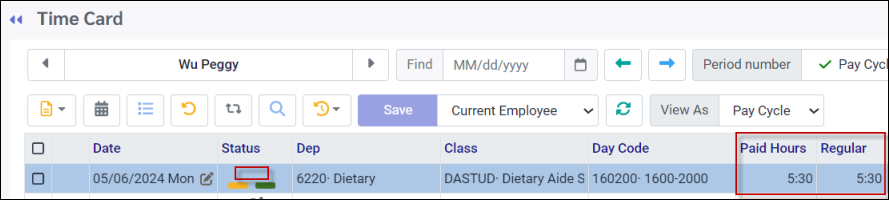
The regular hours are reset, and the Manual tool tip removed.
Recalculate Punches This option should be used instead of Reset Manual to recalculate hours when the punches appear BEFORE the schedule is entered.
For example, Jane took a shift for Marco who called in sick. Jane then punched in and out before the manager updated her schedule. In this case, once Jane's schedule has been correctly updated, Recalculate Punches should be used to tell the system to calculate the hours again, this time against the shift (Day Code), where the overtime, premium and lunch deductions have been configured to automatically calculate.
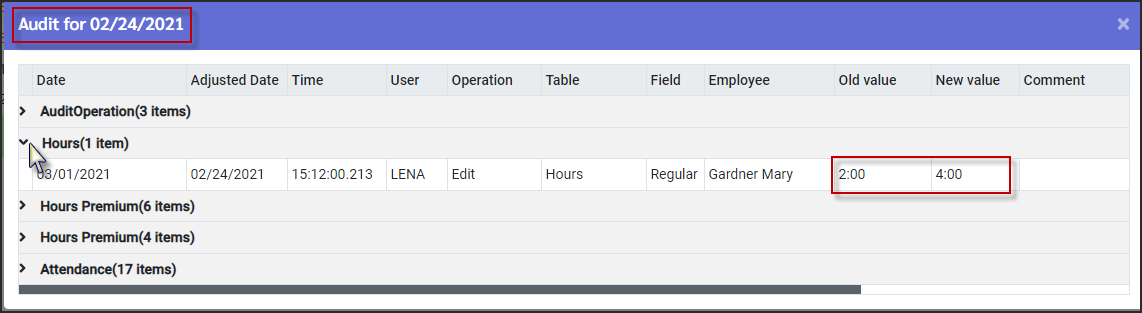
Audit ▪Select the date you wish to audit by clicking on it to highlight it. ▪Click on the Audit icon.
The audit trail window for the date Feb 24th appears. To open the sections, click on the drop-down arrows.
Notice the Punch, Hours, and Attendance line entries. These entries will tell you who, what time, and what was changed.
▪Simply click on the arrow to reveal the activity. ▪Audits from other areas of the software may be found under the Reports / Admin Reports / Audit Report.
Actions Please see Actions options available for each of the three main Time Card sections, Hours, Attendance and Punches.
|
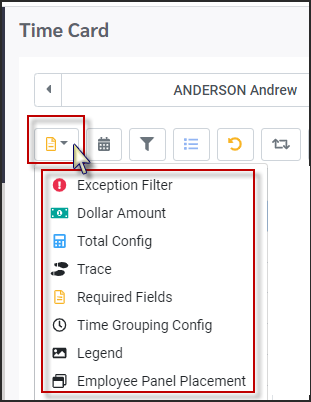
On the Time Card hours toolbar is the Options icon. These options allow you to customize this section.
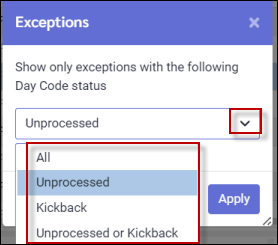
Exception Filter This option allows you to define how you see the exceptions on the Time Card. The visible exception will appear with the exception symbol .
▪Click on this option and the pop-up will appear:
▪Click on the down arrow to select the desired Exception Filter. ▪Click Apply.
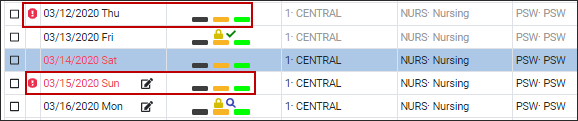
Exceptions - All This option will display all exceptions, whether processed (approved, reviewed etc.) or unprocessed. These exceptions will include the exception symbol.
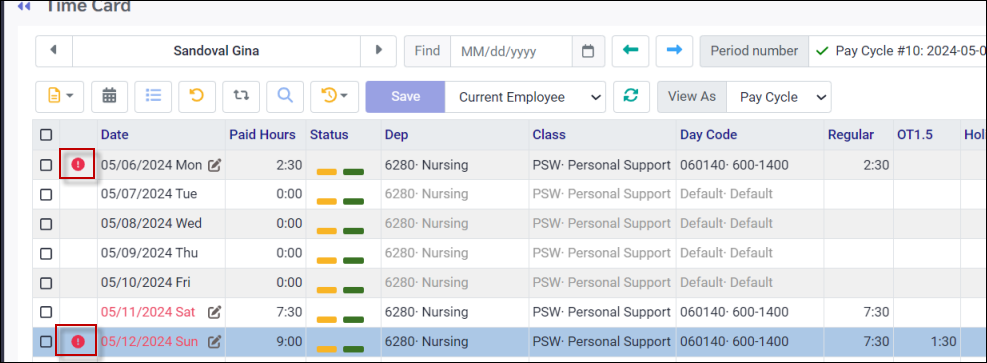
Exceptions - Unprocessed This option will display only unprocessed exceptions with the exception symbol. Processed exceptions (approved, reviewed etc.) will still appear but will not display this symbol (see approved exceptions marked below). In cases of more than one Day Code on the same date, the Unprocessed filter option allows you a quick view of any unprocessed exceptions on a specific date.
Exceptions - Kickback This option will only display exceptions that are Kickbacks with the Exception symbol . The Kickback levels are set based on the company's rules.
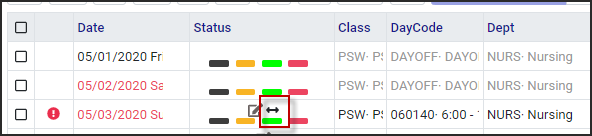
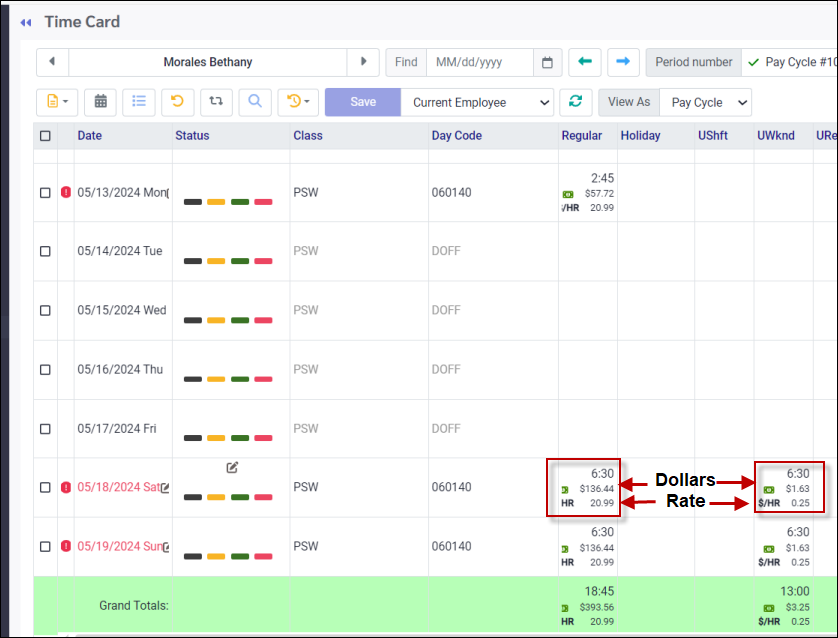
Exceptions - Unprocessed or Kickback This option will display both unprocessed exceptions and kickbacks. Select the desired Exception Filter and click Apply to save your selection. Dollar Amount This option will show you the dollar amount and the rate for each date on the Time Card.
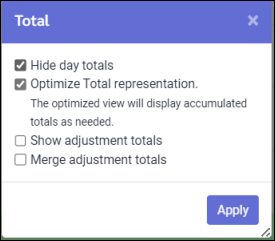
Total Config This option will display the following options:
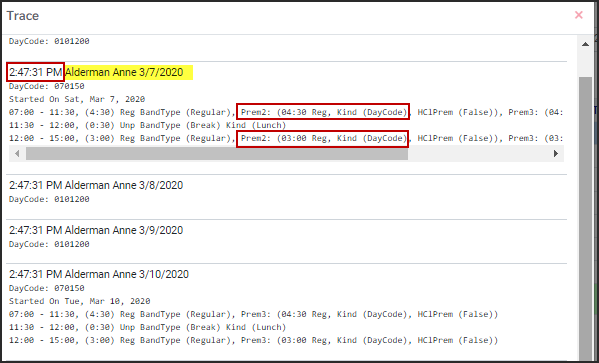
Trace The Trace feature allows you to follow how the hours were calculated per day of the selected pay cycle. The Day Code calculations are shown step-by-step.
This is an example of an employee's Time Card. For March 7th there are 7.50 hours under Prem 2.
The Trace Report shows how the hours were calculated to get the total of 7.50 hours for Premium2. The time displayed in red is the time the Trace was run.
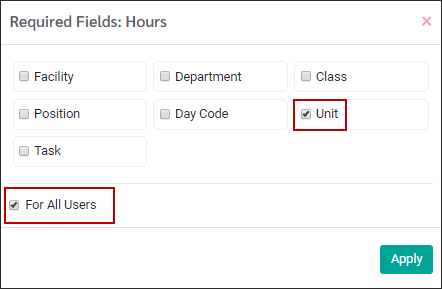
Required Fields This option allows you to specify which fields are required when adding hours to an employee's Time Card.
▪Click on the Required Fields icon. The following window will appear. In the example below Unit is checked. You will not be able to manually add hours to the employee's Time Card, without entering the unit. Select For All Users if the requirement is to apply to all system users.
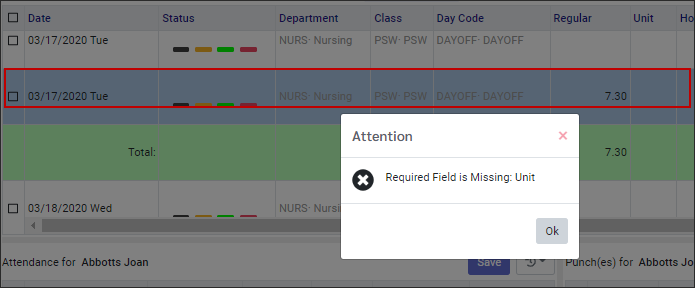
If a required field is missing an error message will pop-up noting the missing field.
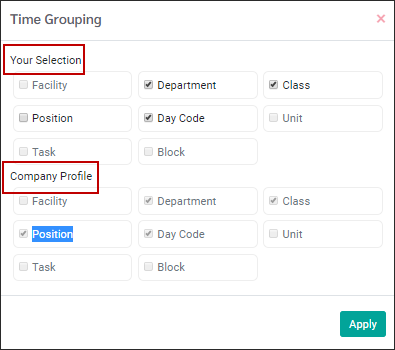
Time Grouping This option will determine how the hours associated with holidays (the holiday column) and Attendance / Exception codes will be grouped when there are multiple lines in one day. Time Grouping will not merge hours or you would not be able to make modifications to each data record individually (see records below).
▪Click on the Time Grouping option to select your grouping preference. You will set up your grouping preference in the Your Selection section. The Company Profile section will have been already configured for your facility, determining your choices on this menu. The grouping above is by Department and Class.
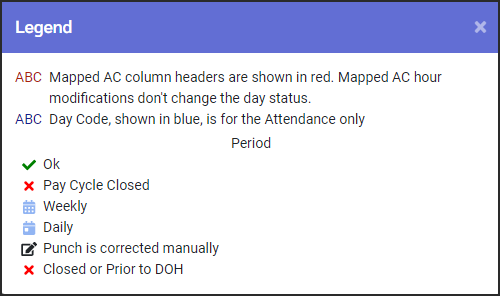
Legend This option identifies icons that may be seen on the hours section of the Time Card.
Employee Panel Placement Please see the Employee Panel for complete details.
|

See Also: