The Time Card activities will include:
▪Viewing, adjusting, reviewing and approving hours, punches and attendance events.
▪Allocating employee hours, punches and attendance events.
▪Changing and moving Day Codes associated with hours and punches.
▪Moving punches to the correct date where needed.
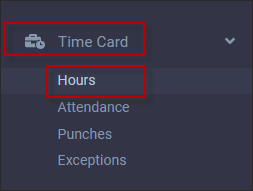
You may access the Attendance and Punches menus separately to view and / or edit a longer date range, but these menus will also appear below the main hours section (top portion) of the Time Card menu.
Actions Menu Options
The Actions menu provides the options to edit employee's hours, attendance and punches and is accessible in all three sections of the Time Card, with unique functions for each menu.
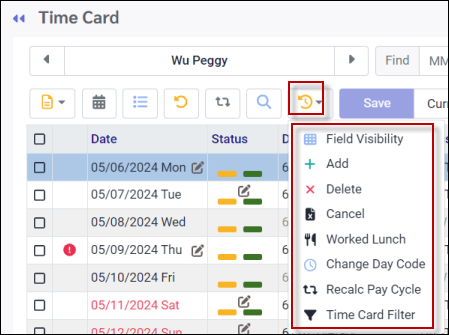
Access to the Actions menu in the hours section is found at the top of the Time Card menu. Click on the Actions icon to access the functions available for the hours section.
Field Visibility See Field Visibility for further information.
Adding a Line (Hours) Adding a line in the hours section of the Time Card is an exception to regular practice but may be needed for example, if hours must be added on a specific date and allocated to a unique department, class etc.
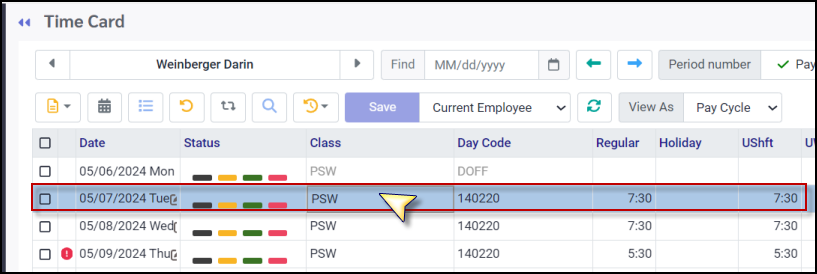
To add a line: ▪Click on the corresponding date to highlight the line. ▪Click on the Actions icon. ▪Select Add.
In this example May 7th is highlighted.
Below is the new line where a portion of the total hours punched under the PSW class (yellow line) were reallocated to the NAIDE (nurses aide) class (red box).
Deleting Hours (Lines) ▪Click on the line to be deleted so it is highlighted. ▪Click on the Actions icon and select Delete. ▪Click Save.
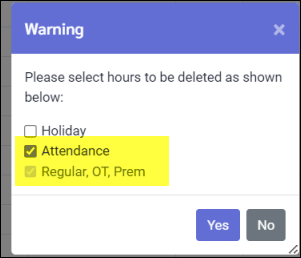
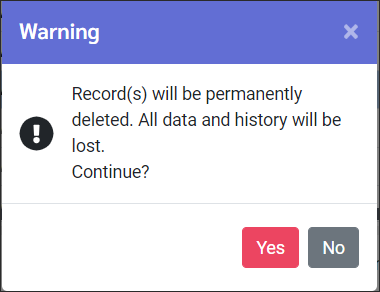
A warning message will show the hours that will be deleted. In this case the attendance option has been selected as well since the line contains one hour of education (EDU) time. ▪Click Yes.
The hours of this line are now removed.
Cancel This feature is used when a new line is in editing mode and not yet saved. The fields have been populated, however, you would now like to clear the fields and start over. ▪Click on the Actions icon. ▪Select Cancel from the list. ▪Click Save.
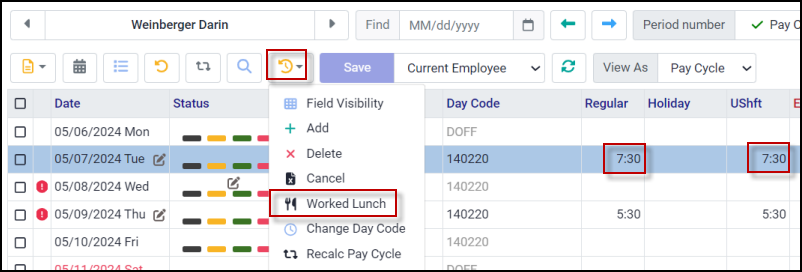
Worked Lunch This option allows you to easily give back an automatically deducted lunch break. ▪Click on the row (date) you wish to edit. ▪Click on the Actions icon. ▪Select Worked Lunch.
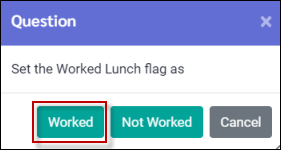
▪Click Worked to apply the lunch break.
In this example the worked lunch break shows in OT1.5 column.
Select Not Worked to remove a lunch previously given back as a Worked Lunch.
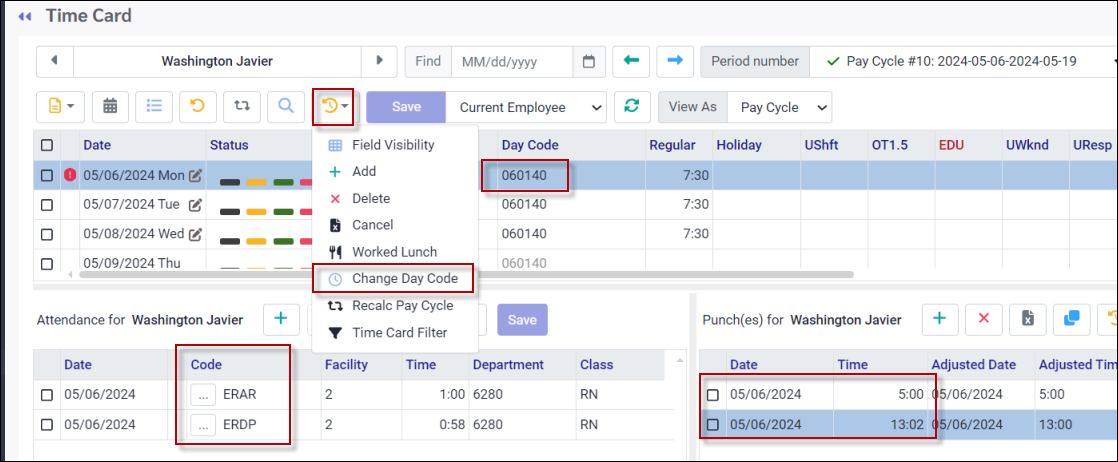
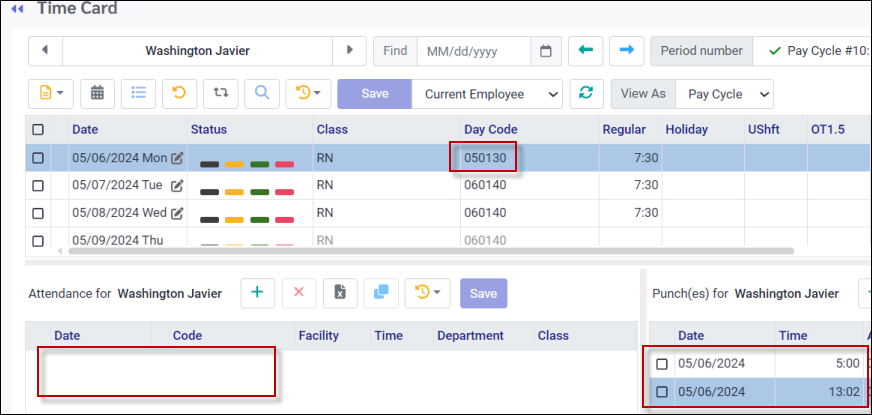
Change Day Code Changing the Day Code in the hours section allows you to select the correct Day Code against which the punches should have been calculated, i.e. for a non-scheduled day or call-in shift that applied the wrong code.
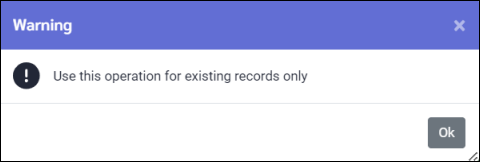
This can only be used if the row (date) to be modified has punches. Otherwise the system will pop-up this warning message.
For the shift below, the employee punched in at 5am and out at 1pm indicating that the shift on the schedule was incorrect. Notice the early arrival (ERAR) and early departure (ERDP) exception codes.
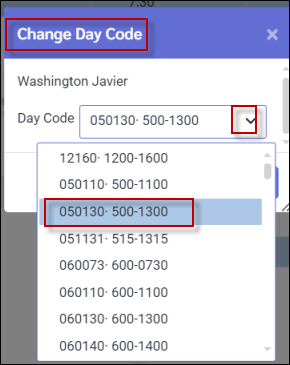
▪Click on the down arrow in Day Code window for a list of Day Codes. ▪Using the scroll bar, move through the list to find the new Day Code. ▪Click on the new Day Code. ▪Click Apply.
The hours have recalculated to match the punches with no exceptions.
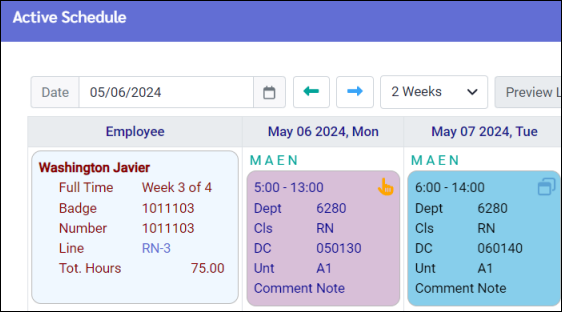
The Active Schedule will be updated with this change as well.
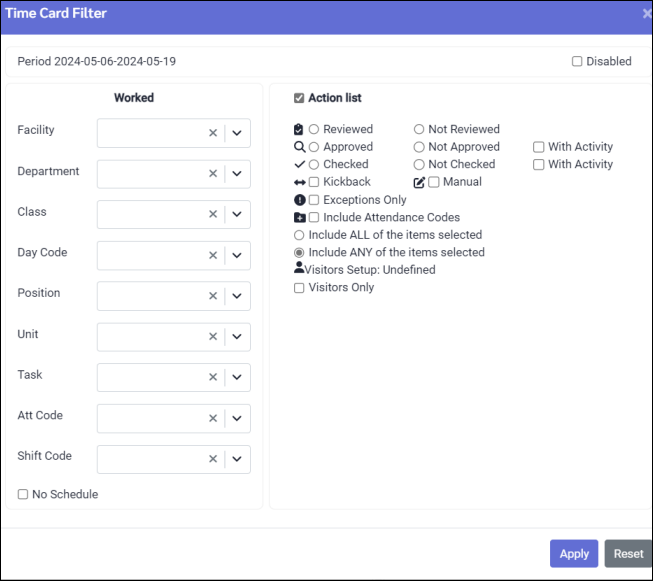
Recalculate Pay Cycle This option recalculates worked hours by comparing the employee punches to the Shift Rotation configuration (for overtime) and the schedule. This process will remove all manual modifications if the date is NOT yet approved. Time Card Filter The Time Card filter (different from the Employee Panel filter) has multiple options to filter the data unique to time card. You may filter, for example by Worked class (below) instead of home class, in which case you would see all employees working in the specified class whether or not this was their assigned home class.
The pay period displayed in the top left will be the same pay period configured currently on the Time Card.
Disabled This tick box (top right), when enabled, allows you to save the filter configuration without actually applying the filter to your data. This allows you to save time by not having to reconfigure the filter selection each time you open it.
▪Click the Disabled box. ▪Click Apply. This filter will now remain selected but will not be active until the Disabled function is unticked.
|
Hours may need to be added if the employee did not punch in and / or out. The system can only generate correct hours, premiums and overtime hours where applicable, when the schedule is correctly updated and the employee has punched in and out.
Adding Hours
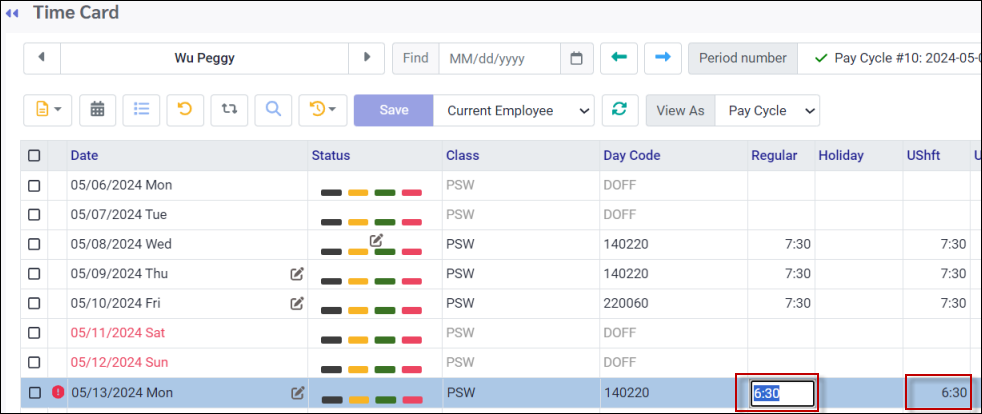
To manually add hours directly into the hours section of an existing line:
▪Select the correct date. ▪Click on the applicable Hours column (Regular, Premium, OT 1.5 etc.) ▪Add the desired number of hours. Remember to include any applicable premiums for manually added hours. In the example below, the shift is from 2pm to 10pm (140220), requiring a shift premium to be manually added as well. ▪Click Save.
Editing Hours
To edit hours in the hours section:
▪Click on the row you would like to edit so it is highlighted blue. ▪Double click in the applicable Hours column (Regular, Premium, OT 1.5 etc.) ▪Edit the number of hours.
▪Edit the remaining data as needed, i.e., hours, department, class, etc., by selecting the correct data from the drop-down menus. ▪Click Save.
Deleting Hours
Please see the previous section for information on Deleting Hours.
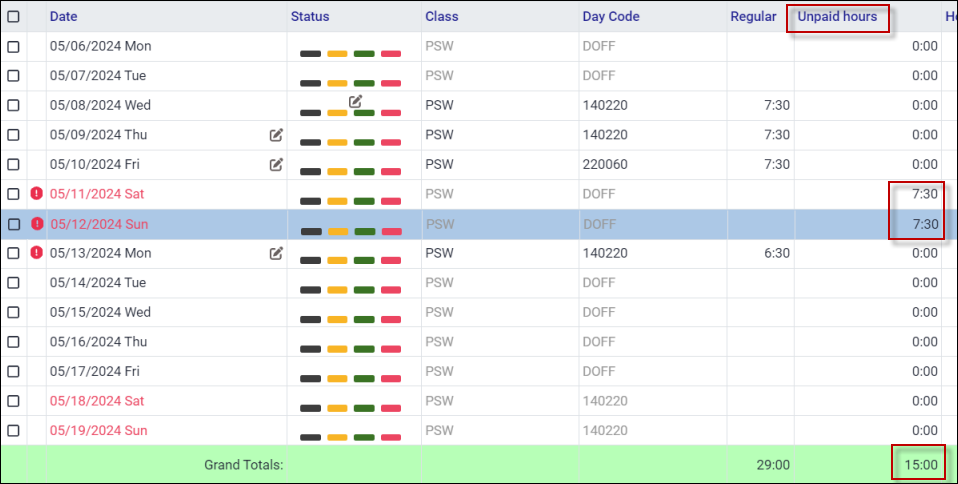
Unpaid Hours Column
The Unpaid Hours column of the Time Card displays any Attendance Codes that are flagged as TCard Unpaid Hours and are not flagged as paid codes in the Attendance Code setup.
This column displays unpaid hours regardless of whether the unpaid Attendance Code is displayed in any other mapped column or not.
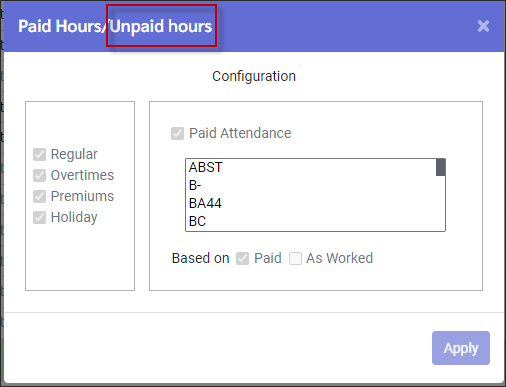
To see which Attendance Codes are configured to appear under the Unpaid Hours column:
▪Hover over any number in the column until the number is underlined.
The Attendance Codes will appear in the centre section (not greyed out).
Paid Hours Column
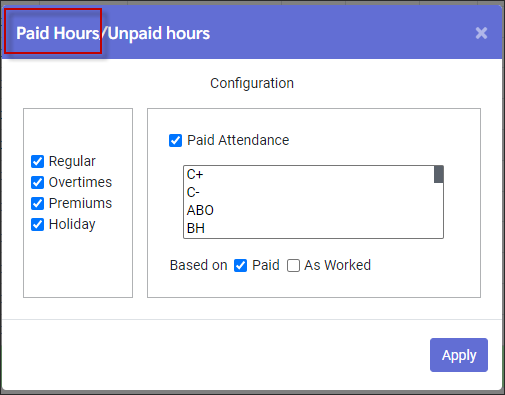
The Paid Hours column of the Time Card displays any Attendance Codes that are flagged as Paid in the Attendance Code setup. To configure the Paid Hours column:
▪Hover over any number in the column until the number is underlined.
▪Click to open the Configuration window.
|
Each section of the Time Card has toolbar and Action icons. The functions vary depending on the section. To launch this menu, click on the Actions icon in corresponding section.
Toolbar Functions
Add (plus symbol) To add a new line to the Attendance section, click on the plus symbol (+). A new line is now displayed.
Double click in each field to enter information. Fields such as Code or Department, will provide a pop-up list to select from. Click Save when complete.
X icon - Delete ▪Click on the line so it is highlighted blue. ▪Click on the red X. ▪Click Save.
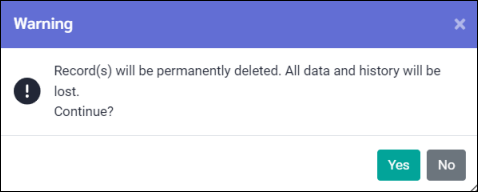
A warning message will pop-up noting that All Data and History will be lost. Click Yes to continue.
Cancel This feature is used when a new line is in editing mode and not yet saved. The fields have been populated, however, you would now like to clear the fields and start over.
▪Click on the Actions icon. ▪Select Cancel from the list. ▪Click Save.
Clone Lines may be cloned (copied). In the example below the first line was cloned. The new cloned line is highlighted in blue. ▪Click on the line to be cloned. ▪Click on the Actions icon. ▪Select Clone from the list. ▪Click Save.
Actions drop-down menu:
Field Visibility See Field Visibility for further information.
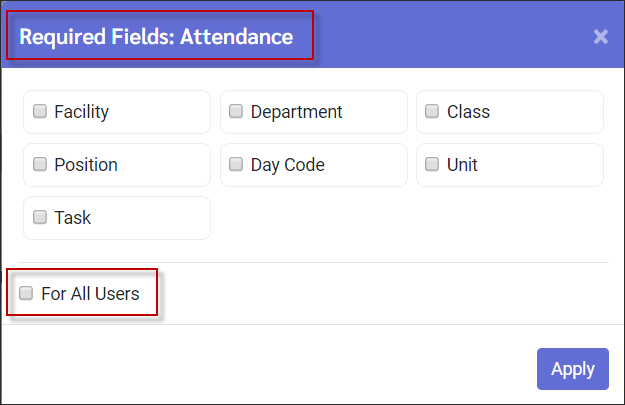
Required Fields This feature is used to set the fields that must be populated when a new line is added in the Attendance section.
▪Click on the Actions icon. ▪Click Required Fields. ▪Tick For All Users if required. ▪Select the required fields by clicking the appropriate tick box(es).
▪Click Apply. Process Deferred Debit The Deferred Debit feature allows you to delay the deduction of requested time off from the bank until the pay period in which the time off occurs. Requests for time off are normally deducted from the bank upon manager approved, however, when Deferred Debit is configured for a time-off Attendance Code, this process must be run to deduct the time from the bank. This process should be run every pay period to ensure that all Attendance Codes flagged as Deferred are processed and Time Bank adjusted.
The Deferred not process column shows whether or not the Attendance Code has been processed and the Time Bank updated (below).
▪Click on the date (line) in the Attendance section to be processed. ▪Click on the Actions icon. ▪Select Process Deferred Debit.
Once complete, the system will remove the check mark from the Deferred not processed box and update the Time Bank.
If the hours entered for the debit are greater than the balance in the associated Time Bank, the difference will be displayed in the Deferred Remained column (2.5 hours below).
|
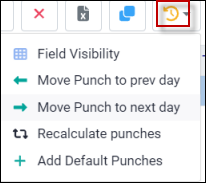
Each section of the Time Card has an Actions icon. The functions vary depending on the section. To access the Action panel click on the Actions icon as shown expanded below:
Toolbar Options
Adding Punches (plus symbol) A missing punch, typically resulting in an odd number of punches, will generate an Exception on the Time Card. To add a new line (punch) to the Punch(es) section of the time card:
▪Click on the plus symbol (+). A new line will appear. The time provided will be the actual system time when the new line was added. Auto populated fields may be adjusted as needed. ▪Populate the line with the required information. Use the scroll bar to move right or left to access additional fields. ▪When complete click Save.
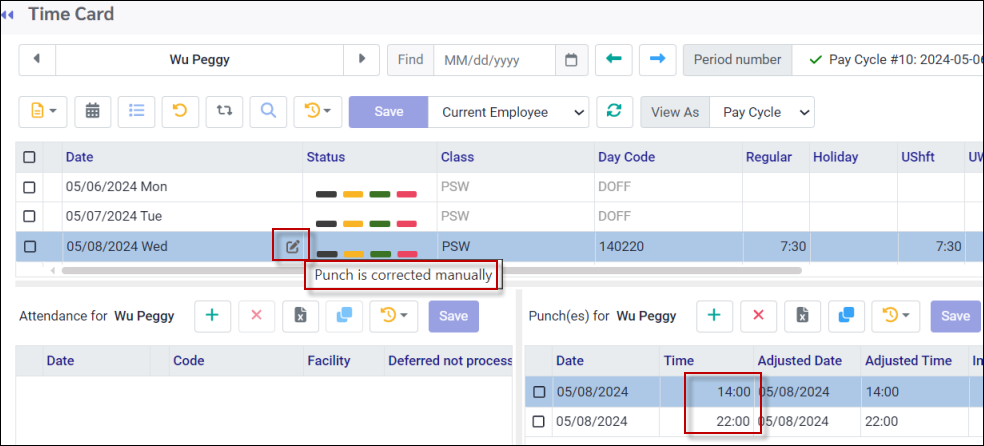
When punches are manually added to the Punch(es) section of the Time Card, an edit icon (paper and pencil) will appear in the hours section as shown. Hover over the icon and a tool tip, Punch is corrected manually, will appear.
Red X - Delete To remove a line, click on the line to highlight it. Click on the red X. A warning message will pop-up noting that All Data and History will be lost. Click Yes to continue.
Cancel This feature is used when a new line is in editing mode and not yet saved. The fields have been populated and you now would like to clear the fields and start over. Click Save when done. Clone Lines may be cloned (copied). In the example below the line in red was cloned. The new line, highlighted in blue, is the duplicate. Click Save when done.
Actions Menu Functions
Field Visibility See Field Visibility for further information.
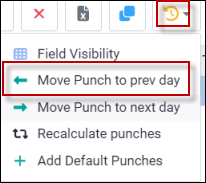
Move Punch to prev day Use this feature to move a punch to the correct day when required. The example below, for the shift on May 10th from 10pm-6am (May 11th), shows the out punch on May 11th instead of part of the May 10th shift. This may occur if the schedule was not up-to-date when the employee punched in or out.
To move the punch back to May 10th:
▪Click on the Actions icon. ▪Select Move Punch to prev day.
The out punch for this shift now appears on May 10th:
Move Punch to next day Follow the same process as Move Punch to Previous day as described above.
Recalculate Punches Use this option to recalculate hours when the punches were done before the schedule was entered.
For example, Jane took a shift for Marco who called in sick. Jane then punches in and out before the manager has updated her schedule. Once Jane's schedule has been correctly updated, Recalculate Punches should be used to calculate the hours again, this time against the Day Code where the overtime, premium and lunch deductions have been configured to automatically calculate.
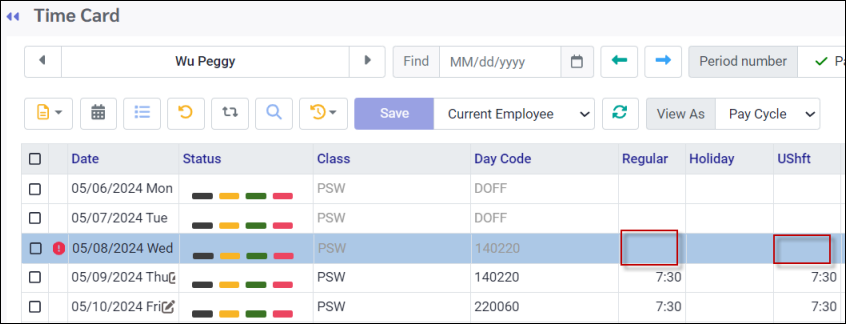
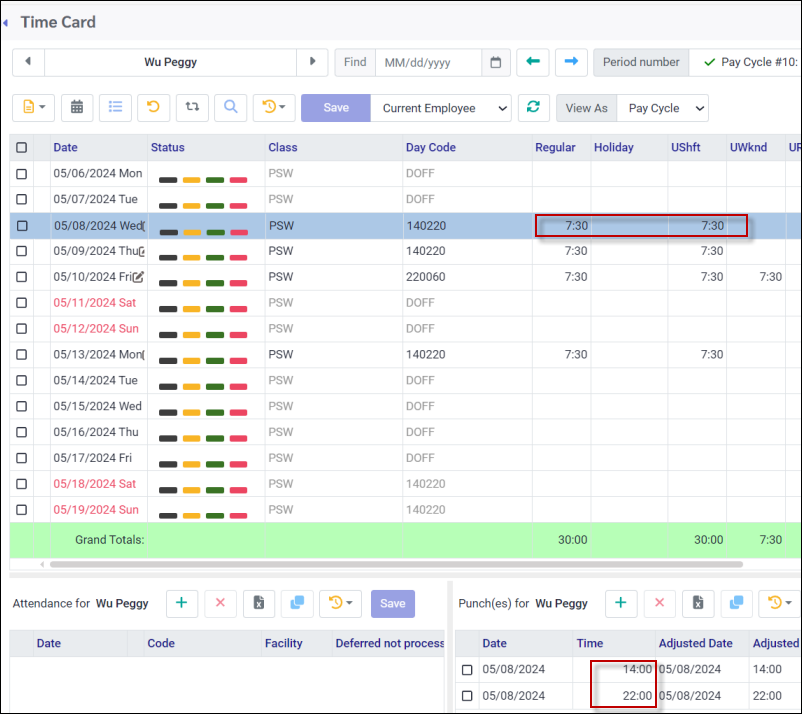
Add Default Punches This option will add punches corresponding with the start and end times of the shift. In the example below, Peggy was working at another location with no punch clock on May 8th. Select Add Default Punches and the system will add her punches with the applicable hours and premiums.
|
See Also:
