Day Codes define all details for a shift. Items such as breaks, grace periods, start / end time, premiums etc. are part of the Day Code configuration.
We do not recommend deleting Day Codes that have historical data tied to them. You may wish to run historical reports etc. that will include this Day Code. By changing the description, you may alert others that it is not to be used.
To access the Day Code setup:
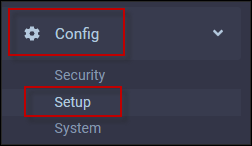
▪Click on the Config menu.
▪Click on the Setup menu.
▪Click on Day Codes.
The Day Code menu is divided into two sections. The left panel is a list of all existing Day Codes. The right panel is the detail configuration for the highlighted Day Code.
Creating a New Day Code
Depending on your security access, you may add, delete or clone a Day Code. Please note that cloning is the StaffScheduleCare recommended method of adding new day codes.
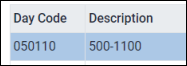
▪Click on the plus symbol (+) to add a new Day Code. A new line will appear at the bottom of the Day Code List. ▪Populate the Day Code and Description fields. ▪Click Save.
With the new Day Code highlighted (blue above), on the right-hand start configuring the rules to be applied. Start with setting up the shift times at the top and work your way through the tabs. Cloning Day Codes The cloning option allows you to make a copy of an existing Day Code:
▪Click on the Day Code you would like to clone so it is highlighted blue. ▪Click on Clone icon (blue folders).
A new line will appear with the same description and detail configurations. Make the modifications to the new Day Code. Be sure to add the new Day Code name and correct new description before your click Save.
Shift Times A Day Code must have a Shift Start and Shift End time. These times are the times that an employee must punch in by and a time the shift ends.
Step 1 Set the start and end times of the shift.
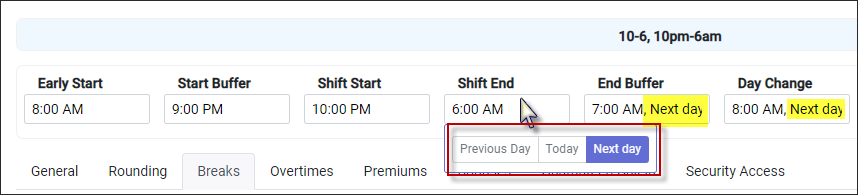
Step 2 Set the buffer times. The buffer times define how much time before a shift and after a shift a punch may appear and be rounded to the shift start / end time. Punches outside this buffer will count as extra time or overtime. In the image below an employee can punch in after 9pm and the punch will be rounded to 10pm. If the employee punches at 8:55am however, an Exception Code will appear, indicating that this punch is outside the buffer.
Step 3 The Early Start and Day Change fields must be a 24-hour period. That period should be defined to accommodate different types of shifts. For example a day shift from 7am to 3pm would be configured with the 24-hour period running from midnight to midnight, whereas a night shift from 11pm to 7am would be configured from noon to noon. You may use the AM or PM options or military time as needed.
If a shift runs across midnight, you must be sure to select the correct day setting. The example below shows a shift starting at 6am today. The Shift End is 7am the Next Day. The End Buffer and Day Change times must also show Next day.
Validation
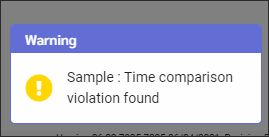
If there is an error with the time line of your new shift, the system will issue a pop-up warning with a quick view of the current time settings. You will need to review the time line setup. Do not click Save. To exit click on the X.
|
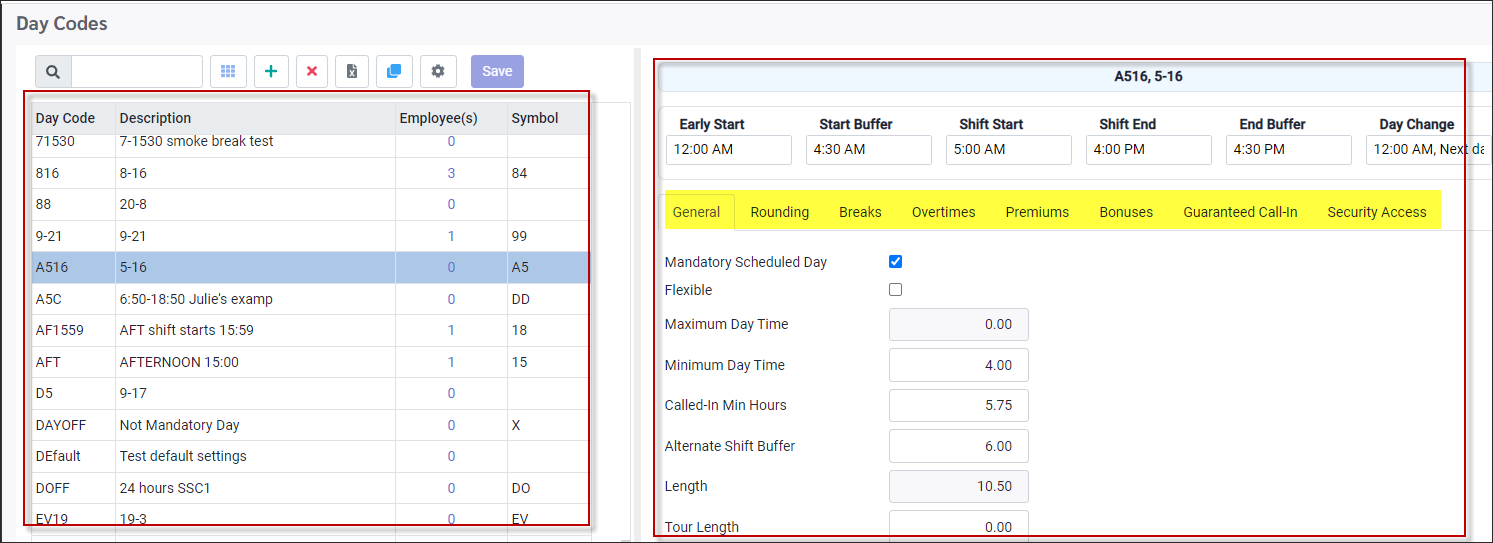


General Tab
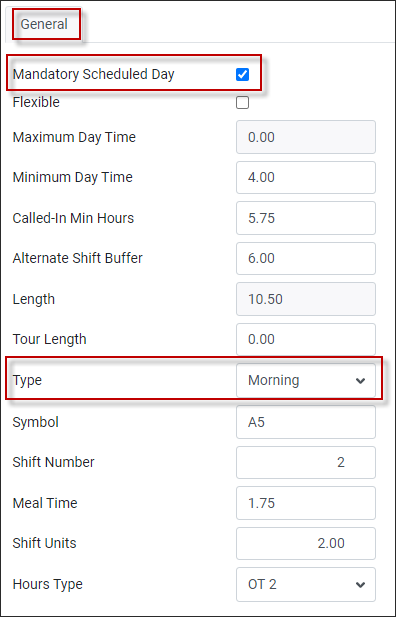
Mandatory Scheduled Day This should be checked and the shift Type selected as shown above. The system will use the Type when matching an employee’s availability for a shift.
Minimum Day Time This field is optional and may be left at 0:00. The Minimum Day Time field is used to identify the Minimum time the employee is required to work for the day to be considered worked.
Flexible This option allows an employee to start at any time within start and end times. When the Flexible option is on, the system does not generate Exceptions. Exceptions are generated only if the employee worked longer than the duration of the shift.
Alternate Shift Buffer Allows you to set a certain amount of grace time that will be applied if this is not the employee's standard shift. This allows them time to punch in before considering them as late. this buffer extends the shifts start time by the time entered in this field. For example, my normal shift is 8-5, but from time-to-time I work 3-11. If I am a little early or late, and the 3-11 day code does not have an Alternate Shift Buffer assigned, my hours will be calculated against my 8-5 day code and my exceptions will be incorrect. But if a buffer is applied, and my in punch falls into these extended parameters, then my time will be calculated against the 3-11 day code.
Length The length of the shift will be calculated when you save. If the length appears as a negative number, you have configured the Time section incorrectly. This length will be 0:00 for ALL non-mandatory scheduled days.
Tour Length Enter the number of worked hours this Day Code will credit towards a Tour.
Type Use the drop-down list to select if the shift will be morning, afternoons, evenings or nights. This will work with the employee's availability for the shift.
Meal Time Used to identify how much time an employee must work in order to be reimbursed for the meal time. Enter a threshold of time in the Meal Time field, i.e., 6:00 hours. The threshold definition indicates that an employee must work at least this many hours in a day to qualify for the meal allowance. This feature is used in conjunction with the Meal Allowance Calculation and requires an Attendance Code set up.
Shift Units This field is used in conjunction with the Holiday Calculation when the number of shifts is used to determine paid hours eligibility. This field will define how many shifts a Day Code will be counted as. For example, an 8:00a-5:00p shift would be one unit, but a double or twelve hour shift, i.e., 8:00a-8:00p might be considered two units.
|
Rounding Tab Rounding is used to set up grace periods to define how long after a shift has started and/or before a shift ends that an employee can punch in or out and have the shift round the time to the actual start or end time. Please see Day Code Rules Configuration for more information.
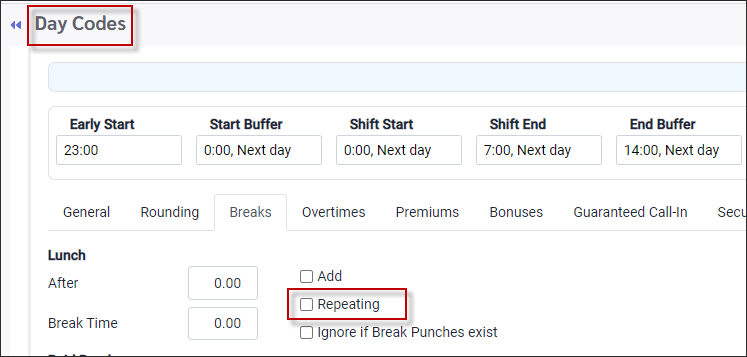
Breaks Tab Here you will define lunch and break periods. You can define them as either paid or unpaid, whether the hours contribute to regular hours and if punching in and out is required.
When checked, Paid and break Duration is tracking by the system accordingly. Any break within start and end times are added to worked hours. The combined time of any breaks are not to exceed one hour of paid time.
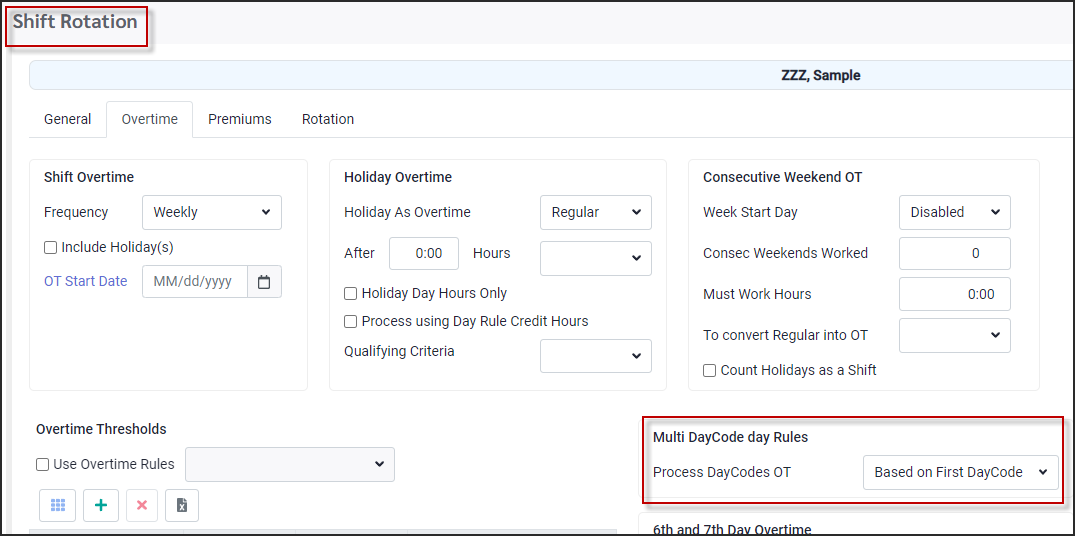
When the Shift Rotation overtime is set to Based on First Day Code, the lunch and overtime calculations are based on the first day code if the employee works multiple shifts. The Rounding, Breaks and Premiums are based on the respective Day Codes.
If you require the second shift to auto deduct lunch. On the First Day Code, Breaks tab, turn on Repeating.
Please see Day Code Break Group Configuration for additional information on configuring Absolute break groups..
|

Overtime Tab
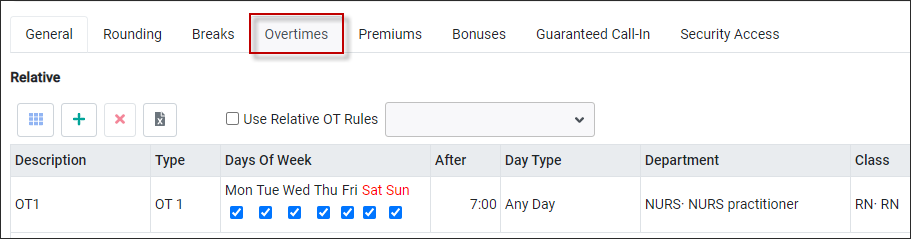
Relative If overtime is to be applied to a shift after working a specific amount of time, you may assign an overtime code to the Day Code of that shift. In the Relative section you may assign an overtime code. ▪Click on the plus symbol (+) and populate the new line. ▪Double click on the Type field for the overtime drop-down list. The Days of Week field allows you to select which days of the week the overtime can be applied. Populate the After column with the number of hours to be worked before overtime is applied. You may click on the check box beside Use Relative OT Rules and choose from a preset rule drop-down.
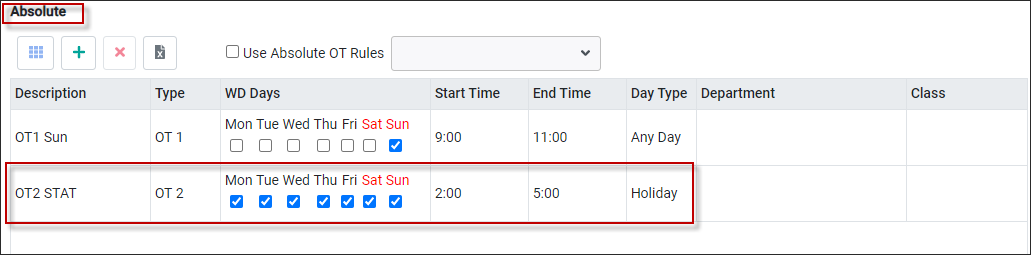
Absolute If overtime will always be applied to shift you may set the parameters in the Absolute section. Use the plus symbol (+) to add new rules or click on the check box beside Use Absolute OT Rules for preset rules.
In the example below: Line #1: The employee with always get OT1 for the hours between 9am and 11an on Sundays. Line #2: If employees work on a Holiday between 2pm and 5pm any day of the week, they will earn OT2.
Premiums Premiums may be associated with a shift based a specific period within the shift.
▪Use the start and end times to define the period the premium should apply to. The Start and End time configuration should logically conform to the 24-hour period Early Start and Day Change times of the Day Code configuration. For example, if you have a shift that starts at 11pm and ends at 7am the next day, the Early Start time may be 12pm and the Day Change time 12pm the next day. In this example, you would set a Saturday weekend premium to apply to the whole 24-hour period i.e.12pm to 12pm the next day, since all hours worked on a Saturday, would get the premium, and in this case we are configuring this window as relating to overnight shifts. ▪You may define an override rate in the Rate column if applicable. If left blank, the system will pick up the premium rate de ▪Double click in the Type column to select the premium to be applied. ▪Set a minimum number of hours to be worked in the Threshold column if applicable. In the image below, the employee must work four hours to get the premium.
You may set up premium groups to apply to multiple Day Codes with similar start and end times, instead of creating the premium rules for each day code individually (or cloning them) Please see Premium Groups for additional information. |

Bonuses This option can be used to add different type of "bonuses" to the Day Code configuration. Please see Day Code Rule Configuration for additional information. Guaranteed Call-in Tab Some shifts get a guaranteed call-in number of hours. In the image below, four (4) hours are guaranteed on all days of the week and on any Day Type.
|

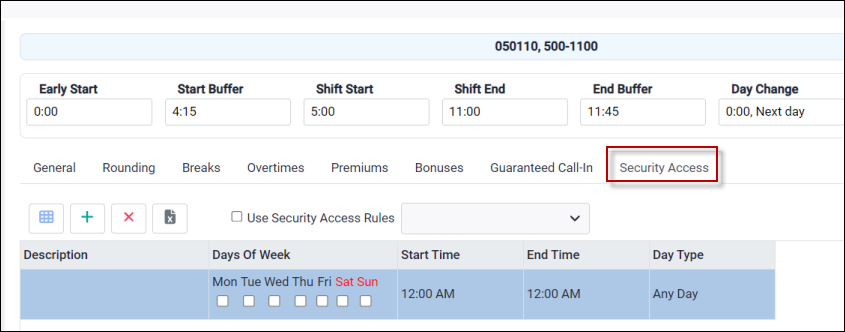
Security Access Tab This feature is used to restrict facility access to just the start and end of a shift. For further information please contact your StaffScheduleCare client care team
|