At the end of a pay cycle, navigate to the Payroll Interface to create the export file for your payroll provider. The payroll file should not be run until after all Time Card exceptions have been completed and approved. The final preparation step should be to review the payroll reports for the pay cycle you will be completing.
Payroll Interface
For a description of toolbar functions see Payroll Processes.
During your system implementation, the StaffScheduleCare client care team configured and tested your payroll interface export file. This means you will only need to select the start and end dates. Below are suggested steps prior to running payroll, however, you should follow your facility's payroll processes.
Time Card Follow these steps to ensure accurate Time Cards: ▪Make all necessary Time Cards corrections. ▪Verify all hours are correct. The Active Schedule and Time Cards should match. ▪Add any paid Attendance Codes i.e. (payouts, vacations, sick time, etc.). All payouts should be completed at the end of the pay period.
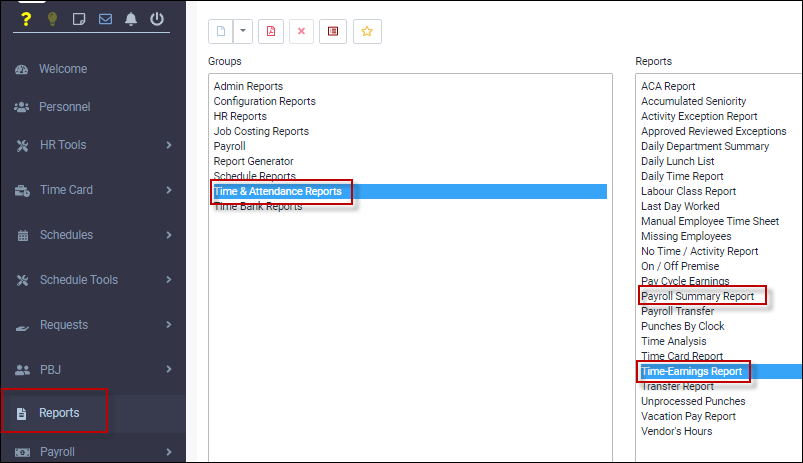
Reports Once Time Cards are complete you will need to run the appropriate reports.
▪Select the Reports menu. ▪Select either the Time Earnings or Payroll Summary Report under the Time and Attendance reports group.
Run and save the report for future reference. Audit hours and earnings.
Payroll Summary Report This report is a summary of the earnings made from the hours, premiums, paid codes, etc. The layout shows the totals for the pay period.
Time-Earnings Report This is a broken-down detailed report for all paid codes and premiums selected in the setup. It will show you hours, rates, dollars, and total amounts.
Processing Payroll
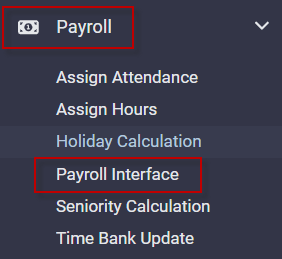
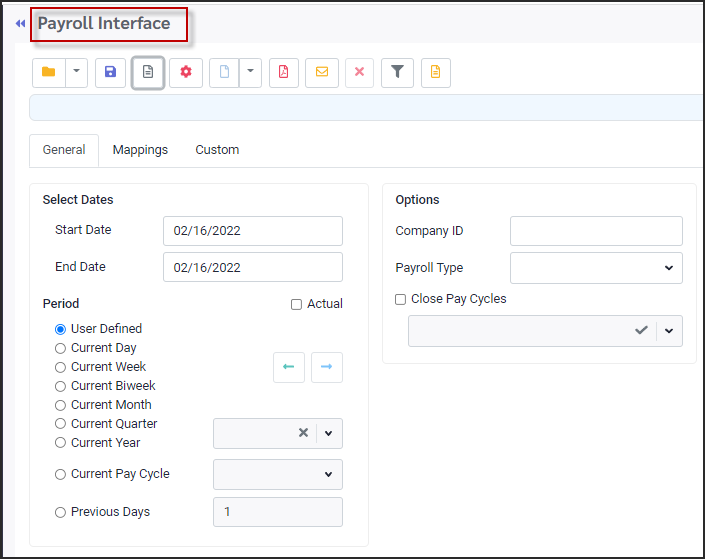
▪Select the Payroll menu. ▪Select the Payroll Interface menu. ▪Select the General tab.
Typically the payroll templates have been defined in advance and saved.
▪Click on the file folder. ▪Select the saved payroll setting you would like to use.
Select Pay Cycle and Dates
▪Click on the Pay Cycle option and select the pay cycle from the drop-down list. ▪To move the Pay Cycle dates, use the green arrows to switch pay periods. ▪Confirm the dates shown in the Start Date / End Date match the pay cycle to be run.
▪The Company ID is setup by your StaffScheduleCare client care team and should not be modified. ▪The Payroll Type does not change nor is it left blank. Unless you are using Payment Evolution (StaffScheduleCare Canadian payroll module), this field should always show StaffScheduleCare.
File Name The name in the File Name field represents the format the export file will be. This should be what your payroll provider has requested. If a change is required simply click on the field and type in the file name.
To add Date/Time Suffix to File Name, tick on this option.
If this is a permanent change be sure click on the Save icon and save your changes ▪Click on the Process icon.
The process will provide your payroll export file. Follow the process provided by your payroll provider to successfully import your data. |


When you have completed a payroll run, click on the Close Pay Cycles option. ▪Select the pay cycle you have just run from the drop-down list. ▪Confirm that the Start Date and the End Date are correct. ▪Click Process.
Once a pay cycle has been closed, managers without access to edit closed pay periods will see a lock and an “X” icon on the Time Card prohibiting them from making edits.
|


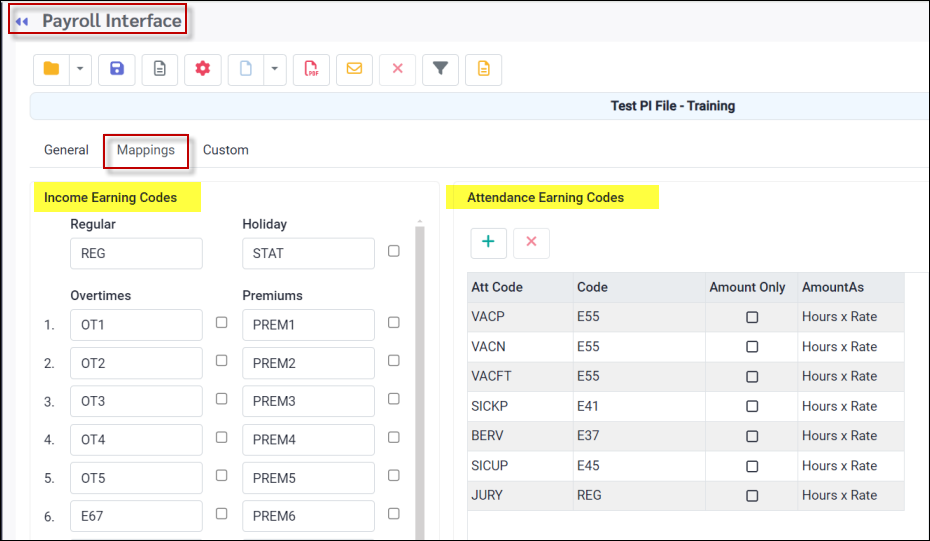
On the Payroll Interface Mapping tab, the earning codes for income and attendance are defined.
Contact your StaffScheduleCare client care team to modify your mapping. This was defined for you during implementation.
▪Select the Payroll menu. ▪Select Payroll Interface.
▪Select the Mapping tab.
Income Earning Codes
The StaffScheduleCare default fields are Regular, Holiday, OT1 to OT20 and Prem1 to Prem 10. Enter the codes from your payroll provider in the boxes that correspond with the StaffScheduleCare fields.The check boxes beside the code fields are used to send across a dollar value when applicable and should not be used or edited once your payroll file has been completed during implementation.
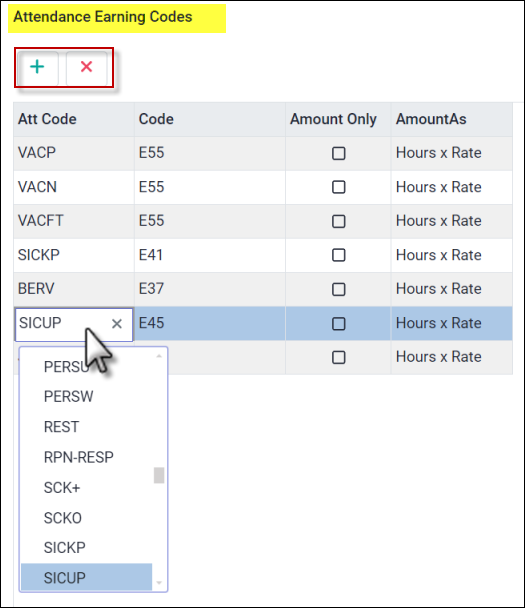
Attendance Earning Codes
To add an Attendance Code: ▪Click on the plus symbol (+). ▪Click in the Att Code field. ▪Select the Attendance Code from the drop-down list. ▪Click in the Code field and enter you payroll provider's corresponding earning code. The Amount Only and Amount As options are used strictly with a Custom setup as instructed.
|