Shift exchanges may be performed by the manager on behalf of the employee or by the employee with or without manager approval.
Performing the Shift Exchange
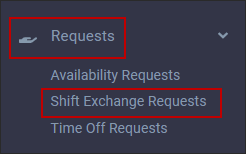
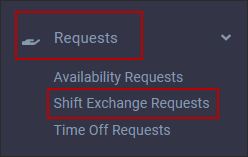
▪Select Requests. ▪Select Shift Exchange.
The Shift Exchange menu will appear.
Create a Shift Exchange Request
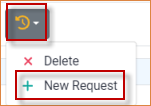
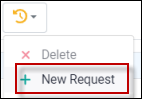
▪Click on the Actions icon and select New Request. The New Request and your Active Schedule will appear.
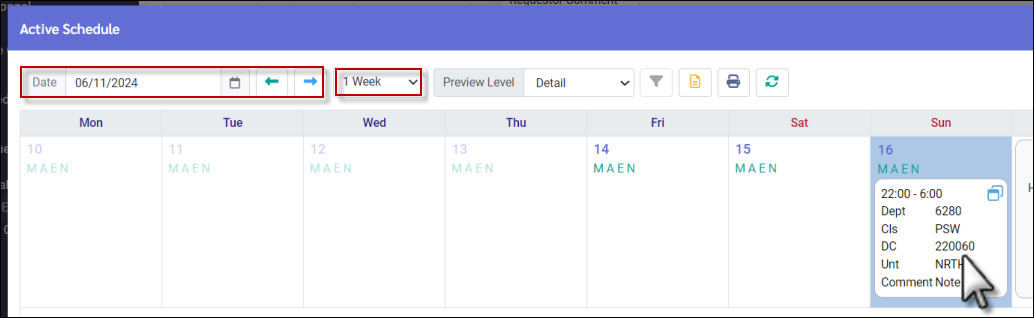
You may change the date range by clicking in the Date field and using the calendar or the forward / backward arrows. To view a different number of weeks or to use the month calendar view, click on the drop-down arrow in the Weeks field.
▪Click on the date you would like to exchange so it is highlighted in blue. ▪Click Apply (not shown). The Shift Exchange Request menu will appear in the right-hand panel.
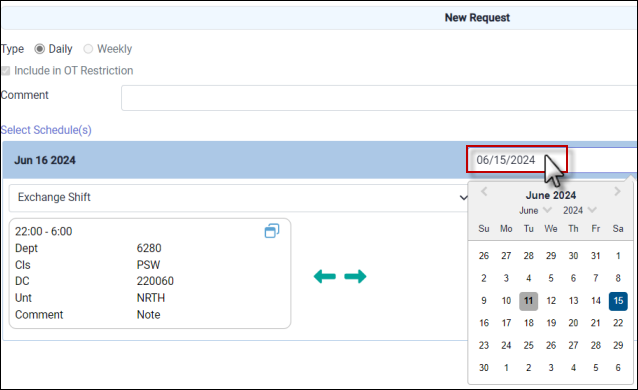
▪Select the date you wish to exchange to by clicking in the Date window.
Selecting a Shift to Exchange - Multiple Bookings
If you are booked to more than one shift on a given day, and would like to exchange only one of them:
▪Select the date you would like to exchange (exchanging the 20th for the19th). ▪Click on the garbage can icon.
The following menu will appear:
▪Select the shift you wish to exchange (yellow) by ticking the corresponding box. ▪Click Submit. The shift you want to exchange will now appear by itself for exchange as shown. The other shift will remain as scheduled.
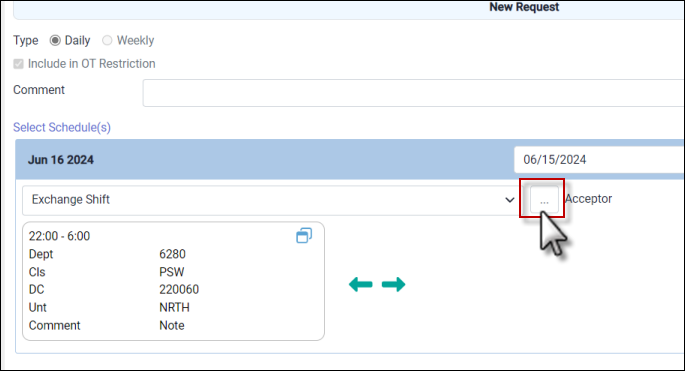
Selecting an Acceptor ▪Click the Acceptor box
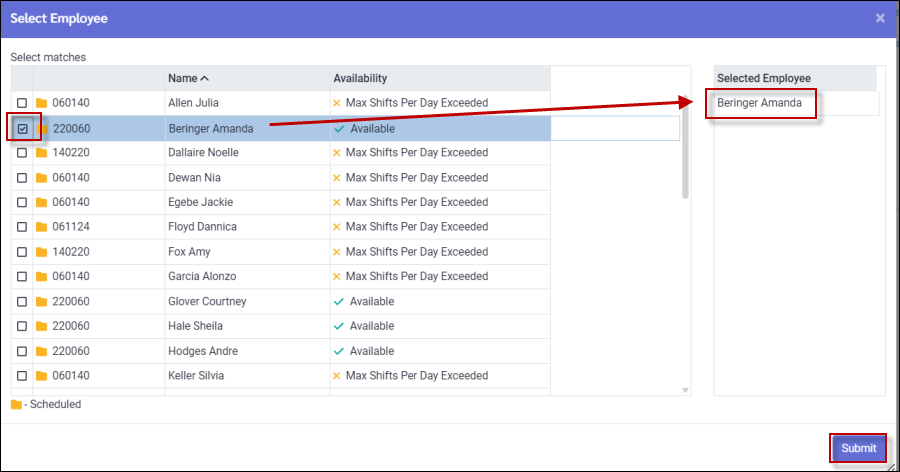
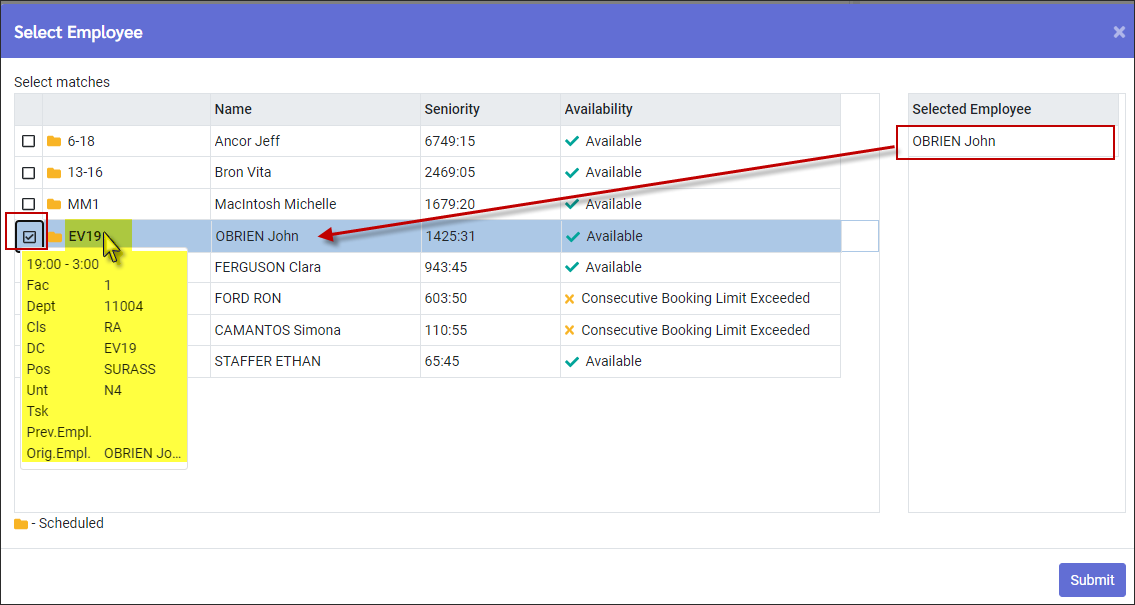
The following menu will appear: ▪Click in the check box beside the employee you would like to exchange with. ▪The selected employee will be displayed in the Selected Employee panel. ▪Click Submit.
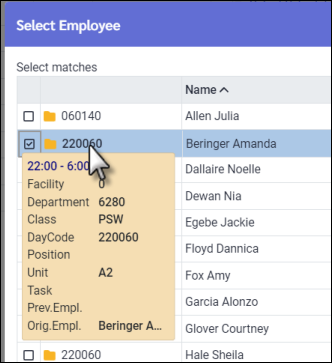
Hover over the Day Code (shift name) and all the details of the employee’s scheduled shift will appear for you to review.
The employee name will then appear under the Selected Employee column on the right.
▪Click Apply (not shown).
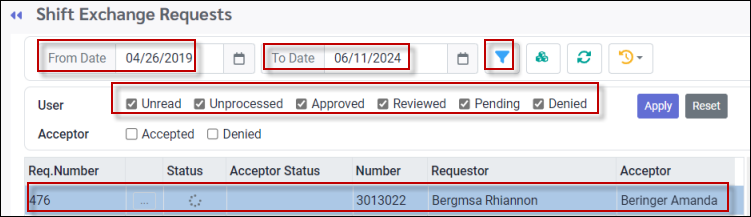
The request will now appear in your request summary section. If you do not see the request, please verify that your filter selection and date range settings include the information you require.
The unprocessed Shift Exchange will now appear under the Shift Exchange date. The Shift Exchange is not complete until the requested employee accepts the exchange. If approvals are required, the manager must approve the exchange before it will be reflected on the employee schedule.
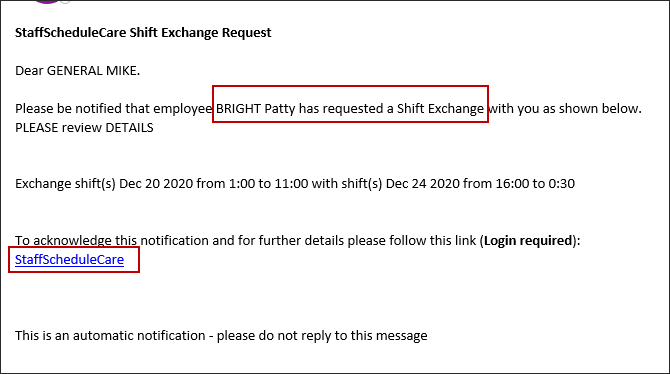
Email Notification of Shift Exchange
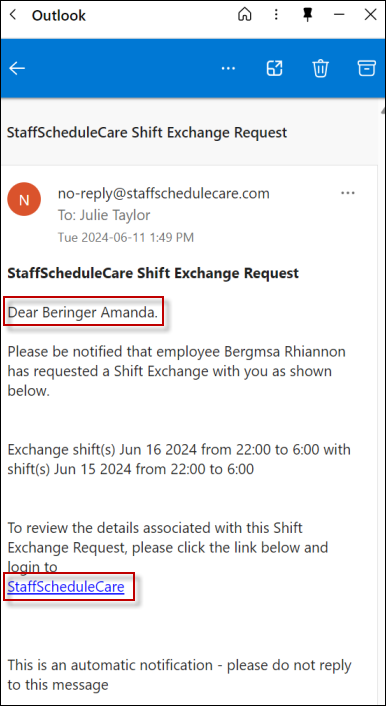
If the system email configuration is complete and employees have their email addresses defined in their profiles, Acceptors will receive email notification. A link is provided to log in and process the request:
When the Acceptor processes the request (accepts or declines) the Requester will get email notification in reply.
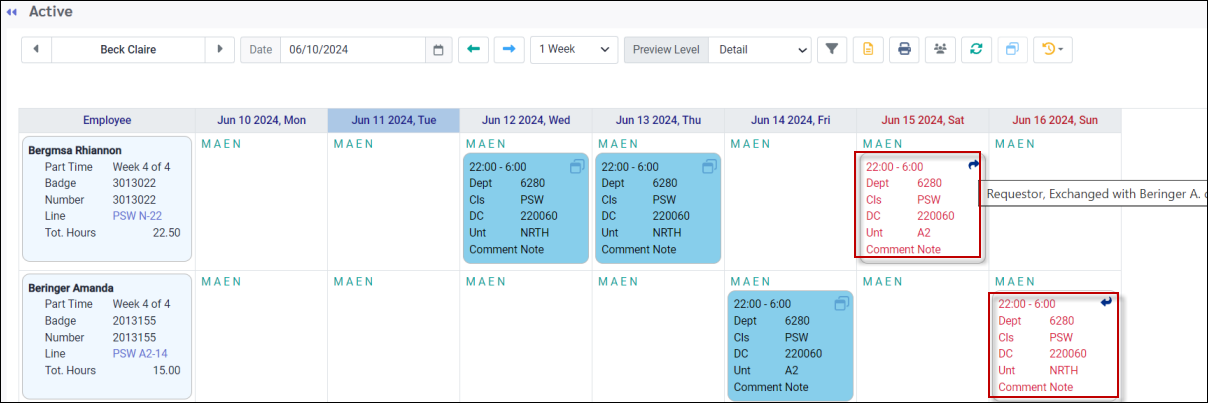
The Active Schedule On the Active Schedule each employee will have an arrow on the dates exchanged; one is the Requester Hover over the arrows for quick details of the exchange.
Decline If the employee declines the Shift Exchange the schedules will remain as they were and a message will be sent to the Requester, which can be viewed on the Welcome menu (Unread Topics) upon login.
|


When the system is configured to not require a manager's approval, employees can exchange shifts directly to each other.
Log in to StaffScheduleCare with your employee username and password.
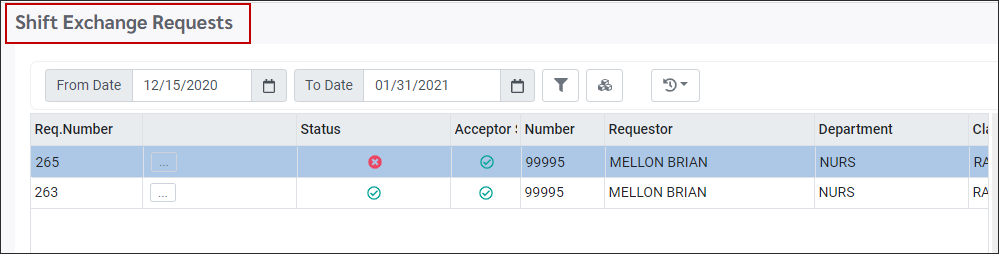
▪Select the Requests menu. ▪Select the Shift Exchange Requests menu.
The Shift Exchange Request window will appear.
▪Select the date range for your request. ▪Right click within the left panel and click on New Request.
The Active Schedule is displayed. You may change how you see the schedule by selecting weeks or calendar view from the drop-down for the Weeks field.
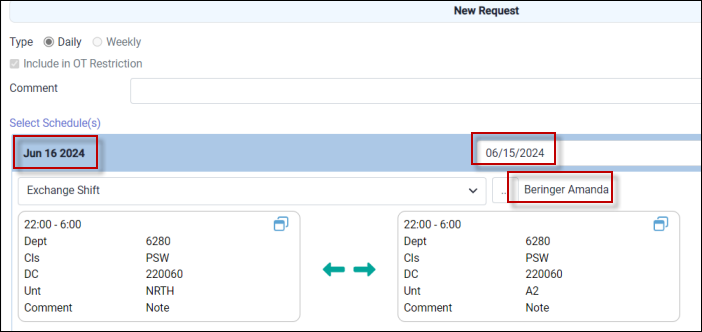
▪Click on the day / shift you would like to exchange. Be sure the day is highlighted in blue. ▪Click Apply.
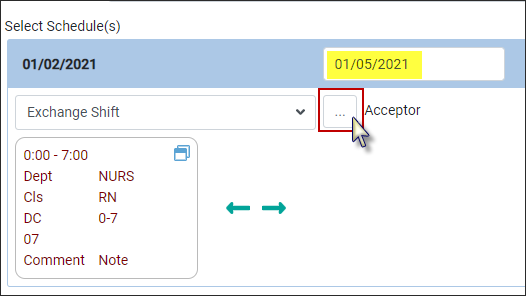
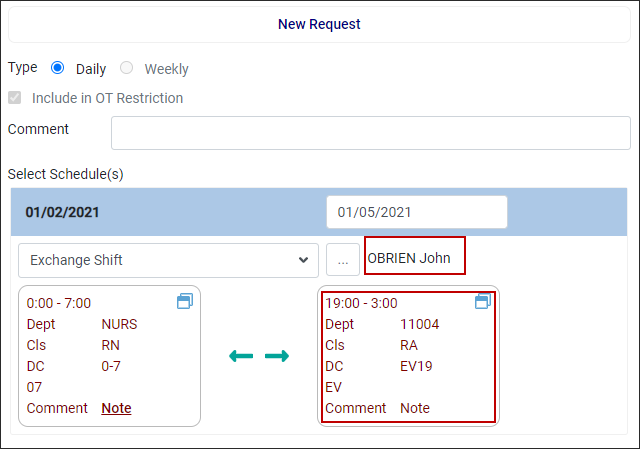
Now the shift to be exchanged appears on the right side panel under New Request. To select the date to be exchanged with, click in the date field for a calendar. A calendar will show the dates the exchange can occur.
In this example we have selected January 5th.
Please see Selecting a Shift to Exchange - Multiple Bookings for information on exchanging shifts when more than one shift is scheduled on the same day.
Selecting an Acceptor
▪Click on the button beside Acceptor. .
▪ Click on the check box beside the employee you would like to select. ▪ The selected employee will appear in the Selected Employee panel. ▪ Click Submit.
To view the available employee's shift, click on the Day Code and view the details.
The selected employee and the exchanged shift will appear on the right panel. A comment field is provided, but not required.
▪Click Apply (not shown).
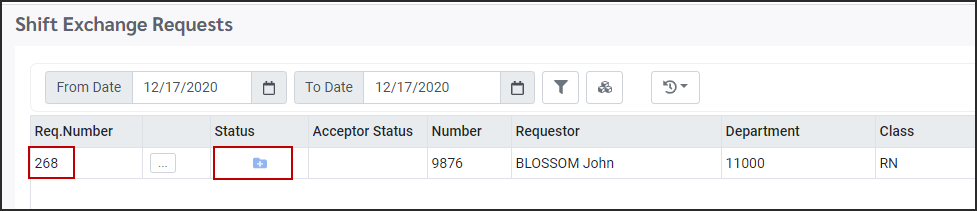
The request is complete. Note the request now appears on the left panel with a request number. The status is New.The Shift Exchange is not complete until the employee requested to exchange accepts the exchange.
Welcome Menu Notification of Shift Exchange
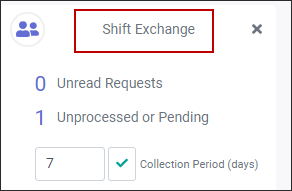
On the Welcome menu, the Unprocessed or Pending option applies to the employee requesting the exchange (Requestor) while the Action Required option applies to the employee who will be responding to the exchange request (Acceptor). Please see Welcome Menu Widgets for further information.
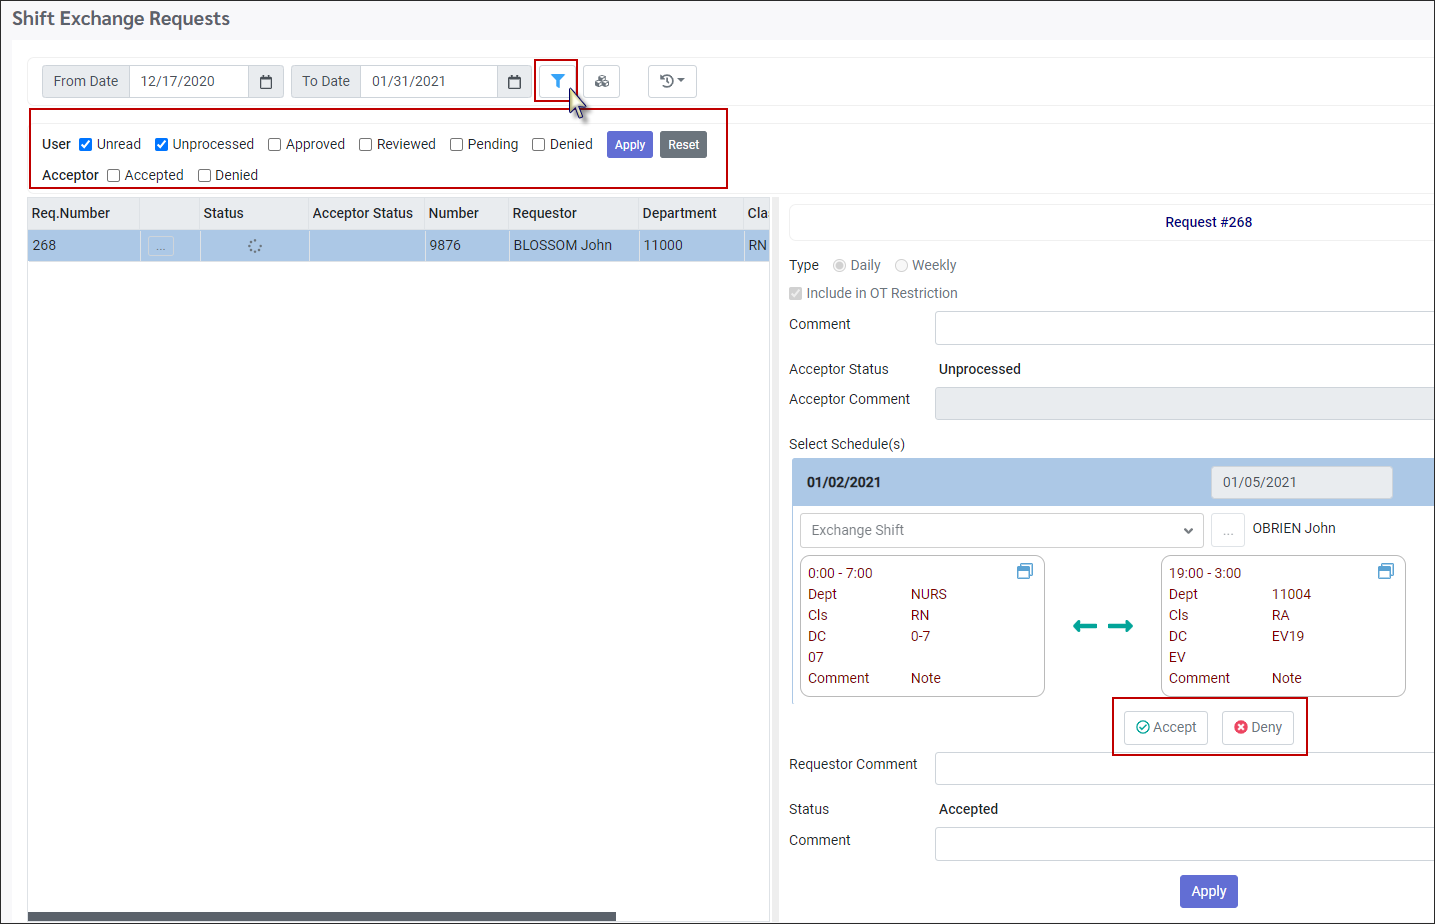
When the Acceptor clicks on the number beside Unprocessed or Pending the following menu will appear. Use the filter to select which requests you would like to view.
▪On the right panel the Acceptor may either Accept or Deny and add a comment. ▪Click Accept. ▪Click Apply.
Accept If the employee accepts, because this exchange does not require manager approval, the two employees schedules will be automatically exchanged and a message will be sent to the Requester, which can be viewed on the Welcome Menu (Unread Requests) upon log in.
Deny If the employee declines, the Shift Exchange the schedules will remain as they were and a message will be sent to the Requester, which can be viewed on the Welcome Menu (Unread Requests) when the employee logs in.
Email Notification of Shift Exchange
If the system email configuration is complete and employees have their email addresses defined in Personnel, Acceptors will receive email notification when requested to exchange a shift:
When the Acceptor processes the request (accepts or declines) the Requester will get email notification in reply.
|


See Also: