The Security Access Groups determine what menus in the software are accessible.
This section describes the menu options for the Security Access and Security Function List menus.
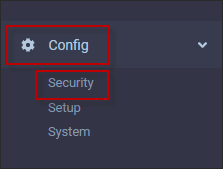
▪Select the Config menu. ▪Select the Security menu.
▪Select Security Access Groups
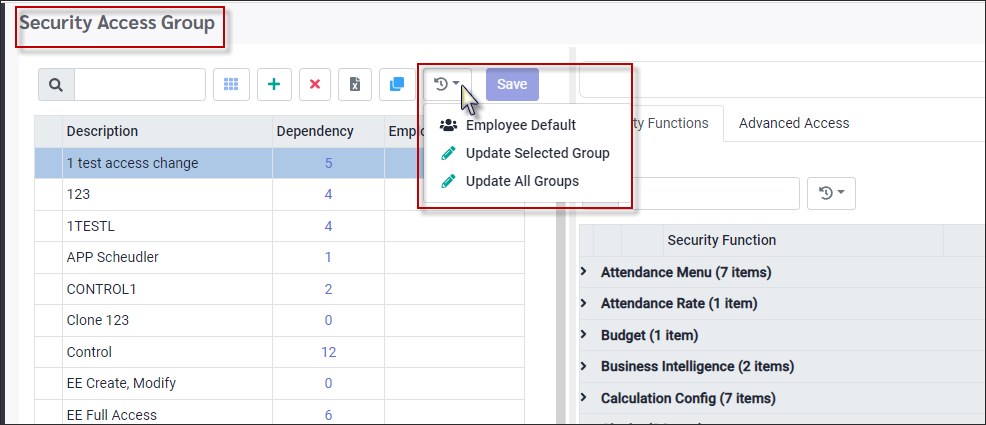
Security Access Groups - Menu Options
Employee Default Please see Employee Default under Adding Security Access Groups.
Update Selected Group & Update All Groups Please see Updating for further information.
Security Function List - Menu Options
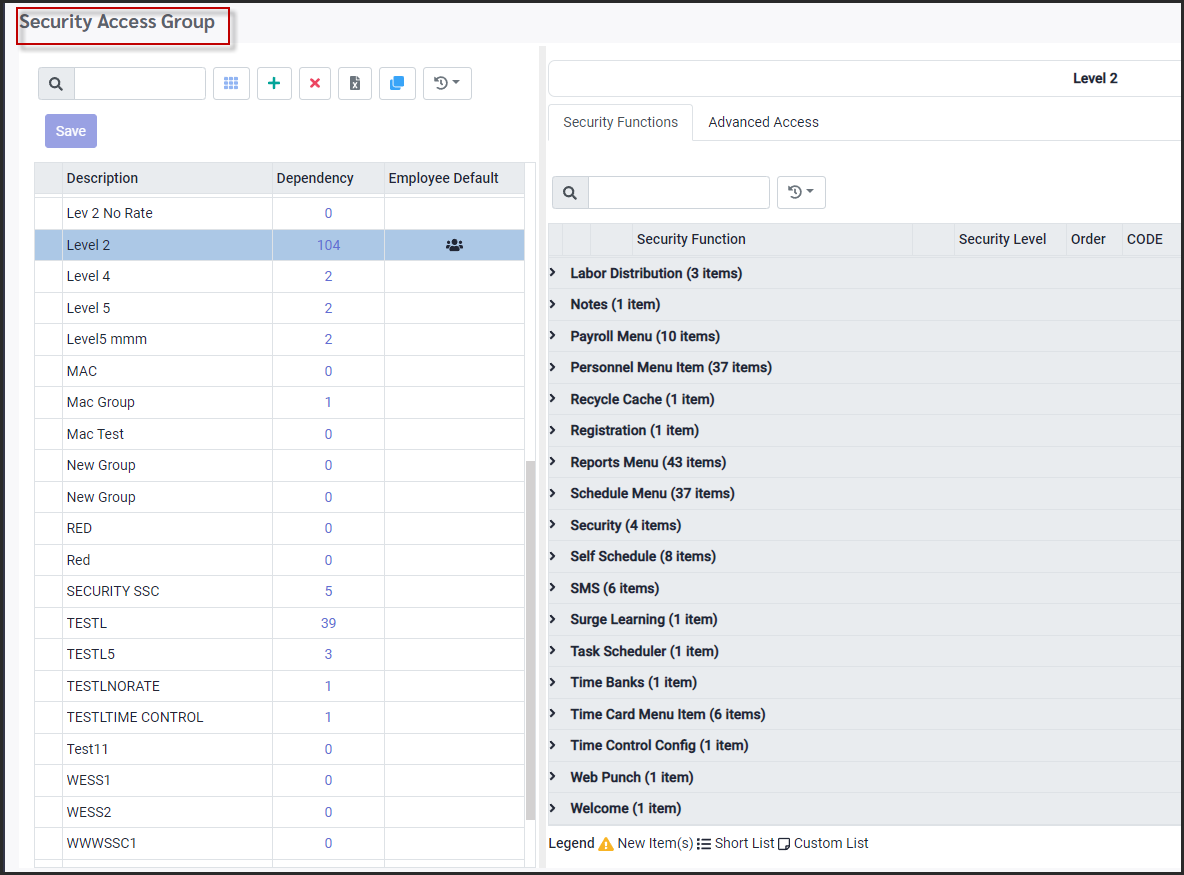
▪Select your Security Access Group line by clicking anywhere on that line. ▪The Security Function details will appear to the right.
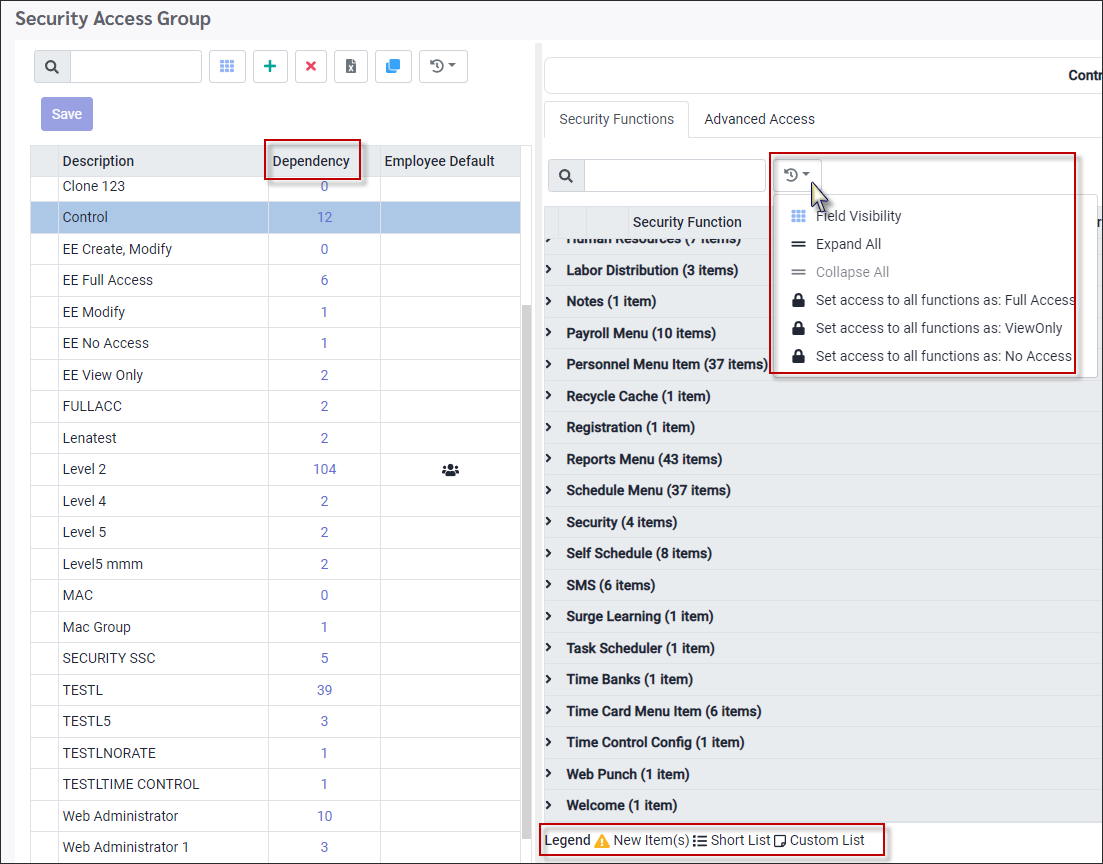
Click on the Actions List to access the menu options shown above.
Field Visibility Please also see Field Visibility for further information on this option.
Expand All & Collapse All Please see Setting up Access Rights for further information.
Set access to all functions as: Full Access / View Only / No Access Please see Setting up Access Rights for further information.
Legend Appears at the bottom of your menu.
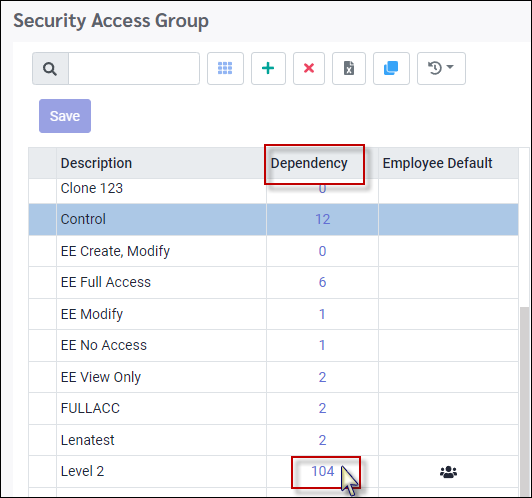
Dependency column Click on the number in the Dependency column to display the users or employees assigned to that particular Security Access Group. You will not be able to delete that group as long as there is a number visible (dependency) for that group. The image above below shows that the Level 2 group including 104 dependencies.
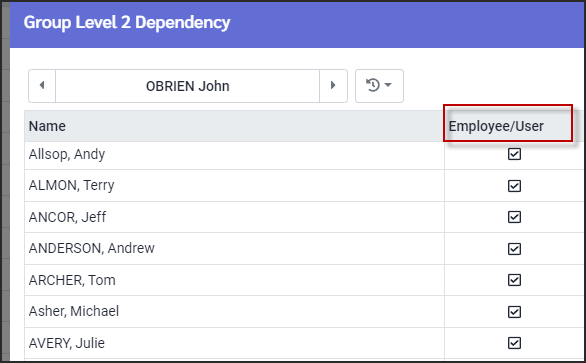
This will open the Dependency window, providing a list of those assigned to this group.
There is a tick box under the Employee/User column indicating that this group is given the Employee Default designation. If the box under the Employee/User column is not ticked, this group is made up of employees with user status, not employee status.
Please see Updating for further information on each legend item which may appear on your Security Function List screen.
|
▪Select the Config menu. ▪Select the Security menu.
▪Select Security Access Groups
The following menu will appear (note: this menu already contains predefined groups):
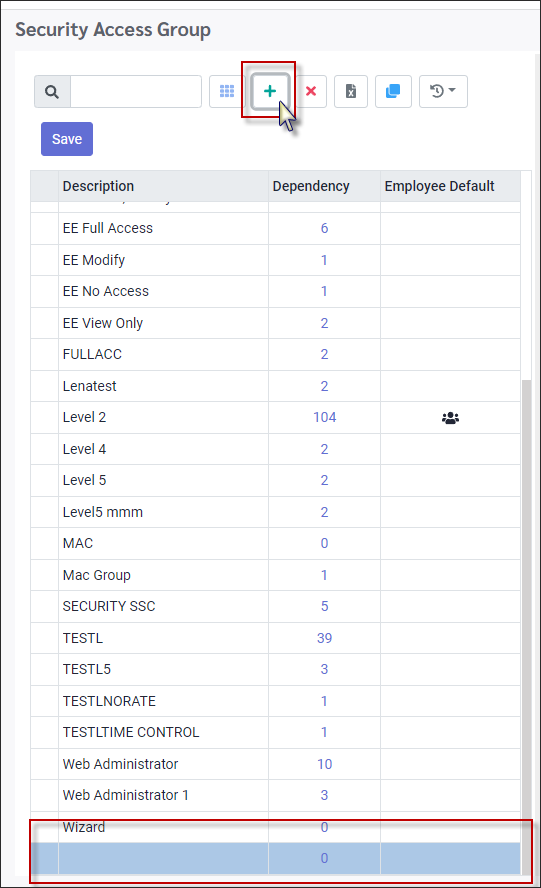
▪Click the plus symbol (+) and select Add. ▪A new blank record will appear below your current records.
▪Add a Description (name) for your new group (up to 20 characters).
Employee Default Setting
▪To assign a Security Access Group as the Employee Default Group, click Actions icon and select Employee Default.
Once this designation is applied, the Employee Default Group icon
The Employee Default setting allows you to quickly assign ALL your employees to this group, instead of having to assign them to this group individually through Personnel. If employees are given access to the system, they will have no access to other employees or users (managers) and can only access their own data based on the access rights you have configured for them.
In the example below we have created a new Security Access Group called Wizard:
Remember to click Save to apply your settings.
|
When creating new Security Access Groups, you can clone an existing group if your new group will require similar setup functions.
▪Select the Config menu. ▪Select the Security menu.
▪Select Security Access Groups
The following screen will appear. This example menu already contains six predefined groups:
▪Click on the line/access group you wish to clone. ▪Click on the Clone icon on the toolbar.
▪.A new line will appear at the bottom of the grid with a description Clone. The Dependency value is NOT cloned.
▪Rename your new Security Access Group. ▪Edit as required. ▪Click Save to save your edits. The security features will not be copied across to the cloned group until you save.
|
From time to time, new security functions are added to StaffScheduleCare which will need to be added to the individual Security Access Groups. The security level for each new function within each Security Access Group will also need to be defined.
▪Select the Config menu. ▪Select the Security menu.
▪Select Security Access Groups
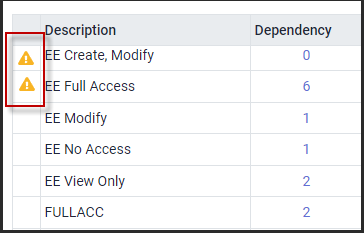
When you open the Security Access Groups menu and the screen appears with a triangle icon beside each group, this means that you need to update with new security function(s). Hovering near the triangle icon will display the update requirement message.
To update the Security Access Groups, perform the following:
▪Click on the Actions icon and select Update. You may choose to update only the group that is currently highlighted or update all groups with the triangle icon.
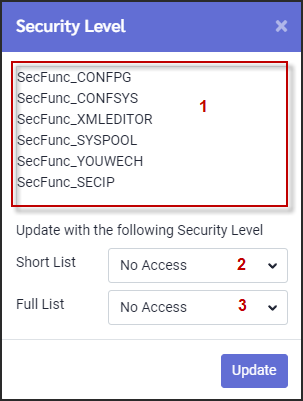
The following menu will appear:
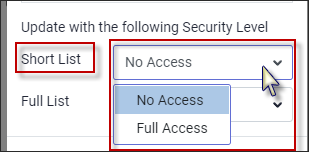
1.This section (marked one above) displays the new security functions you will need to update. In this example you can see the new functions: Save Holiday Calc, Save Seniority Calc and Save Export. 2.This section (marked two above) contains the drop-down menu selections to update the Short List security functions. The Short List functions are defined as functions designed to only require a Yes/No, On/Off or Either/Or type of setup and therefore the drop-down list will only display and allow the following two options when updating:
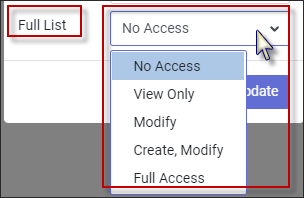
3.This section (marked thre above) contains the drop-down menu selections to update the Full List security functions . The Full List functions are defined as functions designed to accept a multi-level security setup and therefore the drop-down list will display and allow the following options when updating:
▪Select your Short List and Full List access rights using the drop-down menu options. ▪Click Update.
Your update process is now complete.
|
See Also:
