This method of updating from the Master Schedule allows you to see what will be updated before running the process. The report Preview option provides a list of the employees and unfilled lines selected to be updated.
Configuring the Update from Master Enhanced Menu
Without enabling the Remove Catch Up Period check box (Company Profile / Schedules / General), the system will perform a catch up function when updating from master if the employee's Schedules Updated to date (Personnel / Shift and Schedule) is before the first date of the specified update range. If not ticked the system will update the Active Schedule from the Schedules Update to date to the first date of the selected range. |
To use the Update From Master Schedule / enhanced method, the option Remove Catch up Period must be enabled on the Company Profile as shown below (see Configuration Tip above). You should also enable preview mode (also shown below):
▪Select the Configuration menu.
▪Select the Setup menu.
▪Select Company Profile.
▪Select Schedules.
▪Select General.

▪Tick Remove 'Catch Up' period in UFM
▪Tick Enable UFM Preview check box.
The Update From Master menu
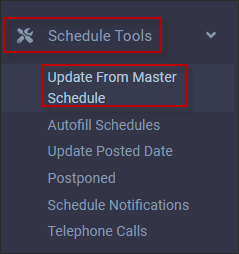
▪Select the Schedules Tools menu.
▪Select the Update From Master menu.
The Update From Master (UFM) Enhanced menu is divided into three sections. You may select employees who are assigned to master lines in the centre section and select unfilled lines on the right. On the left, select the update options e.g., the date range. You may save your settings for future use.

Unfilled Lines
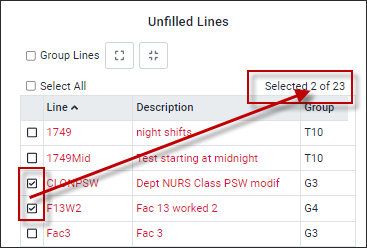
This section (right) lists all master lines (shifts) that are not assigned to employees. Updating this section only will create unfilled shifts to be assigned during the upcoming schedule period. To update the employees' lines (shifts), they must be selected in the employee section (centre).
As lines are selected the Selected number at the top right of the section will increase as it will also decrease if lines are deselected.
Group Lines
Selecting the Group Lines option will group the unfilled lines together based on the grouping code assigned in the Master Schedule Group column.
To select a group, click on the group header check box (red below).

With the Group option enabled, you may collapse or expand the groups individually using the arrows located beside the Group heading (green above) or to expand / collapse all groups, click the icons to the right of Group Lines (blue above).
Employees
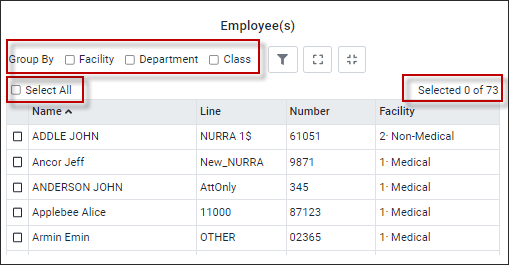
The Employee(s) section (centre) lists all employees who are assigned a master Line. For easy reference their Line name is shown immediately to the right of the employee name column.
As employees are selected the Selected number at the top right will increase. Conversely it will decrease if employees are deselected.
Select Employee
to select a specific employee, click on the check box beside the employee's name. To select all employees, click on the Select all check box. Tick it again clear all selections.
Unassigned Employees (without Master Lines)
Unassigned employees, with no master line appear in the employee section as well so that they may be included in the update from master process to also update their Schedule Updated to date in Personnel.
Selecting Groups of Employees
Use the Group By option to group by Facility, Department, or Class. You may select more than one group to create grouping levels. e.g., department and the classes within departments (below). Use the Expand / Collapse options to view the groups.
Grouping example:
If Department 013 is selected, then all of the employees in the classes under department 013 will also be selected. If only Class (PSW) under Department 013 is selected (shown below), then only the employees in that class will be included.

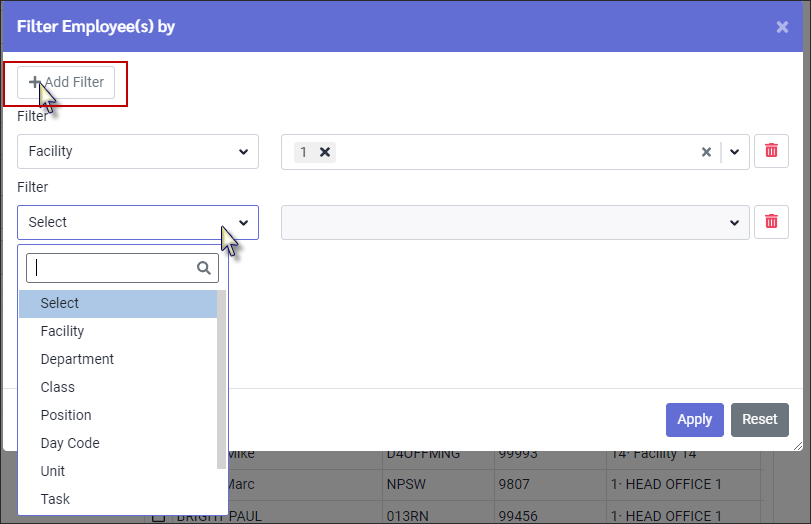
Filter list of Employee(s)
To filter the employee section, click on the funnel icon (shown above). In the Filter Employee(s) by window, click on the Add Filter option. You may add multiple filters. With each filter you will reduce the number of employees shown in the employee(s) panel.
Show Update Settings
Select the Update Settings option to set the date range you would like to update the Active Schedule for. You may select a Period range, e.g., current month. Use the green arrows to move forward/backward in time. To use a custom date range, select the User Defined option. Whichever method you use, the corresponding Start / End dates will be displayed in the Select Dates fields.
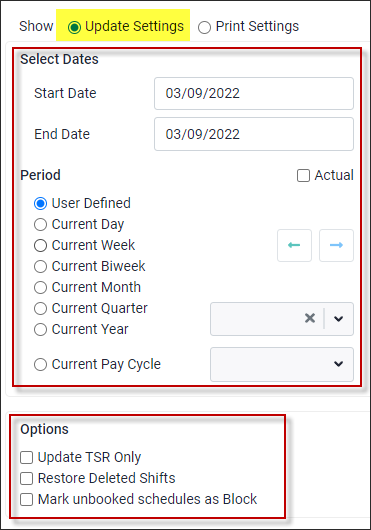
Update TSR Only
This selection will only update employees on Temporary Shift Replacement.
Include Census and Update Census Only (only available with Census option enabled)
These fields are only required if you are using the Census configuration and Census Daily Entry menus for scheduling.
Restore Deleted Shifts
This option applies to booked shifts only. Any deleted unfilled shifts will be restored regardless of whether or not the Restore Deleted check box is enabled.
Mark unbooked schedules as Block
This option is used for Block Booking and will ensure that any shifts unbooked from the Update from Master, including manually created shifts, will appear on the Block Booking menu as part of the block to be filled. If not ticked, only the unfilled shifts from master lines will appear as part of the block.
Show Print Settings
The system will provide a post processing report. Use the options on the Print Settings section to define what you would like included on the report.
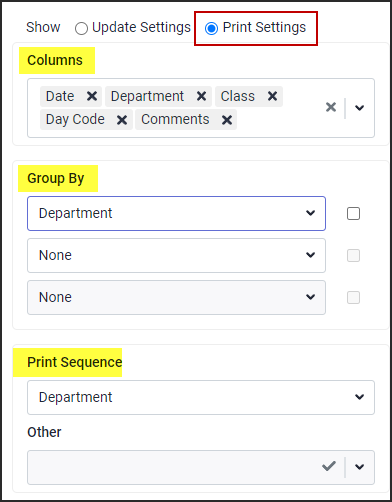
Columns
Click on the drop-down arrow and select columns you would like to include on your report, to a maximum of six. Use drag and drop to arrange the order.
Group By
You may use up to three levels of grouping. i.e., Department, Class, and Unit. Click on the check box on the right of the level for a page break by that level.
Print Sequence
The default for the print sequence is by employee. Click on the drop-down arrow and select from other available sequences.
Processing
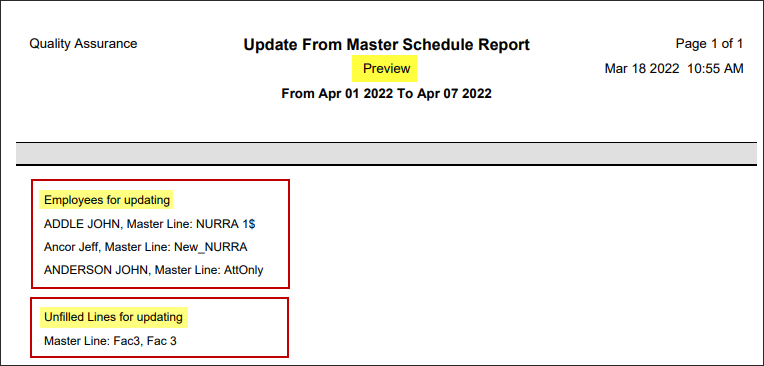
You may use a saved setting or create a new one. After making your selections be sure do a preview. In the example below we are updating three employees and one unfilled line.

Steps to Update from Master
There are two steps to performing an update from master.
1. Preview your selection(s)
2. Process
Preview
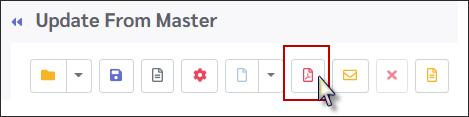
Click on the Preview icon on the toolbar. This will open a report showing the employees and/or the unfilled lines you have selected. Review your preview closely to ensure you have the selection you require. Review the date range to ensure it is correct.
You may repeat the preview step as many times as needed until you have defined who and/or which lines should be updated.
The system will not update the Active Schedule during the preview process.
Process
With your selections complete you may now update the Active Schedule. When the update is complete employees' Schedule Update Date in Personnel under the Shift and Schedule menu, will be changed to the last date of your range.
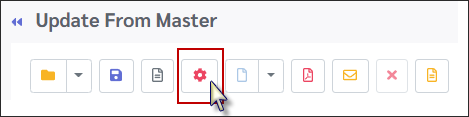
Click on the Process icon on the toolbar.
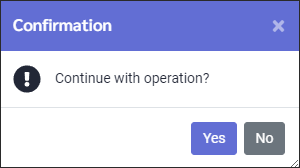
Click Yes to continue or No to return to the UFM screen.
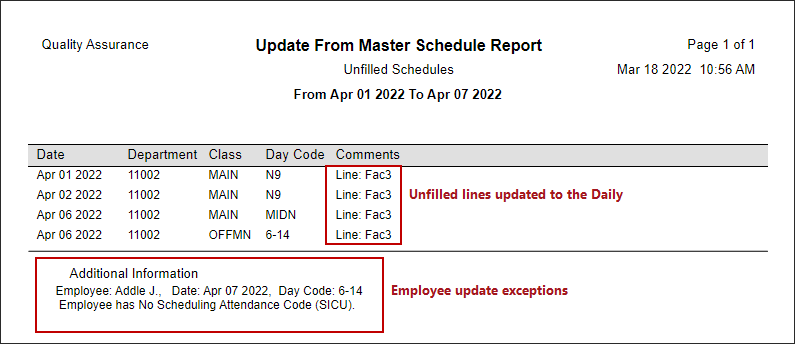
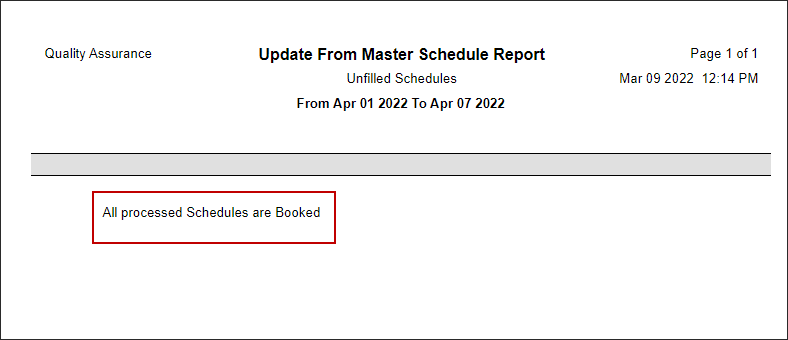
When the processing is complete, a post processing report will be displayed. In this example all schedules and lines were successfully updated.
In this example there was an exception and is provided for you to review. The employee was updated for all shifts except the shift for April 7th.