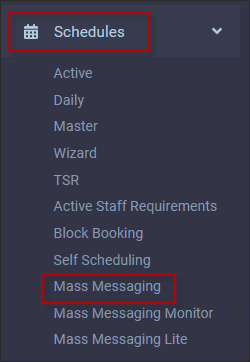
Step 1: Navigate to the Mass Messaging menu
▪Select the Schedule menu.
▪Select the Mass Messaging menu.
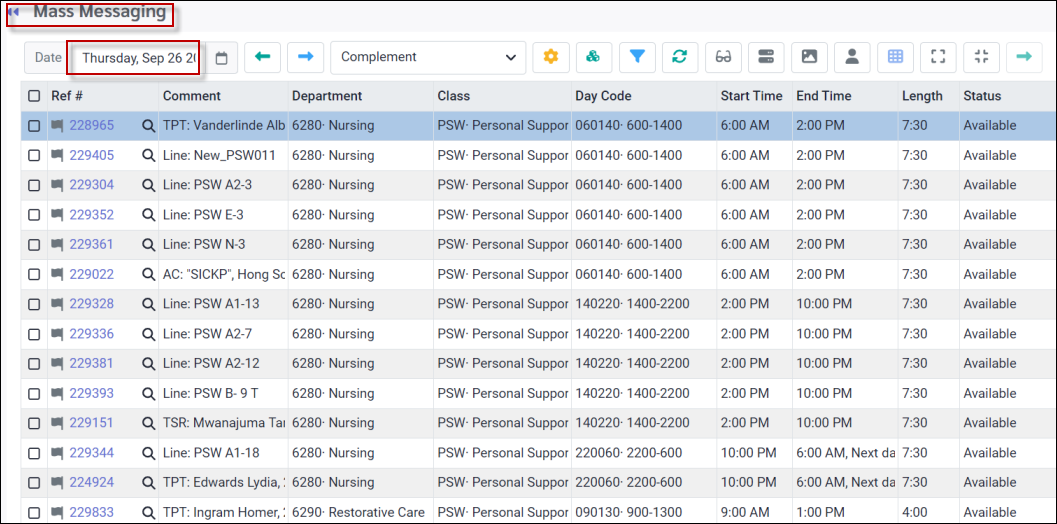
The Mass Messaging main menu will appear displaying the unfilled shifts for the selected date.
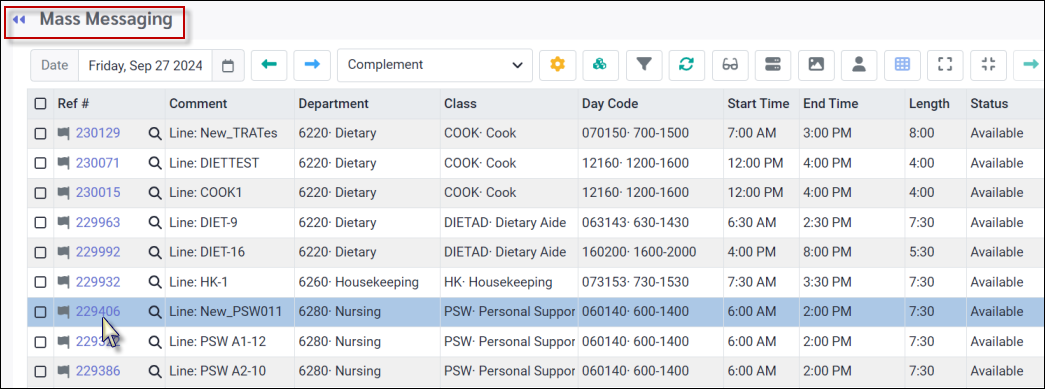
Step 2: Select the Shift(s) to Fill
Click anywhere on the line displaying the shift that must be filled i.e. the 6am - 2pm shift below.
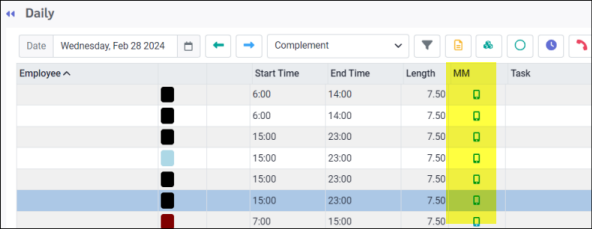
A Mass Messaging dispatch can also be initiated from the Daily Schedule by clicking the phone icon on the row containing the shift you would like to fill (below). |
Step 3: Initiate Messaging
To initiate messaging, click on the reference number link to launch the dispatch menu for one shift.

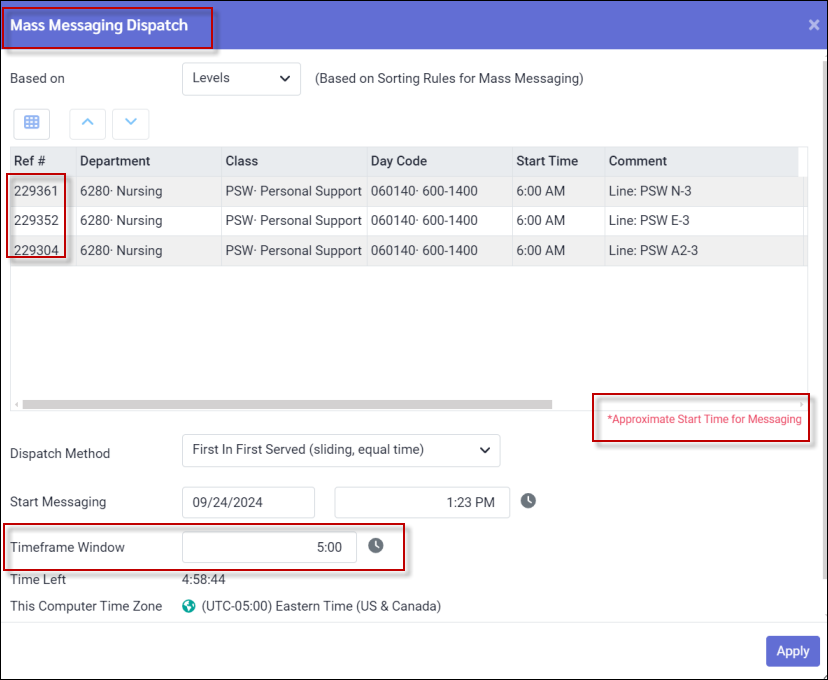
To dispatch multiple shifts at once, tick the box to the left of the shift(s) and click the green arrow at the top right to the launch the dispatch menu:

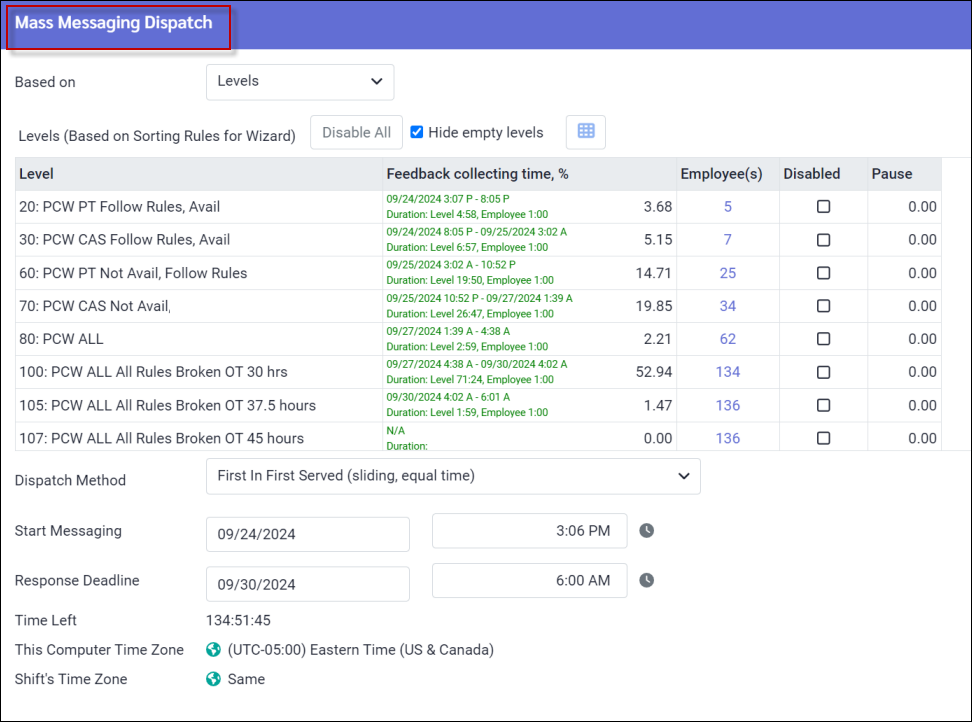
The following menu will appear displaying the predefined levels (see Step 4) as well as the number of employees who will be called at each level.
If multiple shifts are selected for dispatch, the Response Deadline field will be replaced by the Timeframe Window:
Step 4: Choose Your Employee List Option
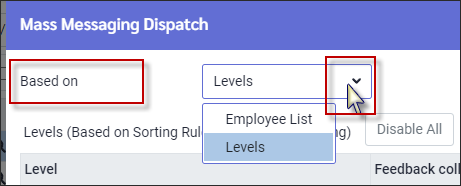
Select the Based on option from the drop-down list which determines the order in which employees are notified of the unfilled shift i.e. predefined Levels or Employee List:
Step 5: Select your Dispatch Method
Select a Dispatch Method from the drop-down options:

Select your preferred method. This method will appear the next time you log in and send out a dispatch.
First In First Served
Messages are sent in order based on the predefined levels. Employees who received the message first must reply (accept or decline) before the next employee will be messaged. Employees who attempt to respond after the response deadline for their level has expired will not be able to.
First In First Served (sliding)
Messages are sent in order based on the predefined levels. Employees may accept or decline a message on a first-come-first-served basis, even when employees who received the message first have not yet responded. Employees who attempt to respond after the response deadline for their level has expired will not be able to.
Broadcasting
Messages are sent to all employees (on the first level) at once. The first employee who accepts the shift will be booked. If no booking acceptance response is received, the system will message all employees on the next level after the predefined response deadline for the first level has expired. Employees from the first level will no longer be able to respond.
Broadcasting by levels (sliding)
Messages are sent to all employees (on the first level) at once. The first employee who accepts the shift will be booked. If no booking acceptance response is received, the system will message all employees on the next level after the predefined response deadline for the first level has passed. Employees from previous levels can still respond until the final response deadline has passed.
First In First Served (sliding, equal time)
Messages are sent in order based on the predefined levels. Time is redistributed among the levels based on number of employees per level after the duplicates are removed. Employees may accept or decline a message on a first-come-first-served basis, even when employees who received the message first have not yet responded.
Step 6: Set the Dispatch Time Frame
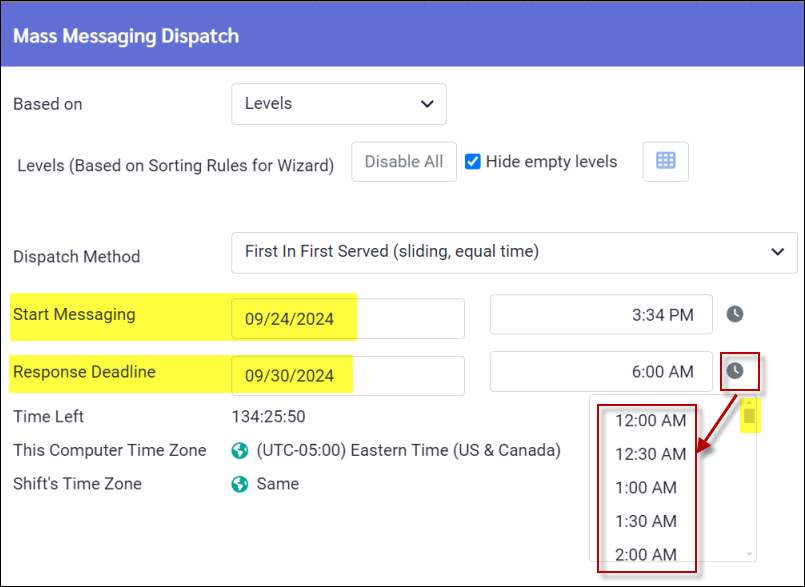
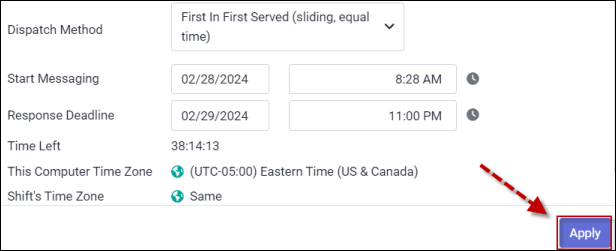
Set the Start Messaging and Response Deadline dates and times. This time frame will be displayed under the Feedback Collecting Time column within the top section of this menu (below).

Click the grey clock to open setting options. Use the scroll bar to move up and down the list.
Edit the Timeframe Window (optional) for dispatches with multiple shifts (process described above).

Step 7: Send your Message Dispatch
Click Apply. Messaging for the selected shift will be dispatched.
Employees have the option of receiving a phone call instead of a text. This is defined in the Personnel / Notifications / Mass Messaging tab. |
Step 8: Monitor Employee Replies
The final step is to monitor the replies from employees who will accept or decline shifts directly from either their mobile devices by text, or by a phone call reply.
Employees who accept shifts, will receive a confirmation phone call or a text similar to the one displayed below.

Mass Messaging Notification
▪Employees will be sent notification of accepted shifts but will not be sent notification of declined shifts.
▪If employees accept or decline shifts after the response period has expired, they will not be notified that the response period is over. Employees must review their schedules for final confirmation of bookings.
▪If messaging is repeated for certain shifts, employees may be included again in the next dispatch if the Autodecline option has been configured to add Postponed employees back to the list after a specified time period. Employees who decline shifts, however, will not be included in subsequent dispatches.
▪The green mobile phone icon will appear on the Active Schedule for accepted shifts (below).
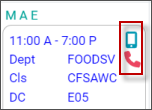 |
▪A red phone icon will appear for all offered shifts including accepted shifts (above).
Mass Messaging Validation
If an employee is listed on the Mass Messaging Monitor Level List, validation has been done according to the rules for that level, both before sending the message and again at time of booking. It is done this way because the text may have taken place a day or two before the actual shift and the employee may no longer meet the validation rules at the time of booking.
Mass Messaging Easy Confirmation of Booking
Without having to search through the Mass Messaging monitor by shift reference number, the manager can simply return to the Mass Messaging main menu and review the Status column of shifts with a green check mark to see who has been booked to the shift:

Mass Messaging Configuration
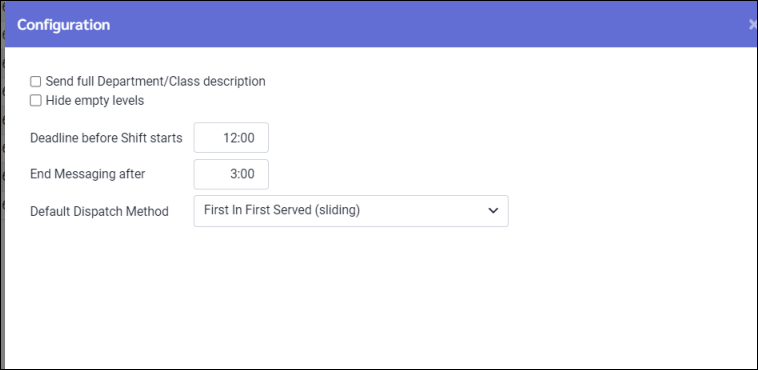
Click on the configuration icon to set some default parameters for Mass Messaging dispatches.

The following configuration menu will appear:
Send full Department/Class description
Tick this option to view the full description for each department and class on your dispatched messages. If not ticked, only the department and class code will be included.
Deadline before Shift Starts
Set the number of hours (a value between 0-24 hours) you would like the system to stop the dispatch prior to the start of the shift you are trying to fill. You may select either this option or the End Messaging After option but both may not be used at the same time.
End Messaging After
Set the number of hours (a value between 0-24 hours) after you send the dispatch, that you would like the dispatch stopped. You may select either this option or the Deadline before Shift Starts option but both options may not be used at the same time.
Hide Empty Levels
If ticked, the system will only display levels with employees available for call-ins based on the rules configured for that level. Levels with no employees available will be hidden.
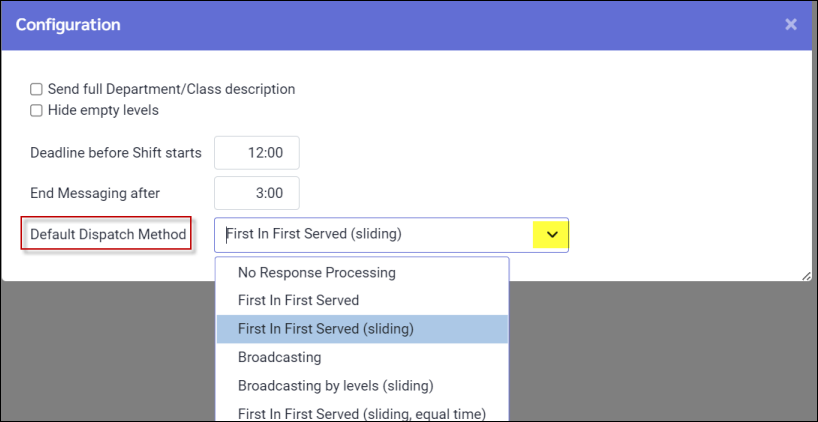
Default Dispatch Method
To configure a default dispatch method select your preferred method from the drop-down list.
See Also:
Filling Shifts Using Mass Messaging