Once you have selected the final candidate(s) it is time to offer the position.
A job offer is sent the applicant through the Job Postings screen. The system tracks the job offer from the date the candidate is offered the position to receiving their acknowledgment.
The job offer will be sent to the applicant through the Applicant Centre as well as an email notification. Once the applicant accepts the offer the onboarding process can begin.
On the Job Posting menu, highlight the posting.
▪Click on the number in the Interview button.
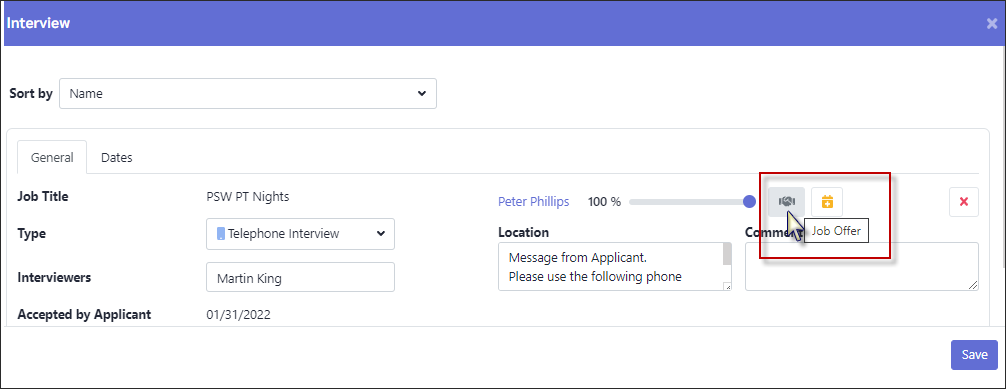
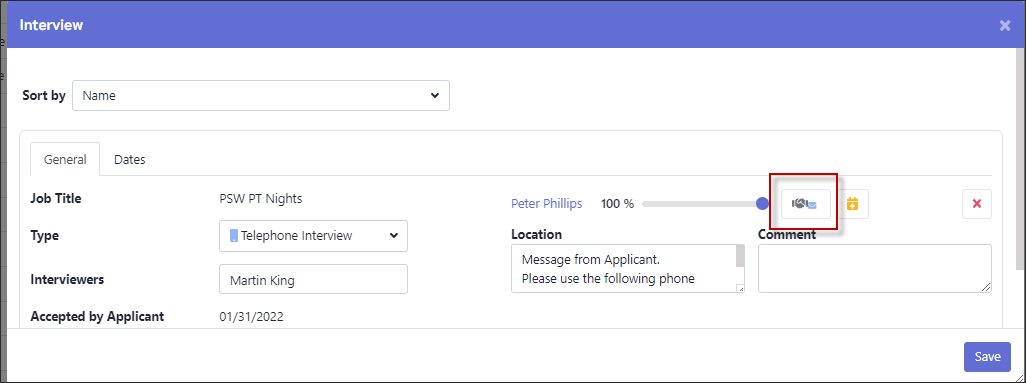
In our example we are going to offer the position to Peter Phillips.
▪On the Interview window, click on the Hand Shake icon.
The system will display the Question window with two options:
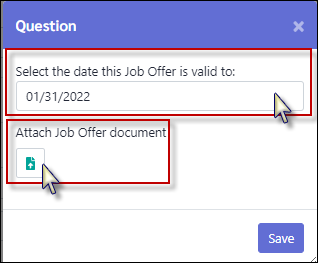
1. Select a date the offer is valid until. Click in the date window and select a date on the calendar provided.
2. You may attach documents to accompany the job offer.
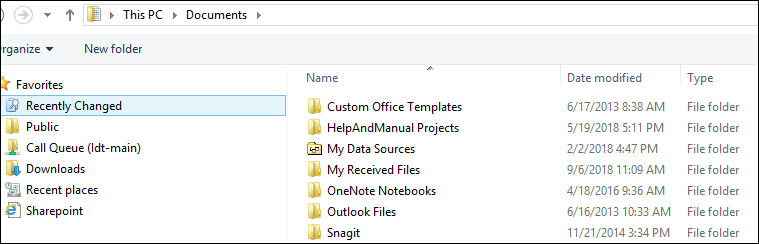
▪Click on the attachment icon to attach a document. ▪Highlight the file, click open to complete the operation. ▪Click Save.
In this example we have selected a date and attached an Acceptance Letter.
A message will be sent to the applicant at the Applicant Centre and an email alert to the email address they provided.
The screen will automatically refresh to show the email symbol below the handshake. This indicates the job offer was sent.
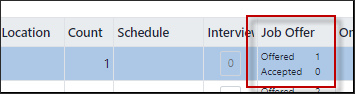
On the Job Posting menu for this position the number beside Offered is now 1.
Once the applicant accepts the offer, the Accepted number will increase.
|


When the applicant accepts the job offer the system will increase the Accepted count. This is located on the Job Posting line under Job Offer. The next step is to start the Onboarding process. Please see the Onboarding section.
|

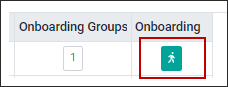
When the applicant accepts the job offer the system will increase the Accepted count for that posting. The Ready for Onboarding icon will appear in the Onboarding column. If one posting will be hiring multiple new employees, see the Onboarding Multiple section below.
In this example the count is set to one for the posting and one offer has been accepted.
In the example below the count is set to three. Meaning there are three positions to be filled from this posting. However, only one job offer has been sent and accepted. The Ready to Onboard icon is enabled if the manager would like to start this person now and complete the others later.
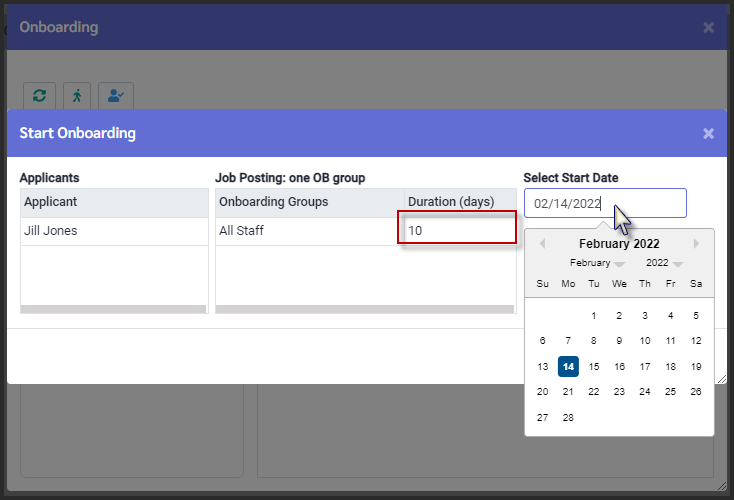
Click on the Ready to Onboard icon to open the Start Onboarding window.
If you wish to defer the requirement deadline out further than using the current date, you may select a different date.
Use the current Start Date and add the Duration number of days to set the required response by date. In the example below the Duration Days is 10 days. The required completion date will be 10 days from the date selected as the Start Date. The Required date is February 24.
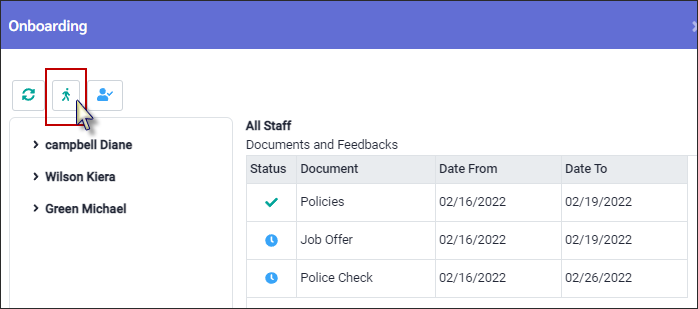
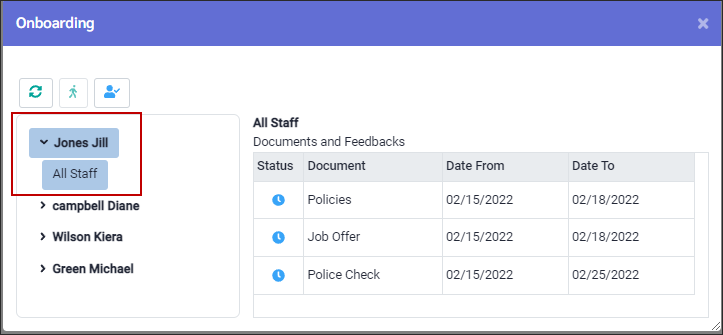
Now that an onboarding process has been started the Onboarding icon will change.
The applicant will be alerted by email that the onboarding process has started and to go to the portal to start their onboarding tasks. On the Onboarding window a completed date is shown as the tasks are done.
A green mark in the Status column indicates completed. Click on the Feedback link to view / save documents the applicant has returned. Completed documents without a Feedback link means the applicant has acknowledged this document. The blue clock icon indicates the completion is pending from the applicant.
Onboarding Multiple New Hires
In this example the posting was for hiring four new employees using the same job posting. Three of the four positions have been accepted and the Onboarding process has been started.
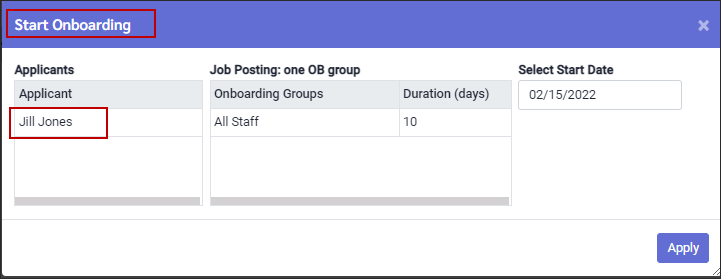
Now the fourth person has accepted their job offer and need to be onboarded. Click on the Onboarding icon.
This will open the Start Onboarding window. In our example Jill Jones is waiting to start her onboarding process.
▪Click Apply to start Jill’s onboarding.
The Start Onboarding window will close; the Onboarding window refresh with the new hire added.
Finish Onboarding Process
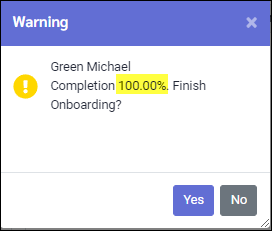
A new hire has completed all documents and feedback so now it is time to add them into StaffScheduleCare.
▪Click on the employee. ▪Click on the Finish Onboarding icon.
A pop-up window will provide the completion percentage and ask if you still would like to finish the onboarding process. Click Yes to continue.
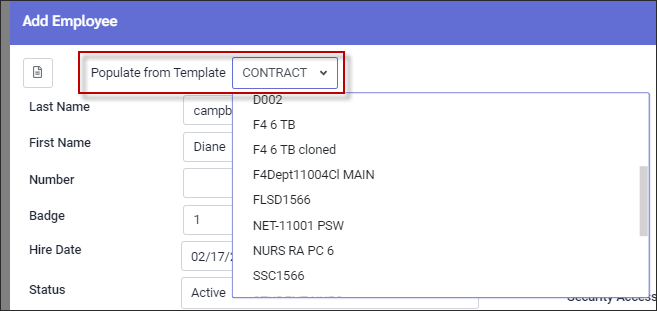
The StaffScheduleCare Add Employee window will open. If your facility has multiple saved templates for adding new employees, Click on the Populate from Template field and select the template from the drop-down.
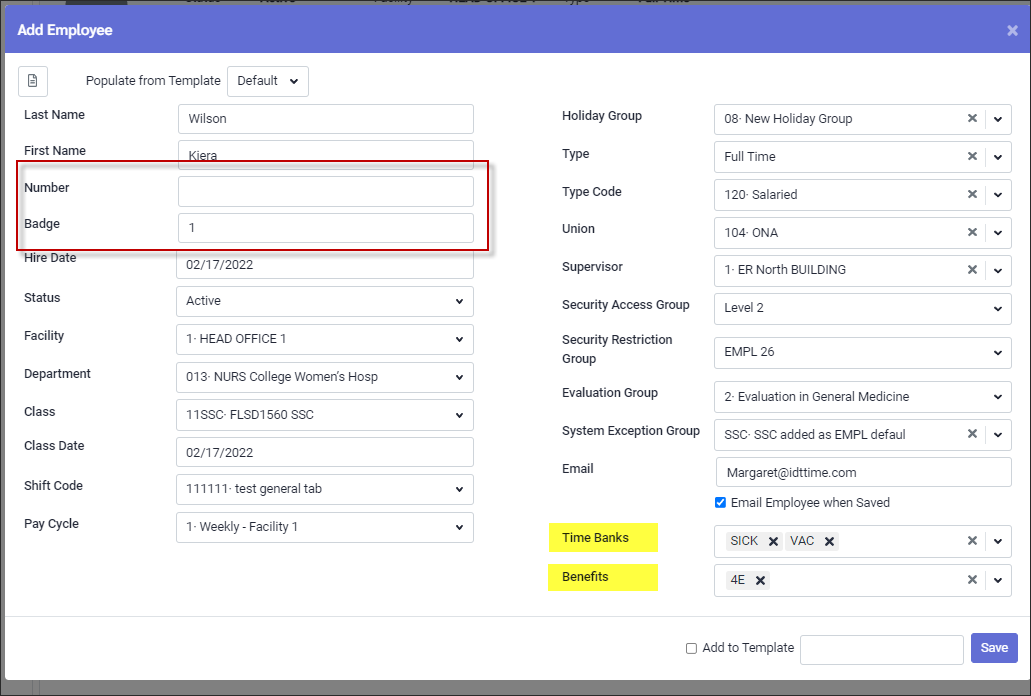
You must enter the employee number and badge number. These are required fields.
Based on the template you are using there may be additional field you may choose to update at this time. Remember that you are adding the options and may need to add addition information. i.e., Time banks and Benefits.
▪Click Save.
The system will notify you that the Welcome email, which includes their login credentials, has been sent to the new employee. This is the same process as entering a new hire directly into the system.
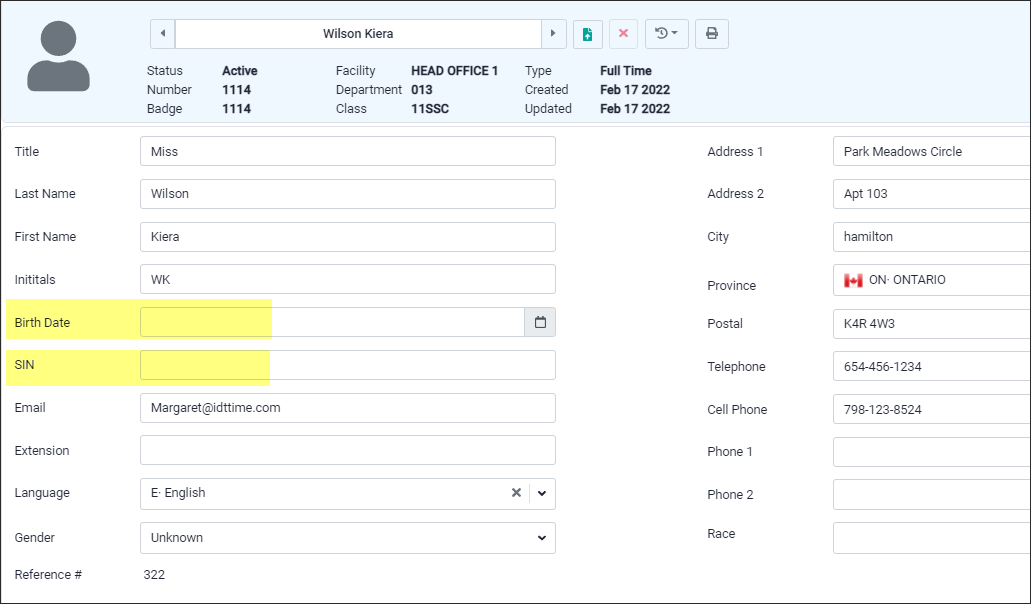
The system will redirect you to the new employee's profile. Review to see if additional information should be added.
|