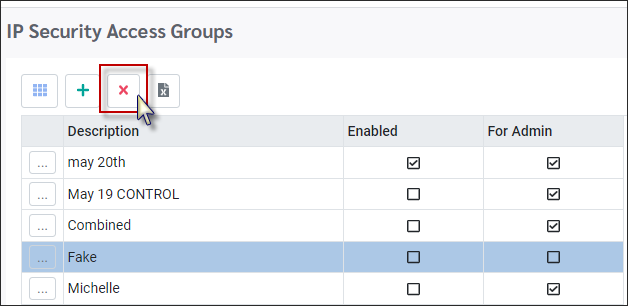
IP Security Access Groups may be set up to restrict the user's access to StaffScheduleCare based on IP address.
▪Select the Config menu.
▪Select the Security menu.
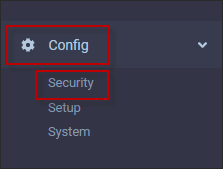
▪Select IP Security Access Groups
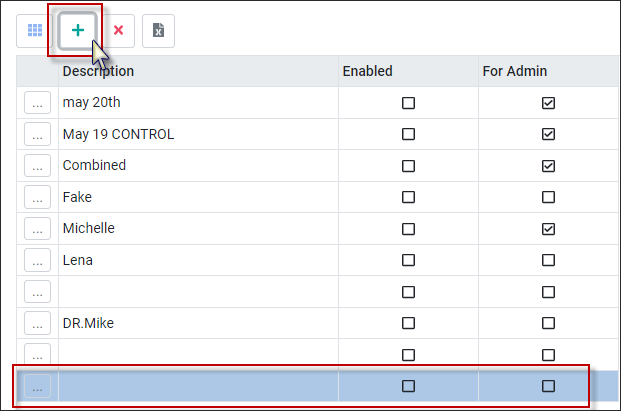
The following menu will appear:
Create A Group
To add a new IP Security Access Group, click on the plus symbol (+). A new blank line will appear at the bottom of the grid.
▪Add a Description (group name) for this group.
▪Tick Enabled (required).
▪Click on the Details icon to open the Authorized IP Address menu. Here you will enter the IP address(s) that this group can log into StaffScheduleCare from.
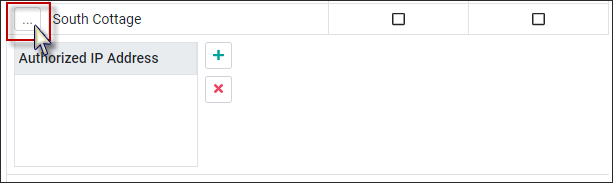
Click on the Plus icon to add the IP address for this group.
▪Add the IP address and click Save.
▪To delete an IP address, click on the red X.
▪To remove the Authorized IP Address menu from view, click the box icon again.
The For Admin option is for StaffScheduleCare IT administration only.
Delete a Group
▪Click on the group.
▪click on the X icon.
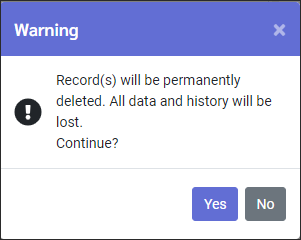
The system will pop up a warning message. Click Yes to continue.
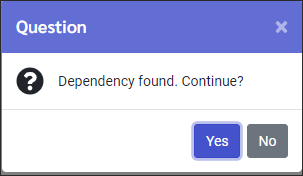
If managers or employees are assigned to this IP Security group, a pop-up warning will be displayed. Click No to stop or Yes to continue deleting the group.
Assigning Groups
IP Security Access Groups may be assigned either using the IP Restriction field on the employee profile or using the Security User menu.
Employee Profile
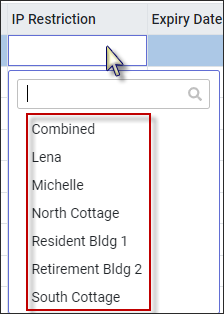
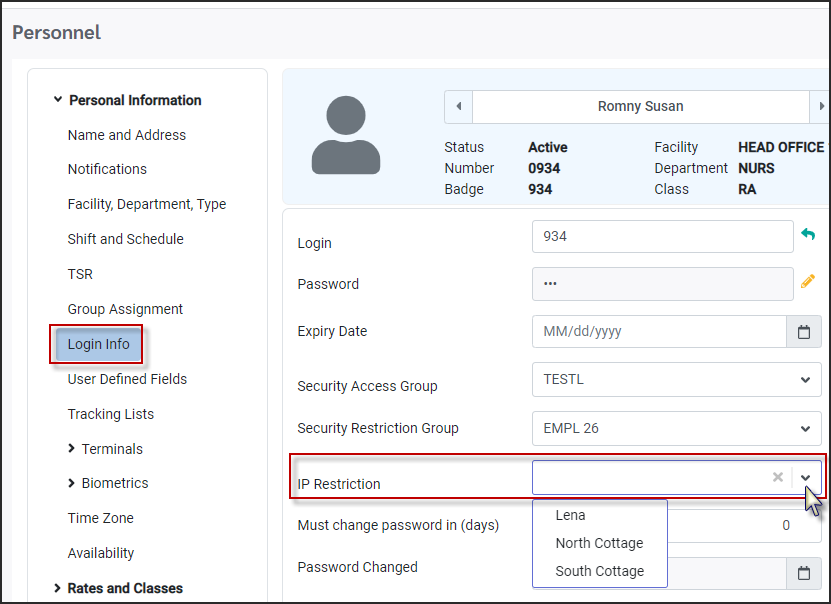
Navigate to Personnel / Login Info.
▪Click on the IP Restriction drop-down arrow.
▪Click on the group from the drop-down list.
▪Click Save.
Security User
Within the Security User setup is the field to assign an IP Security Group to a User (manager).
Navigate to Config / Security / Security Users.
On the Security User main screen is the IP Restriction option.
▪Click on the group so it is highlighted.
▪Click in the IP Restriction field to open the drop-down list.
▪Click on the IP Restriction group
▪Click Save.