The StaffScheduleCare system has both an import and export feature. In both cases the StaffScheduleCare support team must submit a internal request to create the client specific import or export.
To import employee data, use the Employee Import. For payroll data, use the Payroll Import . The export feature is for all data within the StaffScheduleCare database.
Import
In our example we will be importing employee data.
The option screen for both types (employee and payroll) are the same, but function differently in the software.
To access Import:
▪Select the Payroll Tools menu.
▪Select.
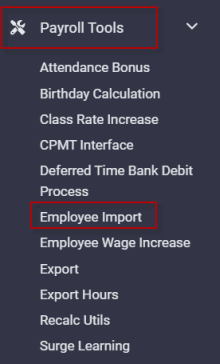
The following import menu will appear:
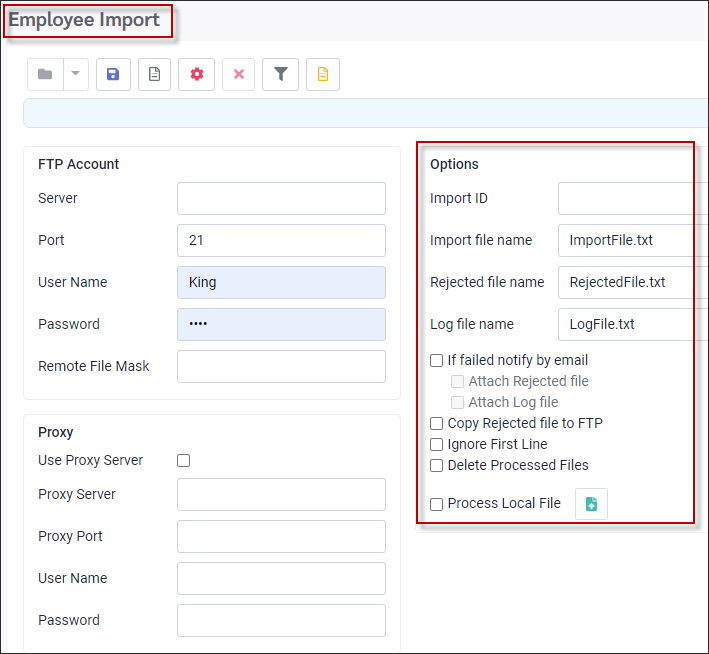
Import File Options
Support must submit a request to programming to prepare the import setup in the software. Programming creates the import process and will provide the representative with the required specifics. A software update will be required.
Programming will provide support with:
▪Import ID identifier
▪Required data columns
The file can only be either TXT or CSV.
▪In the Import ID identify field enter the process name provided by programming.
In this example we are going to import a client's FTE values. In the Import ID field, we will use FTE provided by programming.
▪Enter the file name in the Import file name field.
▪Enter a name in the Rejected file name field. The system default name can be used.
▪Enter a Log file name in the Log file name field. The system default name may be used.
The Reject and Log files will be saved to the same location as the Import File.
▪If the file has a header row the Ignore First Line must be ticked.
![]()
Processing
▪To import the file tick Process Local File.

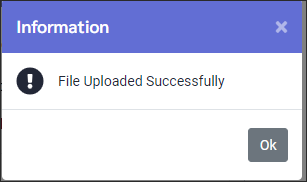
▪Click on the Upload icon. The system will open a window to your computer.
▪Navigate to and click on the file to be uploaded.
the Uploaded Successfully message will display when completed.
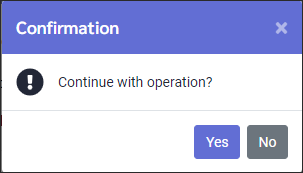
▪Click on the Process icon ![]() to import the data to the employees' profile.
to import the data to the employees' profile.
▪Click Yes to continue.
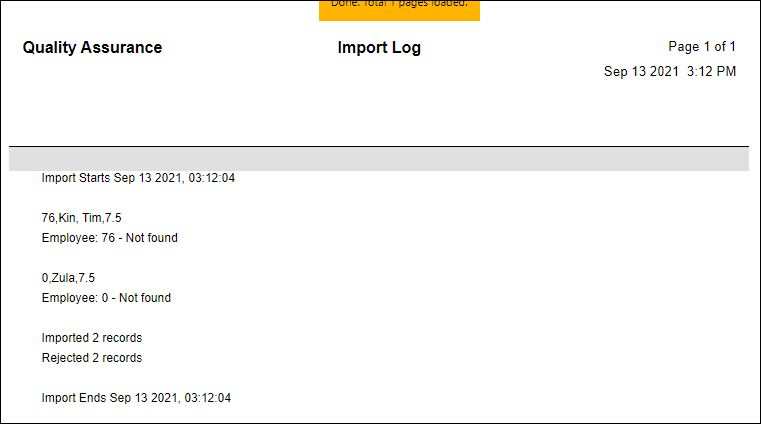
Sample report when completed.
Emailing options
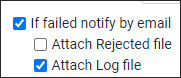
If the If failed notify by email option is ticked and the email information is NOT populated, the system will not complete the upload, however, you will still get the Upload Successfully message. Make sure to Save after entering the email information.
▪Select the Options Icon.

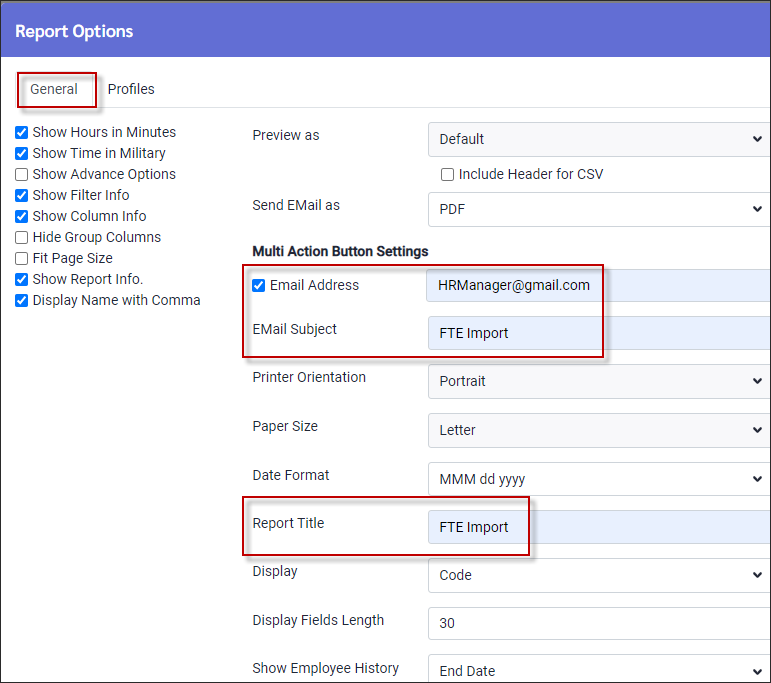
Navigate to the General tab.
▪If you are emailing the file, you may choose the Send Email As format, i.e., PDF.
▪Tick Email Address and enter in the email of the person to receive it.
▪Give the Email Subject a definition, e.g., Employee Data Import.
▪Choose your Date Format, i.e., MM/DD/YYYY.
▪Enter a Report Title, i.e., (Client name) Employee Data Import.
▪Click Apply to add these features to the export routine.
Make sure to SAVE the template / report after entering your email information. |
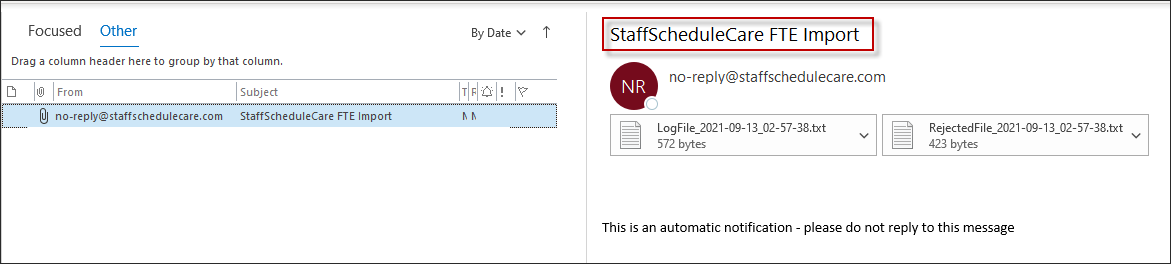
The email will arrive to the recipient with the subject as configured.
Saving the Report
To save the setup click on the Save icon found on the toolbar ![]() , or, if you make any changes to previously defined settings that you want to be permanent or save a new setting.
, or, if you make any changes to previously defined settings that you want to be permanent or save a new setting.
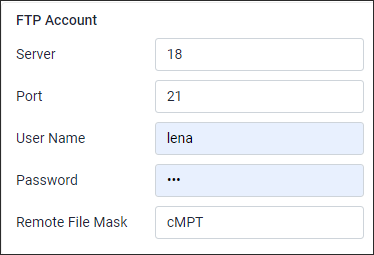
FTP or Proxy Options
The rejected file can be copied to outside locations.
▪Tick on the Copy Rejected file to FTP option. In this example we have used an FTP Account and completed the appropriate fields: Server, Port, User Name and Password.
Custom Settings
This section is used only if programming provides additional setting to be entered.