Performance evaluations are used to communicate with employees about their performance and to rate them on the tasks they perform. You may set up Evaluation Groups with specific criteria and assign employees to these groups.
Managers may notify employees by email on the status of their evaluations and schedule their next evaluation. Employees may acknowledge their evaluations by responding to the manager's email. All evaluations are stored within the system, however, a print option is also available.
You will need to set up as many evaluation groups as you require to cover all the different evaluations for your facility. First you need to create the evaluation form with the evaluation criteria and assign employees to the evaluation or evaluation group.
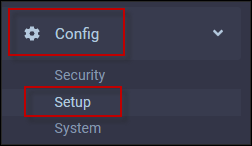
▪Select the Config menu. ▪Select the Setup menu.
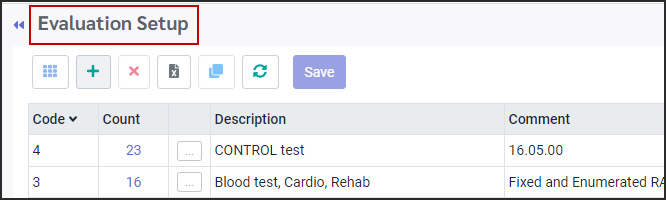
▪Select Evaluation Setup.
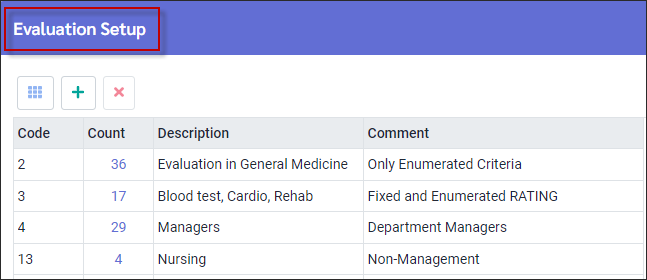
The following menu will appear:
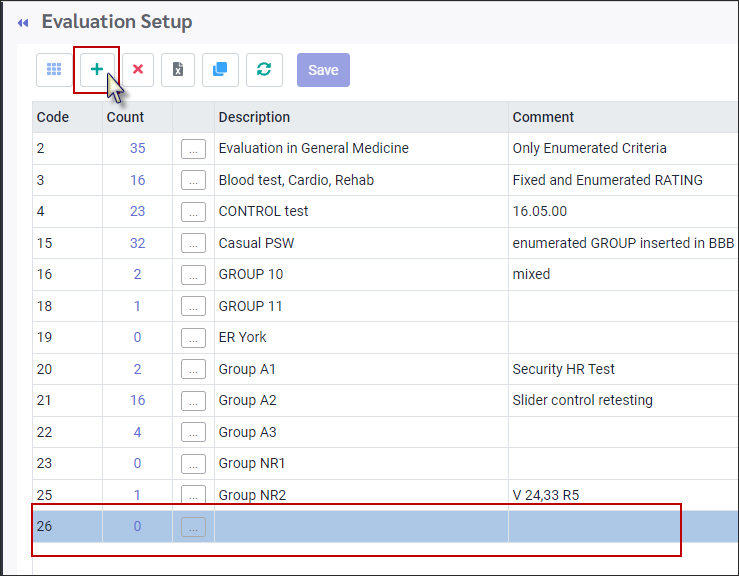
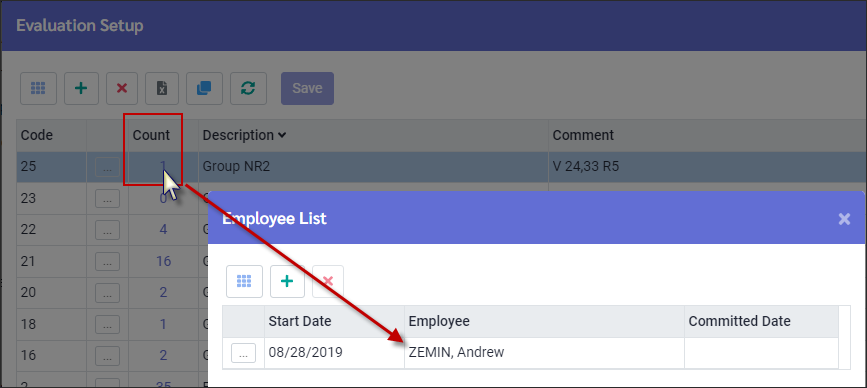
Click the plus symbol (+) and a new blank record will appear at the bottom of the grid. The Code number is assigned by the system. The Count number increase as you assign employees to the Evaluation Group.
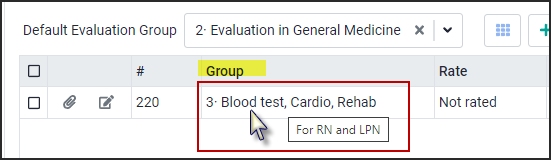
▪ Add a comment (optional). If a comment is included, it will be displayed when you hover over the Group setting on the employee evaluation menu as shown below:
This field is restricted to a maximum of 35 characters.
If a number appears in the Count column, click on the number and you will see a list of employees who have had evaluations set up and who are assigned to the group (see below).
Click Save.
See Setting Up Evaluations Criteria & Ranking to complete the evaluation configuration.
|

Criteria Setup
Within each evaluation group you must set up the criteria. Managers will use these criteria to rate the employees.
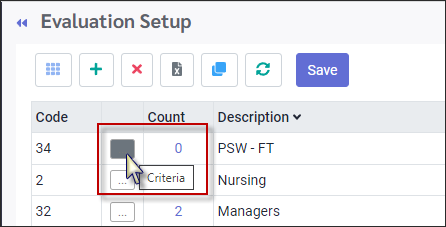
To set up Criteria for an Evaluation Group, select the Evaluation Group line click on it to highlight it (line 34 PSW-FT in the example below).
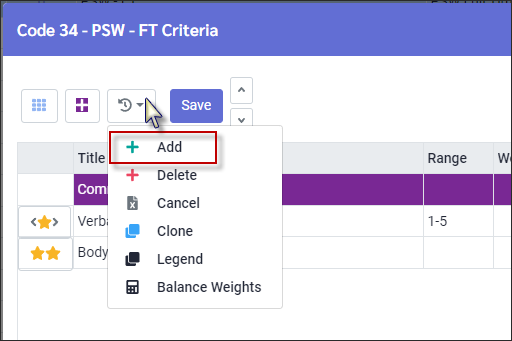
▪Click on the criteria three-dot button.
The Criteria setup menu will appear for the selected evaluation group.
▪Click on the Action icon and select Add.
▪Set up a description (title) for the criterion e.g., one of the criteria for this evaluation group is Gen Medicine 1.
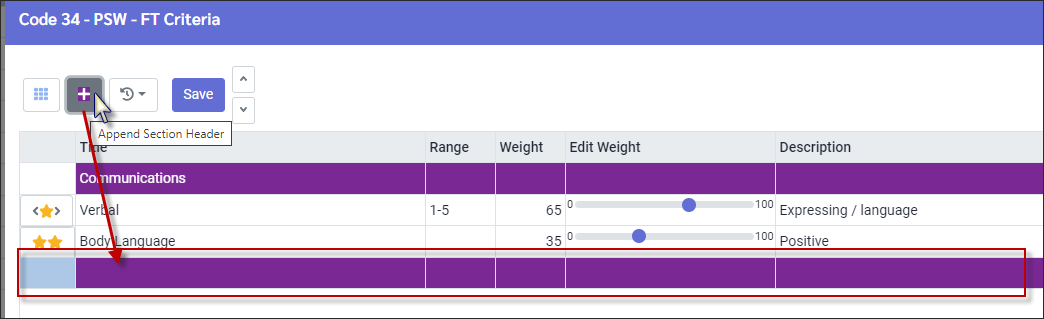
Append Section Header
Add a section header(s) to create sections in your evaluation. This is useful for longer evaluations. ▪Click on the Append Section Header icon. ▪A new header will appear at the bottom of the grid. ▪Click in the Title field and add the section name.
Criteria - Ranking / Range
A criterion can be set up to use either Ranking or a Range with a weight value. You may add as many criteria as you like with a different weight assigned to each one but the total weight of all the criteria must equal 100% for the entire evaluation. Weighting must be applied whether you use Range or Ranking Value to set up the rating.
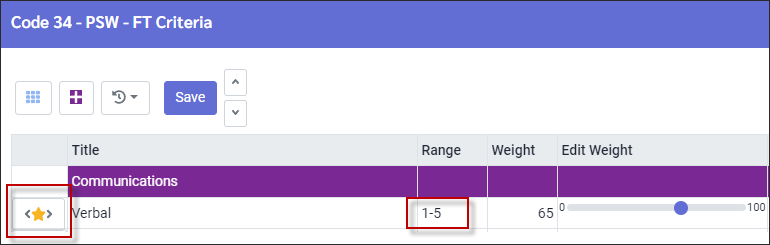
Range Value
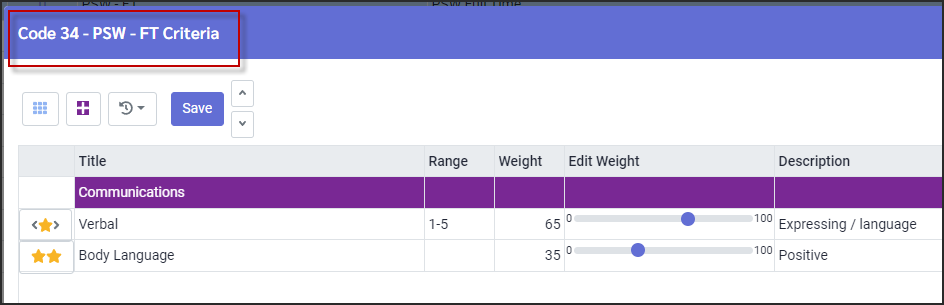
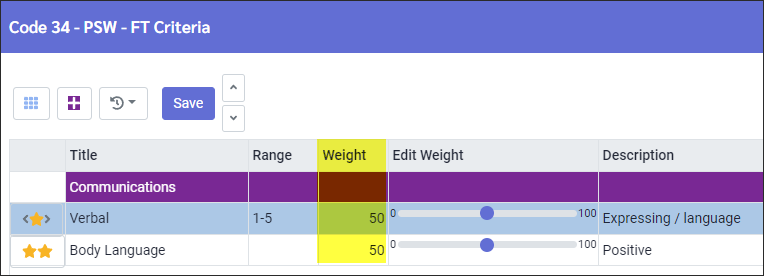
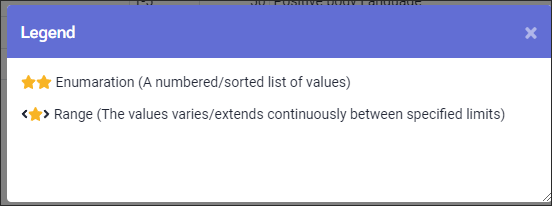
You can define a custom rating range for each criterion—for example, 1–5, below. In the example provided, Verbal (Communications) is rated on a 1–5 scale and is assigned a weight of 65 out of 100. A star icon with brackets indicates that the criterion is using the Range option. Note that the range is customizable and not limited to the 1–5 scale.
This is an example of what a criteria setup with range looks like on the evaluation. The sliding bar is used to drag the blue dot along the bar. Notice that there is a one (1) on the left of the bar and a five (5) at the right end. This is a range of 1 - 5. As the bar is moved either right or left, the larger number on the left of the bar will change to show the current range setting (3) and the score % will change:
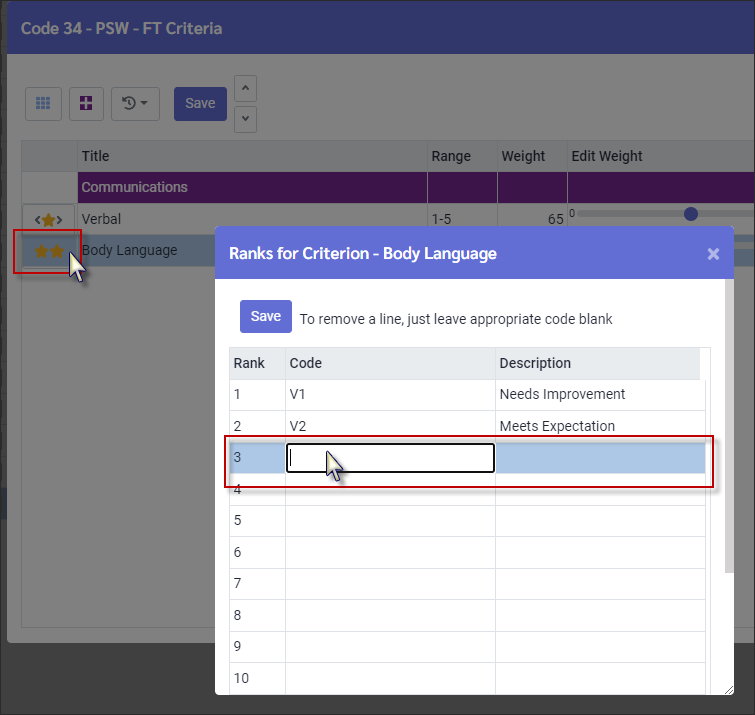
Ranking Value Each criterion may have its own unique ranking value. When performing the employee evaluation, the system will automatically assign the percentage weight for each ranking to equal a total of 100 percent.
If you already set up Range when you added your criterion, you do not need to set up the ranking value if you use the Clone option. ▪Click on the Ranks stars. ▪Double click in the Code field. ▪Enter the Code and Description. ▪Click Save.
.
Criteria Weight
If you have many criteria and do not wish to enter the Weight but want all weights equally balanced use the Balance Weights option. ▪Click on the Actions icon and select Balance Weights.
In the example above, the weights are 76 and 35. After using the Balance Weights option, the weights are 50 and 50, since they are the only two options added so far.
▪Add the Comment defining the meaning of this criteria (optional). ▪Click Save.
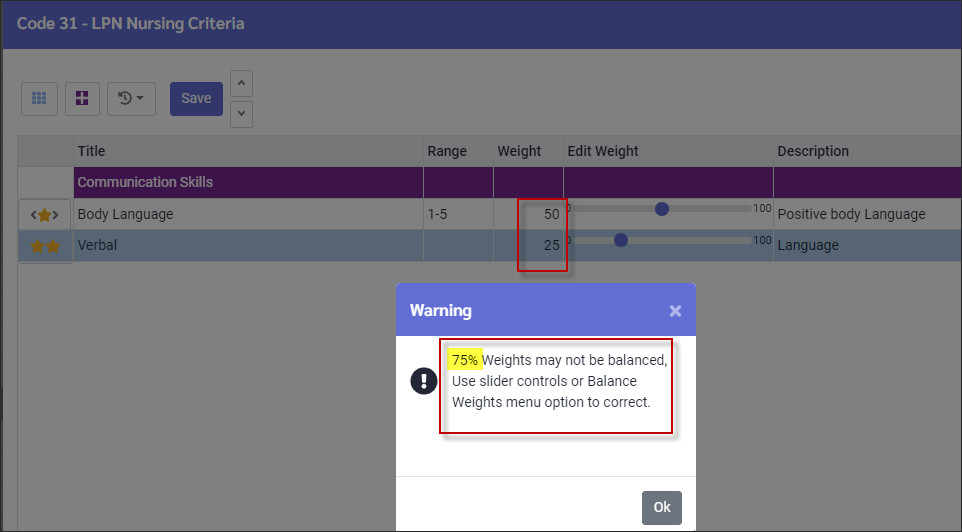
The system will not save your criteria if the weights do not equal 100%. The system will provide a warning with the current weight.
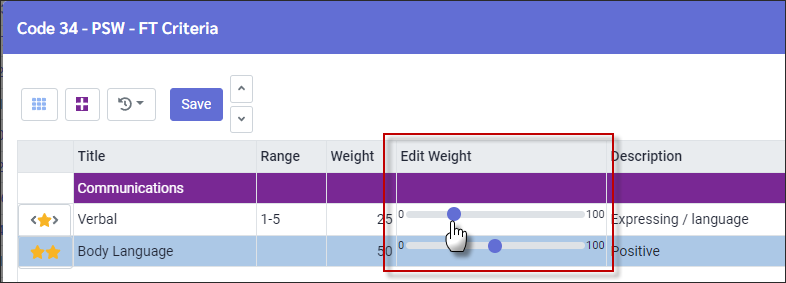
You may also use the Edit Weight sliding bar feature to adjust the weights. Click on the blue dot and drag it left or right to adjust the weight.
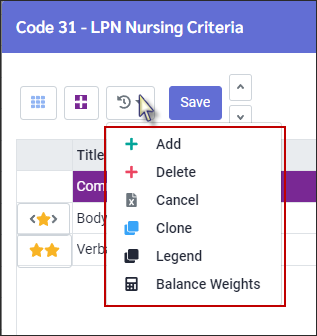
Other Criteria Menu Options
There are additional options available on the Criteria menu.
See Field Visibility for further information on Field Visibility, Add, Delete and Cancel.
Clone Select this option to clone a line as described above. All columns of the criterion will be cloned except the weighting of the criterion. You must enter a weight to equal a total of 100 or select Balance Weights.
Legend This option defines the star icon representing your Criteria configuration of either Range or Ranking Values.
Balance Weights Select this option to balance the Criteria weighting. The system will evenly apply a weight out of 100 to each criteria. i.e., 5 lines, each line is assigned a weight of 20%.
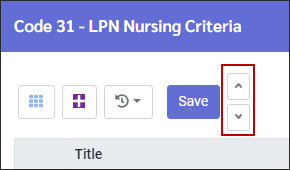
Moving Criteria Around on Your List Use the up and down arrows to move a criterion up or down on your list. Criteria will appear in the order you select here when you are performing an employee evaluation.
Click on the line that you want to move; then click on the up or down arrow to move the line. This movement may also apply to the Section Header rows.
|


StaffScheduleCare provides the ability to set up evaluations for multiple employees (groups) at once so that everyone in this group has a new evaluation assigned to them in their Evaluation profile.
They will have the same header information set up for their evaluations e.g., date definitions, so there is no need to define these fields individually.
▪Select the Config menu. ▪Select the Setup menu.
▪Selection Evaluation Setup.
This will open the Evaluation Setup menu.
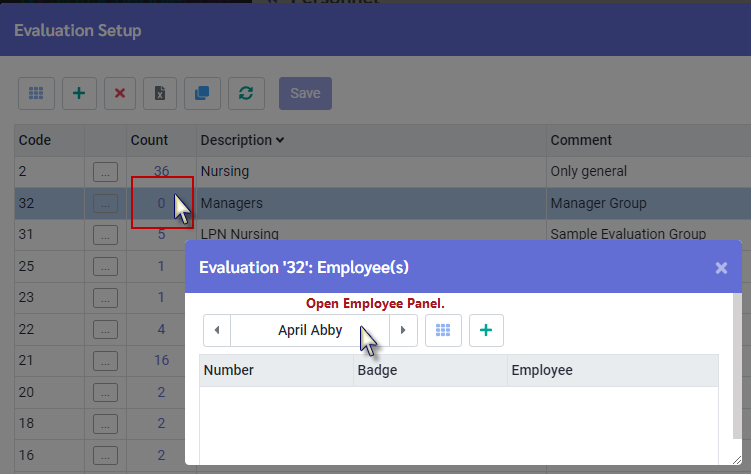
▪Click on the Count line for the group to which you will be adding a new evaluation. In this example, we will add a new evaluation to all managers. The list of employees with evaluations in this group will now appear. We will have no employees on the list since the count is currently zero. ▪Click on the Employee window to open the Employee Panel.
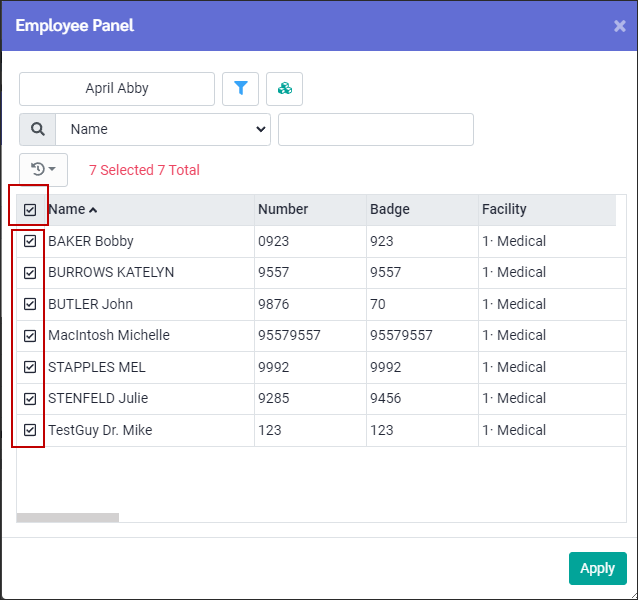
Selecting a Group of Employees ▪Use the Filter option to filter the list to a specific group of employees e.g., the Nursing Department
▪Click in the check box beside the Name title to populate all of the check boxes. All of the employees appearing on your filtered list will now be selected.
Selecting Individual Employees Tick the box to the left of the employee's name. In this example we selected two of the seven. Continue this process till you have selected all the employees required.
▪Click on Apply to close the Employee Panel and return you to the Count window. ▪Click on the plus symbol (+). ▪Review the employees who have been selected. ▪Click Yes to close the window.
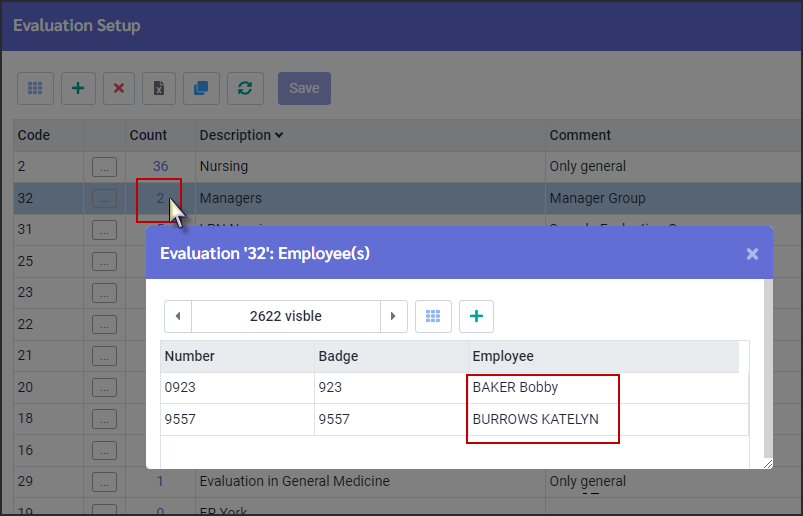
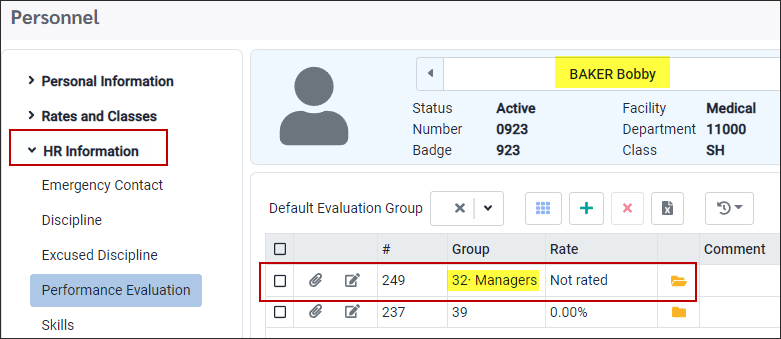
The employees you selected above will now appear on this list with new evaluations containing the system default header information for each selected employee.
In our example we added Bobby Baker to the group. The evaluation will now show on his Performance Evaluation ready to be rated.
|