This option was designed to create a CSV file that contains hours and Resident Day counts as defined in the software. A Resident Day refers to the number of beds filled over a defined period.
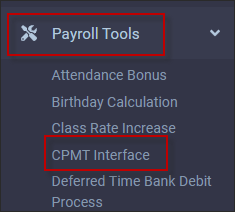
▪Select the Payroll Tools menu.
▪Select CPMT Interface
The following menu will appear:
Interface Setup
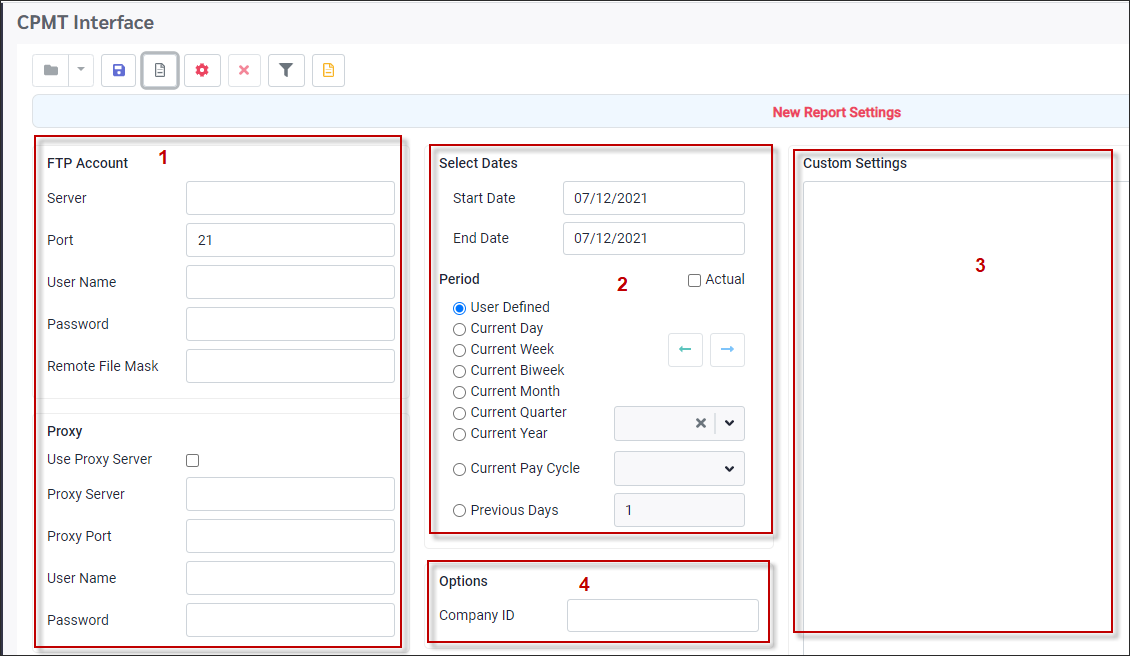
1.The FTP Account section will contain the server information indicating the report export location.
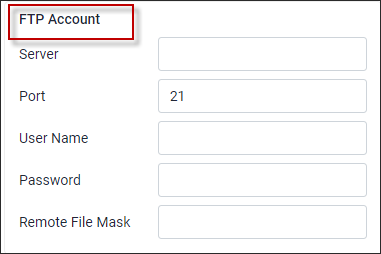
Enter the Server name, the Port, and the FTP User Name and Password.
The Remote File Mask is optional. In the Remote File mask, you may specify File Mask to select/deselect files (or file types) and directories for the transfer. The option also selects files for synchronization and Keep Remote Directory up to Date function.
2.The date section allows you to select a defined period (Current Day, Current Month etc.) by clicking on the desired radio button, or a specific User Defined period by entering the Start Date and End Date.
3.The Custom Settings section, will contain the combinations of the DeptClassIndicators (see below) or each of the four categories being tracked i.e. 1,1a,2, 2a. Please note that while only 1,2 are visible in the screen capture below, 1a and 2a would be visible as you scroll down in this setup.

The setup 10,300,1,2 indicates that any hours in department 10, class 300, will be included in the reporting for categories 1 and 2 of the export.
The [General] section of the Custom Settings will be used to identify which labour classes will contribute 40% of their total hours to categories 1a and 2a. In our example above, they are classes 140 and 305 and are represented as Proc40=140,305.
1,21473.00,390
1a,3911.50,150
2,3259.50,240
2a,1314.25,90
Note: If a percent distribution is not used, this section remains blank.
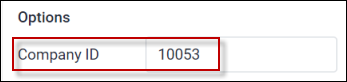
4.The Options section is where you would input the Company ID which will then become part of the export file's header record (10053 in our example below):
Report Options
Next, we define the additional Options of the export report:

▪Preview As must be set to Special for this custom export.
▪If you are emailing the export file you may choose your Send Email As format, i.e., PDF.
▪Tick Email Address and enter in the email of the person to receive it
▪Give the Email Subject e.g., cPMT
▪Choose your Date Format, i.e., MM/DD/YYYY
▪Give a report a user definable Report Title, i.e., cPMT Report
▪Choose your hours format, i.e., Show Hours in Minutes = 8:30. If not ticked, it would be 8.50.
▪Click Apply to add these features to the export routine.
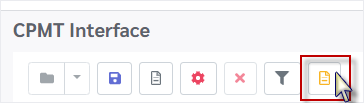
Saving the Report
Finally, we need to save our choices by clicking on the Save icon as follows:

The following menu will appear:
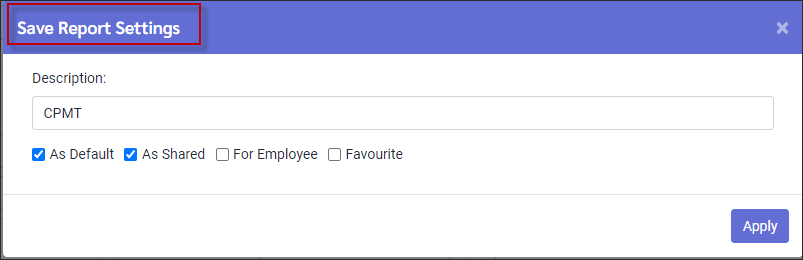
▪Give the process a Description, i.e., cPMT Export. Note: The saved process could be used with the Task Scheduler.
▪We flagged this process As Default process, which means if there was more than one process saved these configurations will always appear when we enter the export menu.
▪We also flagged the process As Shared which means that anyone with access to this process can use these saved settings.
Processing the Export
▪Select the month (or other time frame) for processing.
▪Click the Process icon as follows:

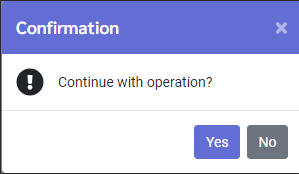
▪Click Yes to the Continue with Operation message.
▪The file will export to the FTP site.
▪Choose Open or Save as follows:
![]()
Export File Contents
The header record, which includes the company code (10027), and the year and month the report was run for, 201505. The remaining header information is hard coded to specification.
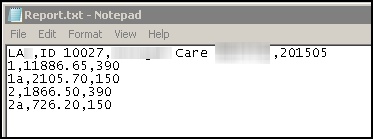
The four lines of the file represent the four categories being reported, 1, 1a, 2, 2a. The information that follows each category are the hours and Resident Days. For example:
▪1, 11886.65, 390 is: category 1.
▪11886.65 accumulated worked hours (only) in all classes designated as category 1.
▪390 are the accumulated Resident Days.
Note: Per specification, the Resident Days for categories 1 and 2 and 1a & 2a will always match, i.e., 1 and 2 = 390 for this month's run, and 1a and 2a are 150 for this month's run.