The Unfilled Shift Wizard is used to fill unfilled shifts due to absences (e.g. sick days, vacation days), unfilled Master Schedule rotations etc.
The system may be configured to fill shifts with specific employees, called Shadow Employees. If you would like to have the ability to fill shifts that have already passed, the system may be configured to do so.
To access the Wizard:
▪Select the Schedules menu.
▪Select the Wizard menu.
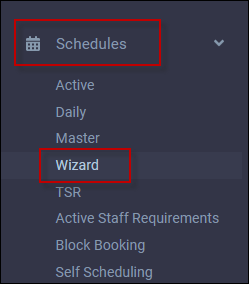
From the Wizard menu select Unfilled Shifts.
The following menu will appear:
▪Select the date of the shift you need to fill (May 2nd). ▪Select the unfilled shift line to highlight it. ▪Click Next Page. The list of available employees based on your predefined sorting levels will appear in priority order on the right.
The Cell Phone and Other Phones fields may be edited directly on the Unfilled Shifts menu.
▪Click on the pencil icon. ▪In the New Phone Number pop-up window, enter the new number. ▪Click Save. The menu will refresh with the new number displayed. This will also update the employee profile information.
The employee highlighted on the right, will appear on the left with the shift and call-in information visible. The list will be displayed one level at a time with all employees for each level, in the order they will appear, one-by-one on the left, allowing you to know in advance who is going to appear next.
▪Enter the employee's response from the drop-down list. ▪Click Submit.
▪Click Yes on the confirmation menu that will appear next.
The response will be processed and the next employee on the list will appear:
Continue the calling process until you find an employee to fill the shift. Amy Fox accepted the shift, so our Unfilled Shifts Wizard is now complete. Amy's Active Schedule is shown below. Hover over the phone icon and the tool tip with the call details will appear.
|


Unfilled Wizard Menu Options and Toolbar
Date Click in the Date window or on the calendar icon to open a calendar. Select the date of the shift you are trying to fill.
Forward / Backward Arrows Use these arrows to move the ahead or to a previous date.
Complement / Creation Click on the drop-down arrow to access the full list. Select either Complement or Creation Order to determine how the shifts are ordered on this menu.
The filter may be used to filter the visible shifts. For additional information see Menu Setup Options.
▪Click on the Wizard tab for options relating to the Wizard specifically. ▪Click on the Keep Selected Date to keep the menu on the date you have selected. ▪Click on Make Call in List selectable if you want to be able to select employees out of sequence from the Wizard list (not recommended).
This option provides a list of employees who have been "postponed". This normally occurs when the employee is called with no answer. Any response other that accept or decline (left voice mail etc.) would put the employee in a postponed state. The window will open to the current date. The available functions will be visible.
▪Click on the employee's name and select Book Schedule (the plus symbol +) if the employee has called back and is able to take the shift.
To view the details of the postponed shift, click on the button icon. To close the detail window, click the button again.
Click the phone icon for a list of the employees called either on a specific day or a range of days. Set the dates using the From / To date windows. To view the details of the shift, click on the Detail button. Click again to close.
The Split option allows you to take one shift, i.e., 14:00 – 21:00 and create two smaller shifts, i.e.,14:00 – 17:00 and 17:00 - 21:00.
▪Highlight the shift you want to split by clicking on the shift line to highlight it blue.
▪Click on the Split Shift icon. In the pop-up enter the time the shift is to be split. ▪Click Apply.
There will now be two shifts each with one half of the shift that was split.
Group By The shifts may be grouped using the three available Group By Levels options. To expand or collapse the groups either click on the arrow beside each group to open one at a time or click on the Actions menu and select Expand All / Collapse All.
After you have entered data into a field (i.e.dates or time) you must tab out of the data field or click anywhere within the menu to activate Save or Apply.
|


