To create a Master Schedule, you will need to create Master Schedule lines (rotations) and assign the shift information to the lines. Lines will be assigned to employees but may also be left unassigned, to be filled as employees are available before or during the scheduling period.
This section will describe how to add the shift information to your Master Schedule lines.

Once you have created a Master Schedule line, you must add the shift requirements to it, i.e., Day Code, Department, Class, etc.
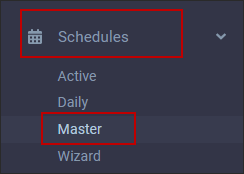
▪Select the Schedules menu. ▪Select the Master menu.
The menu below will appear (with existing lines where applicable). To search for employees with their corresponding lines, you must synchronize the Master Schedule with the Employee Panel by ticking Synchronize with Employee Panel. When you open the Master Schedule menu the system will now highlight the Master Schedule line of your selected employee.
This section will provide information on how to add shifts to the weeks of the rotation (Schedule tab), and how to view these shifts in a grid format (Schedule Grid tab). Please see Adding Attendance Codes to the Master Schedule for information on the Attendance tab.
Adding Shifts
To add shift information to each day/week of your Master Schedule Lines, select the Schedules tab. The total number of weeks of the rotation, that you defined when you created your Master Schedule Line will appear (two weeks below). In the example below, 14 days creates a two-week schedule. Shifts have not yet been added to this rotation.
▪Click on the day of the week you wish to add a shift to. This will highlight the day in blue. To select more than one day, Hold down the CTRL key and select multiple days.
▪Click on the Actions icon and select Book Schedule(s).
▪Select each of the fields you require e.g., Department, Class, Day Code. ▪To start your selection again, click Reset. ▪Once all your shift requirements have been selected, click Apply.
The required fields are indicated in red.
The following new shift has been added the weeks / days we selected.
Continue adding shifts to complete this rotation. You may also copy Master Shifts to accelerate this process.
|
Once you have added a shift(s) to your Master Schedule Line, you may copy it to other days of the rotation. To copy a shift(s): ▪Click on the shift to outline it in blue. ▪Click on the Actions icon and select Copy.
▪Select the date you wish to copy to by clicking on it. ▪Click on the Actions icon again and select Paste.
The rotation below is missing the shifts for weeks three and four:
To copy and paste multiple days at once:
▪Select all the shifts you wish to copy by clicking on the first shift, then holding down the Control button on your keyboard, click the remaining shifts until they are all outlined in blue. ▪Click on the Actions icon and select Copy.
▪To paste to multiple days, follow the same process described above for selecting multiple days to copy. ▪Click on the Actions icon and select Paste.
The copied shifts from weeks 1 and 2 are now showing on weeks 3 and 4.
|
▪Select the Schedules menu. ▪Select the Master menu.
The following menu will appear (partial menu and schedule tab displayed):
▪Click on the day you wish to edit to outline it in blue. To edit multiple shifts, use the Control key function on your keyboard to select more than one. ▪Click on the Actions icon and select Modify Schedule(s).
The system will take you to the Schedule Grid tab which will display the shift(s) you selected in individual rows. You may modify fields by clicking within them, highlighting the data, and typing over it, or by selecting a new option from the predefined drop-down menu (if applicable).
Make Schedule Temporary
You may select Make Schedule Temporary to assign the predefined temporary colour setting to a shift or multiple shifts. The only function of this feature is to adjust the colour to visually recognize the shift(s) as temporary. Temporary colour settings on the Master Schedule will not apply to the Active Schedule and vice versa.
|
▪Select the Schedules menu. ▪Select the Master menu.
The following menu will appear (partial menu and schedule tab displayed):
You have the option of deleting Master Schedule shifts completely or Unbooking them which will assign them to a separate default line for tracking purposes only.
▪Click on the day you wish to Delete/Unbook to outline it in blue. Use the Control key function on your keyboard to select more than one shift. ▪Click on the Actions icon and select Delete Schedule(s) or Unbook Schedule(s).
Delete Schedule
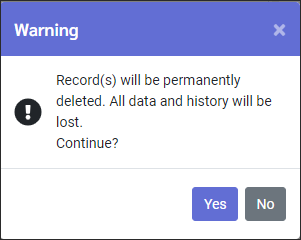
▪Select Delete Schedule. The following warning message will appear. ▪Click Yes to confirm deletion. The shifts will be deleted.
On the next window you may indicate how to manage the unfilled shifts. The Delete Schedule(s) option works with the Effective Date. Enter the effective date as shown below:
If you select None, all unfilled shifts will remain and need to be removed manually.
Unbook Schedule
▪Select the shift(s) to be unbooked. ▪Right click and select Unbook Schedule. ▪Click Yes when the warning message appears.
On the next window you may indicate how to manage the unfilled shifts. The Delete Schedule(s) option works with the Effective Date. Enter the effective date as shown below:
If you select None, all unfilled shifts will remain and need to be removed manually
This time, although the shifts will be removed from this schedule line (011 PSW) the same way they were when deleting them, they will now appear in a default schedule line, which will be automatically created by the system when you apply the Unbook function. See the new default shifts below:
If you then select other lines and unbook shifts, they will be added to the default line as well. Below we have selected a different line (013 PSW) and will unbook the 9am - 5pm shift on Friday on Weeks 1 and 2:
You will now see the shifts from above added to the default line along with the shifts from line 011 PSW:
|


