The Automated Call Outs menu offers a quick and efficient method for filling shifts by selecting multiple unassigned shifts at once, dispatching them to employees, collecting their responses, and allowing the manager to sort and accept them once received. Alternatively, employees may accept the shift directly from the dispatch, and the system will automatically assign them to the shift upon acceptance.
|
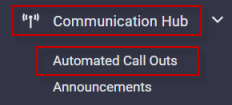
To access the Automated Call Outs:
▪Select the Communication Hub menu.
▪Select the Automated Call Outs menu.
The following menu will appear:

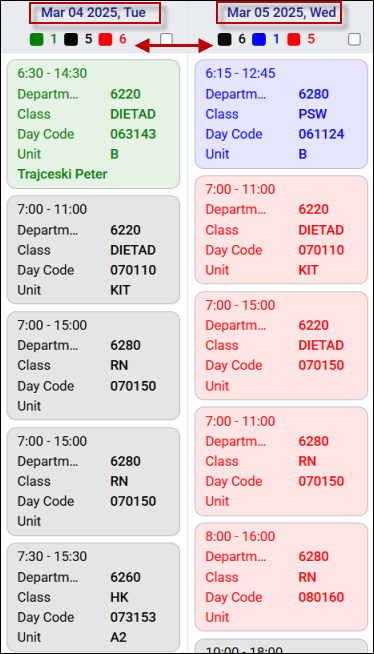
The Automated Call Outs menu displays all unfilled shifts for the selected date range (one week selected). Shift colors indicate both the current status and the amount of time remaining before each shift begins. When no status boxes are checked, shifts of all statuses are displayed by default.
The statuses are defined as follows:
Booked The shift has already been booked through Automated Call Outs or elsewhere in the system, but only if it was originally dispatched using Automated Call Outs.
Unbooked The shift is unbooked and is ready to be filled.
Active A dispatch for this shift has been sent out and is in progress.
Hot This shift's start time is within 24 hours of the current time.
Ready to be Booked The shift has been dispatched using the broadcast and pool method. The dispatch period has expired, and employees have responded and are awaiting manager action.
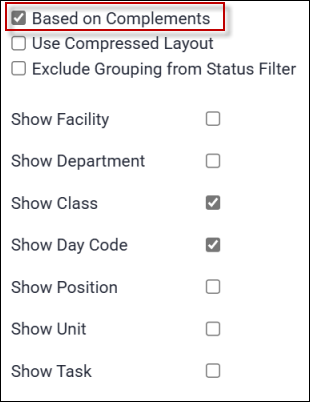
The (partial) image below, for March 4th and 5th displays the number of shifts in each category:
|

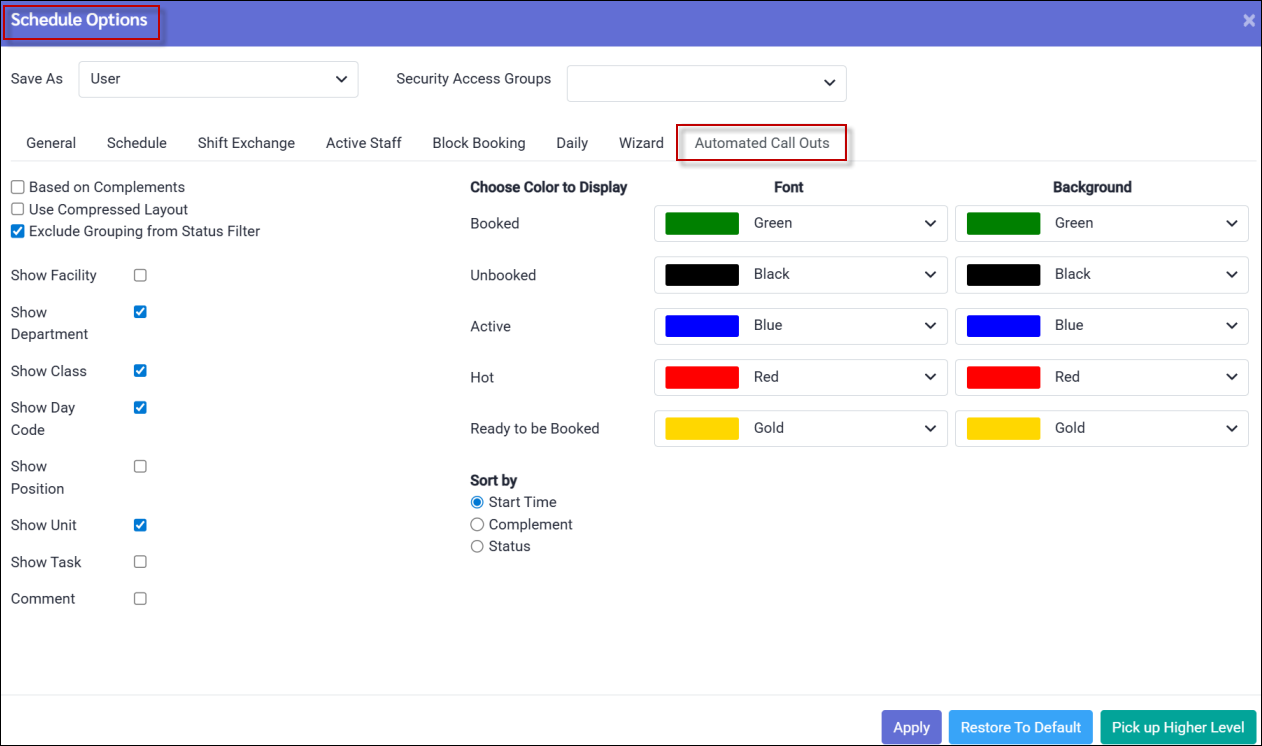
The colour and schedule settings may be configured using the Options menu and selecting the Automated Call Outs tab:
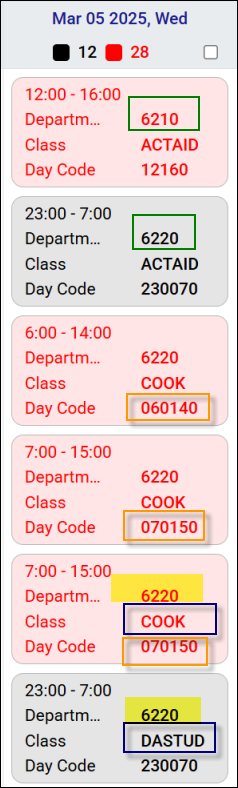
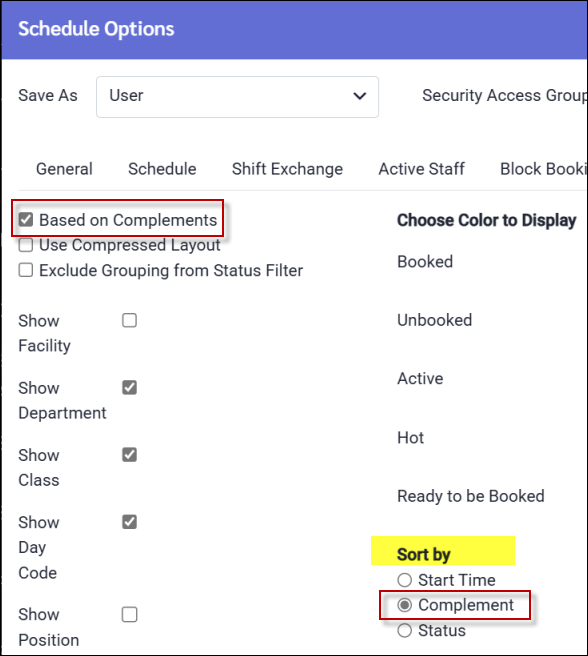
Based on Complements When checked, the unfilled shifts will be grouped by Complements, which are the required fields for all shifts. In this case the complement requirements are Department, Class and Day Code. Not all the required fields need to be visible on this menu. Below only Class and Day Code are selected.
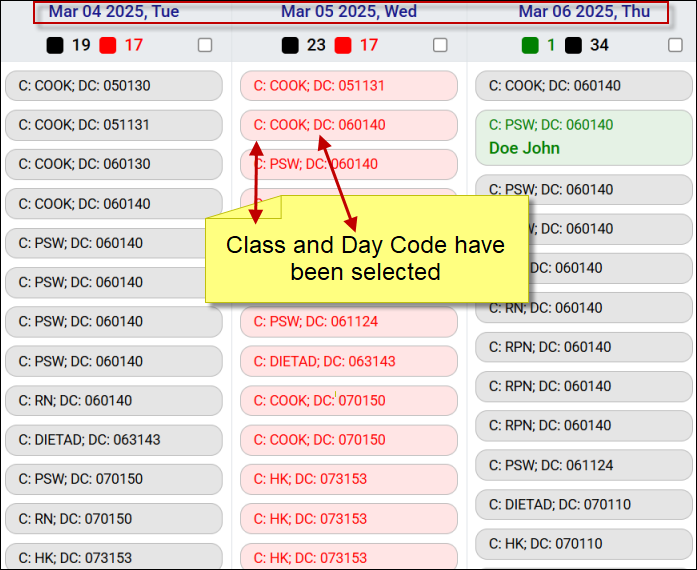
The shifts below are organized alphabetically by Department (green), followed by Class within each Department (blue), and finally by Day Code within each Class (orange).
The Sort by Complement option is also selected (on the right). If you'd prefer to sort the shifts by Start Time or Status within the complement grouping, simply choose the appropriate radio button.
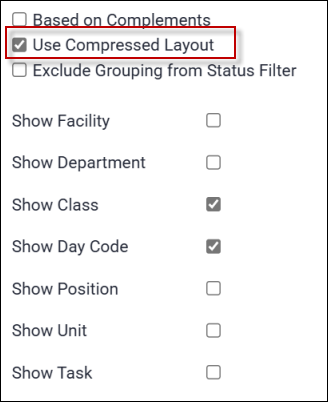
Use Compressed Layout Check this option to condense your view and get a clearer overview of unfilled shifts. You can choose the options to include in your compressed view. Below, Class and Day Code have been selected:
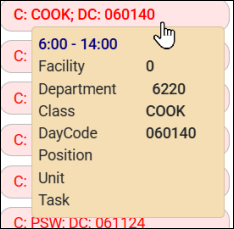
You may hover over a shift to view its full details:
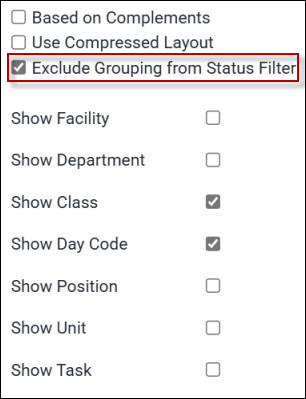
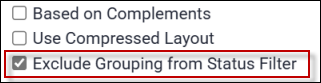
Exclude Groupings from Status Filter When ticked, this option allows you to exclude any grouping settings when you are filtering your main dispatch menu by status. Please see Grouping Settings for additional information.
Show Comment If the Comment option is selected, the Comment / Note field will appear on the schedule.
To view the full content of a note or comment, hover over the field to display it in a tool tip. If the Comment / Note fields are not visible in the menu where you add or view them, you can enable them through the Field Visibility setting.
|


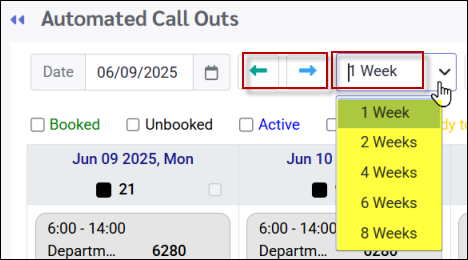
Navigation and Date Selection Select the date by clicking within the date field or on the calendar icon. The current month will appear:
Choose the desired time period for viewing unfilled shifts from the drop-down menu, as shown. Use the green left and right arrows to access the previous or next time period.
Filtering the Automated Call Out Menu
You may filter your list of unfilled shifts by clicking on the Filter icon:
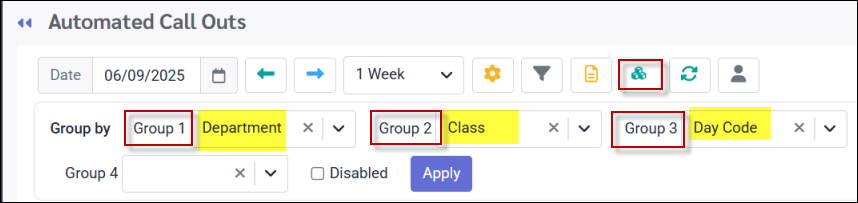
Please see Filtering for additional information. Grouping the Automated Call Out Menu You may group your data by selecting the Show Groups option. The groups available will be based on the required complements configured in the system. As you add a group, the next group selection will become available.
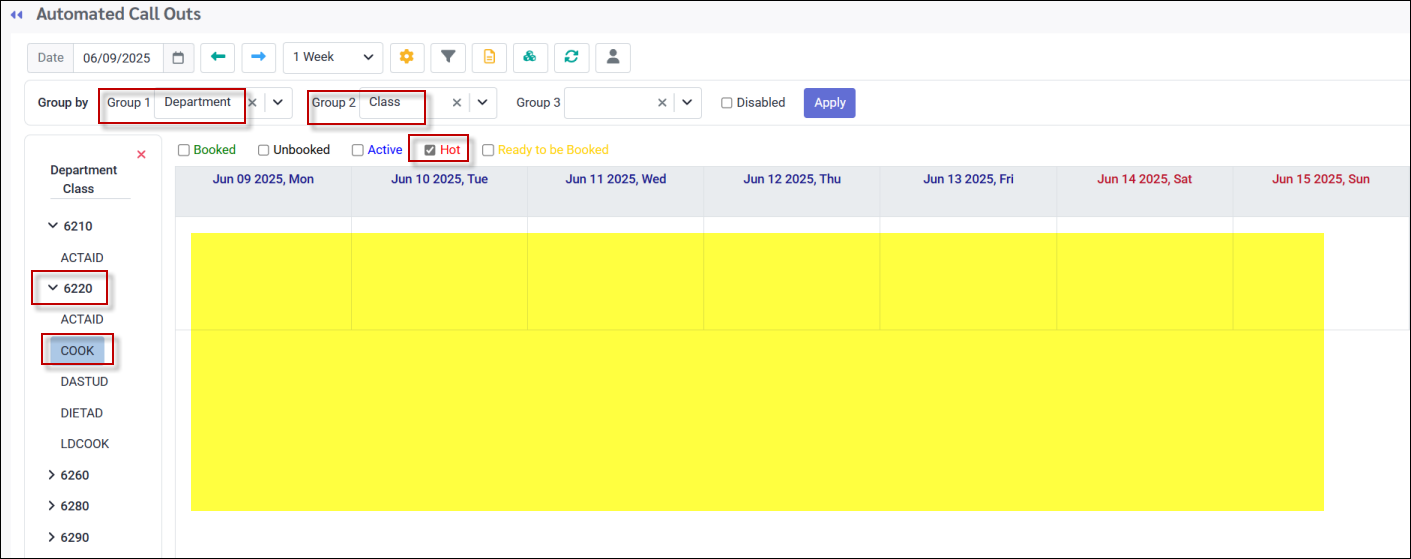
To filter by status (e.g. Booked, Unbooked, Active etc.) while grouping, select the Exclude Grouping from Status Filter from the Options menu to ensure that the grouping categories remain visible, even if they have no shifts while the filters are active. If this option is not selected, any grouping categories with no shifts in your filter selection (empty categories), will be hidden from the grouping section.
Below, the Status Setting is filtered to Hot. The Exclude Grouping from Status Filter option is checked. The grouping categories will all be visible, even those without shifts that match the filter selection. Notice that Department 6220, Class COOK, does not contain any shifts but the category is still visible. Grouping categories with NO shifts at all, regardless of the filter selection, will remain invisible.
This time the option Exclude Grouping from Status Filter, is NOT selected in which case the grouping will only display categories with shifts that match the filter selection: Department 6220, Class COOK no longer appears. Any visible category selected on the left, in this case will contain shifts e.g. ACTAID shift shown below:
|


You have the ability to add, delete, edit, split and clone shifts on this menu.
Adding a Shift Click on the plus symbol (+) to add a shift. Select the required fields and click save (department selection shown below):
Deleting a Shift Select a shift by clicking on it (Jan 13, 7am-3pm below). Click the red X to delete the shift:
Editing a Shift Click the edit symbol to modify a shift. See Adding a Shift above for additional information.
Cloning a Shift Click the Clone icon to clone a shift. A duplicate shift will appear.
Splitting a Shift Click on the two-line icon to split a shift.
Enter the time you want the split to occur (6pm below) and click Apply:
Two shifts will now appear based on the split time selected:
|


Scheduler Option Overview
The Scheduler option is designed to ensure that on-premise employees have the opportunity to accept available shifts, even if they are unable to access their cell phones during work hours. When a dispatch is released, either a text message is sent to a designated scheduler, or notification is sent to the scheduler's mobile application, notifying them of the available shift. The scheduler can approach the on-site employee directly to offer the shift and can then accept or decline the shift on the employee's behalf. Scheduler Response by Text By ticking the Use Scheduler box and entering a Cell Phone number, the system will send texts for any on premise staff to the scheduler's phone.
A notification for the shift below was sent to the scheduler because employee Summer Lee was working at the time of dispatch.
The scheduler will use the same text response format as an employee when responding on the employee's behalf. In the example below the Shift ID number is 1863. The scheduler has entered Y1863 to accept the shift.
Scheduler Mobile Application Feature If Use Scheduler is enabled but no cell phone number is included, the system will default to the scheduler function on the application shown below
▪On the Mobile App, schedulers log in using their manager login. ▪Select the Scheduler icon under the Schedule menu.
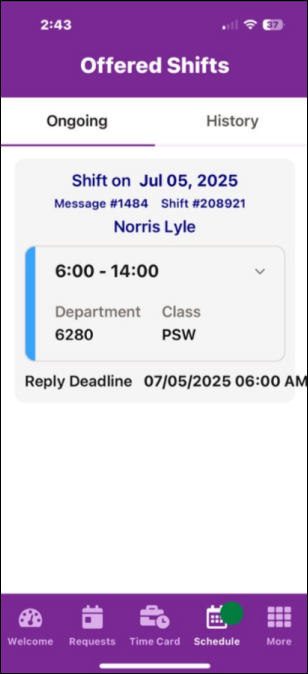
Below, employee Lyle Norris was working (scheduled) when the text message was sent. The message was redirected to the manager's mobile application as shown:
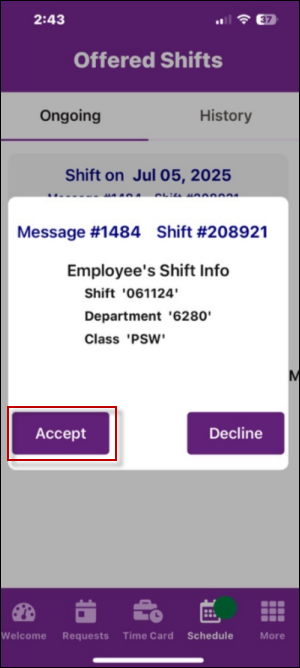
Click on the shift offer to access the Accept / Decline options:
In our example the manager has accepted the shift on the employee's behalf:
Tracking Scheduler Responses On the Active Schedule the shift displays scheduler acceptance details, shown as a tooltip when you hover over the red phone icon.
|