Navigate to the Automated Call Outs menu. From this menu you may select a shift or multiple shifts and create a dispatch notifying employees of available shifts.
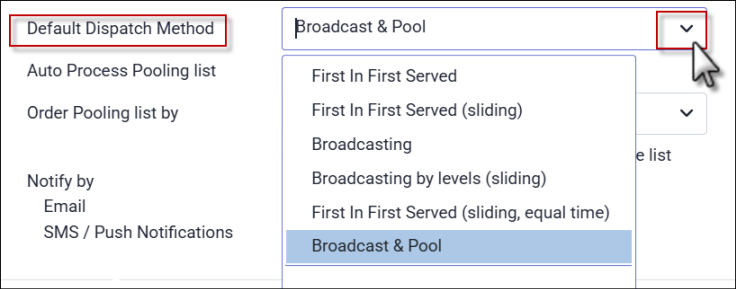
Please see Dispatch Methods for a description of Broadcast & Pool.
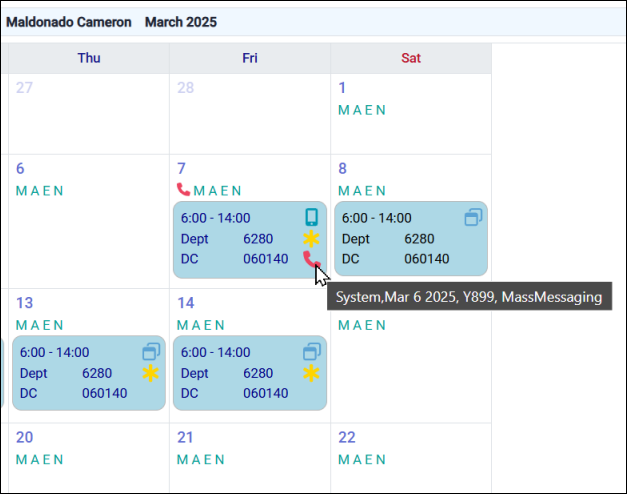
Selecting Shifts
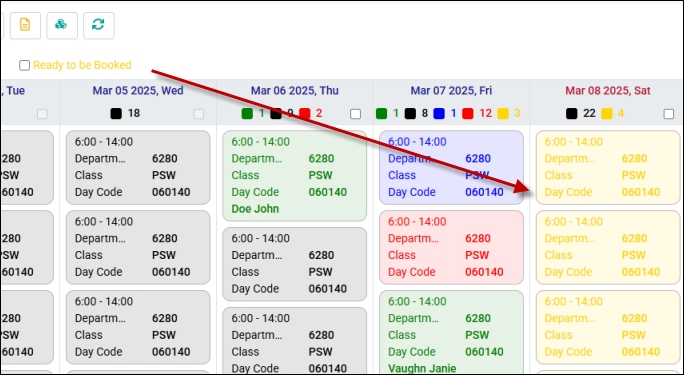
▪Select all shifts for a day by clicking the box at the top of the date column (see Jan 1st below). ▪Select a few shifts by clicking on them (Dec 31st below). ▪A total of eight shifts are selected below.
Preparing your Dispatch
Once selected, the dispatch menu will appear with your default configuration. You can modify the default settings from this menu if necessary.
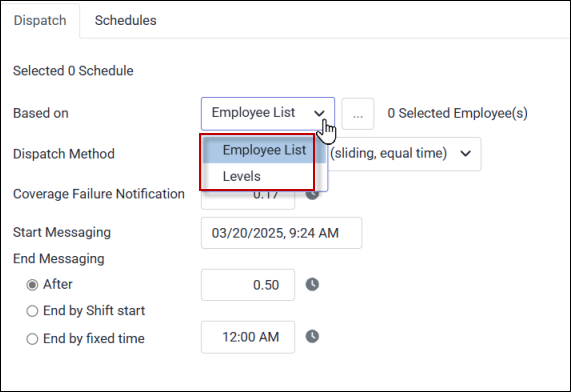
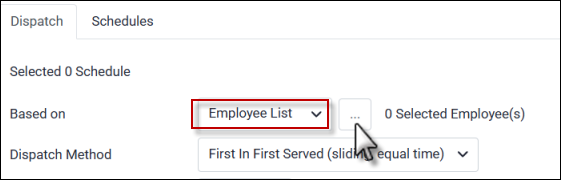
Complete the Based on setting by selecting Levels or Employee List from the drop-down menu:
Levels This selection will follow the Sorting Level call in order, configured with your facility's unique seniority, availability and schedule rules. Notifications will go to all eligible employees at once when using Broadcast and Pool but the Contacted and Responses tabs may be configured to order the employees according to the rules defined by the Levels configuration.
Employee List Click the three dots to access the employee list and select the recipients for the dispatch. You can filter the list by facility, department, class, individual employees, and more. The system will send the dispatch based on the order and filters you select:
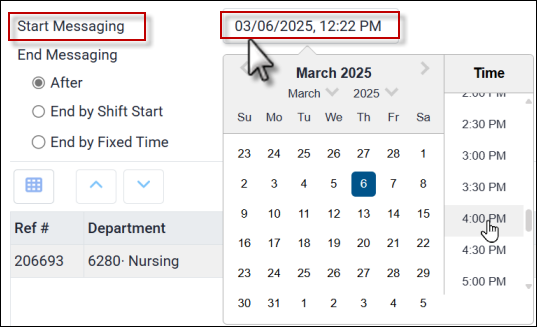
You may set a specific date and start time for your dispatch by clicking within the Start Messaging date field to access the date and time calendar:
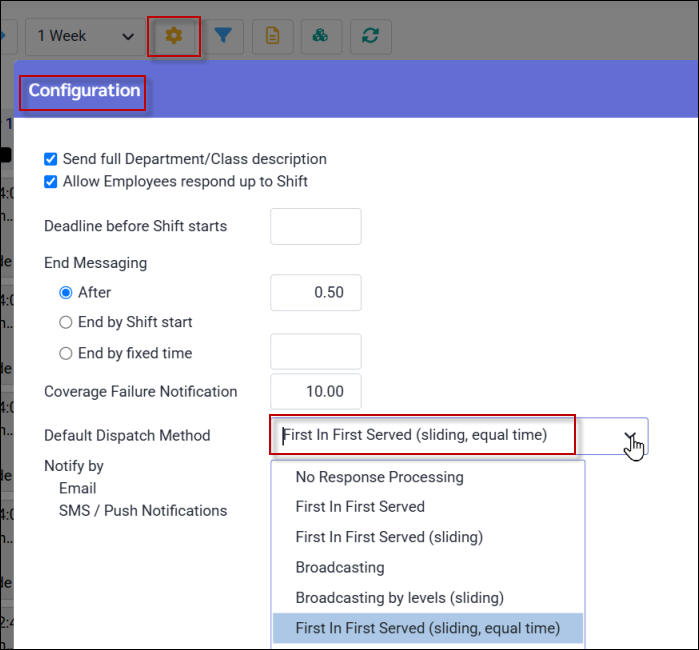
In the example below, the default Broadcast & Pool Dispatch Method is selected. The Pooling Notification time has been set up for 10 minutes (0.17) using a decimal configuration. We recommend no less than three (3) minutes so that you will be notified as soon as possible of employee responses. Additionally, the End Messaging After default has been changed from 30 minutes to one hour.
Please see Delaying & Filtering Your Dispatch for additional options. Once your settings have been edited, or with your default settings unchanged, click Send to launch messaging for the selected shifts. |
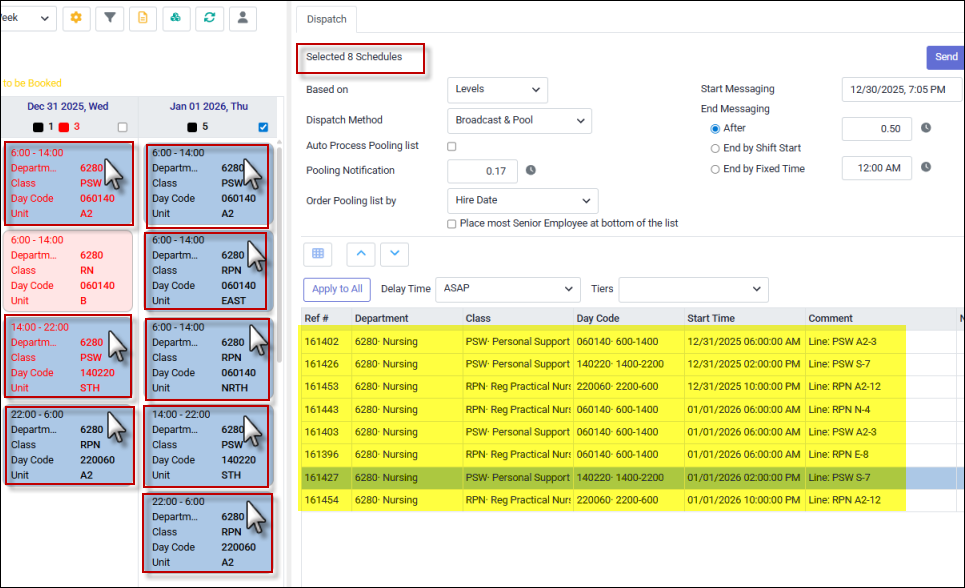
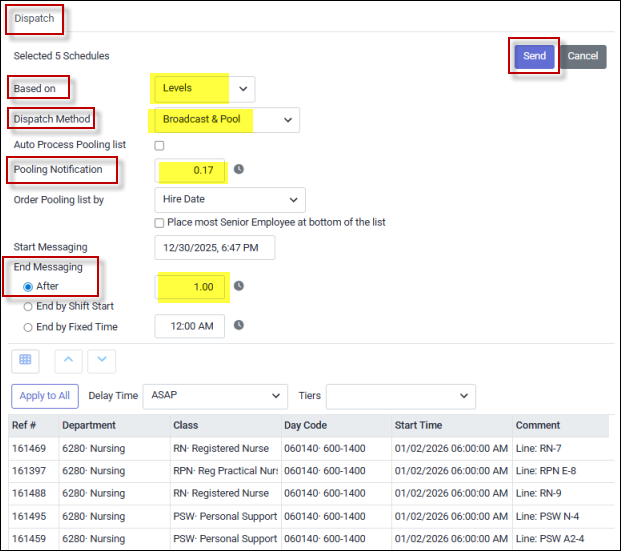
The lower portion of your dispatch displays all the shifts selected in you Automated Call Out.
Time Delay
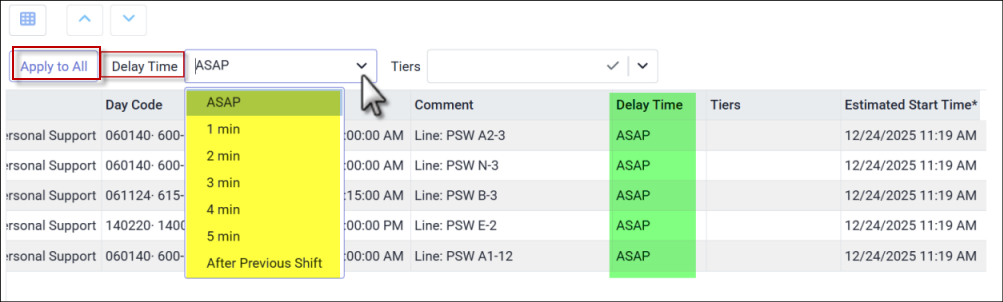
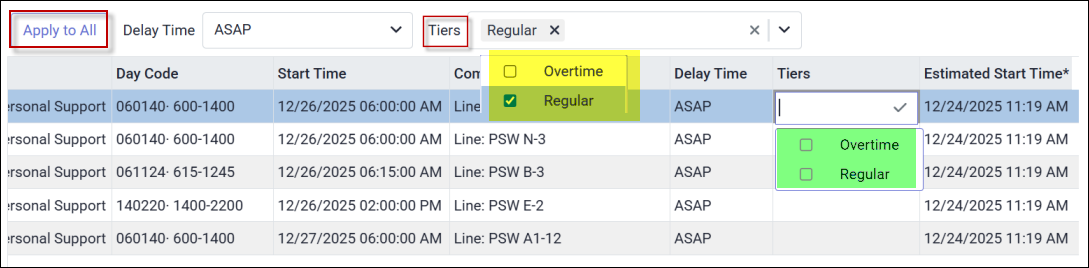
When dispatching multiple shifts, you can set a delay between dispatch start times. In the heading section, double-click the Delay Time field to select your default delay from the drop-down menu (yellow below). Click Apply to All each time you send a dispatch to apply the delay to all shifts; otherwise, no delay will be applied. You may also override the default by selecting a delay for individual shifts from the drop-down menu (green below).
Filtering the Dispatch Levels
You can control which levels are included in each shift dispatch using the Predefined Tier Setup. Each sorting level is assigned a Tier in the sorting level configuration. In the example below, the Tier levels are Overtime (may break schedule or availability rules) and Regular (straight-time levels that do not break rules). As with the Delay Time option, you must select Apply to All to apply the Tier setting to all shifts. Alternatively, you may set the Tier preference for individual shifts. To choose which Tier to send, double-click the appropriate column and select the corresponding box. If no Tier is selected, the dispatch will include all levels. The Sent Tiers field shows the history of the Tiers to which the shift has previously been dispatched.
Click Send to send your dispatch.
Please see Booking Employees for further information.
|

Employee Messages
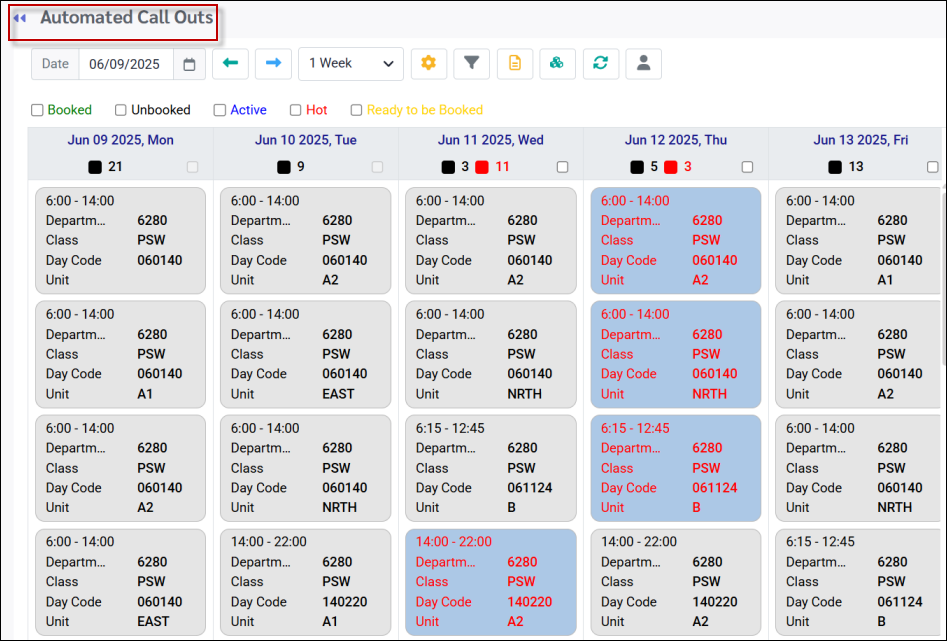
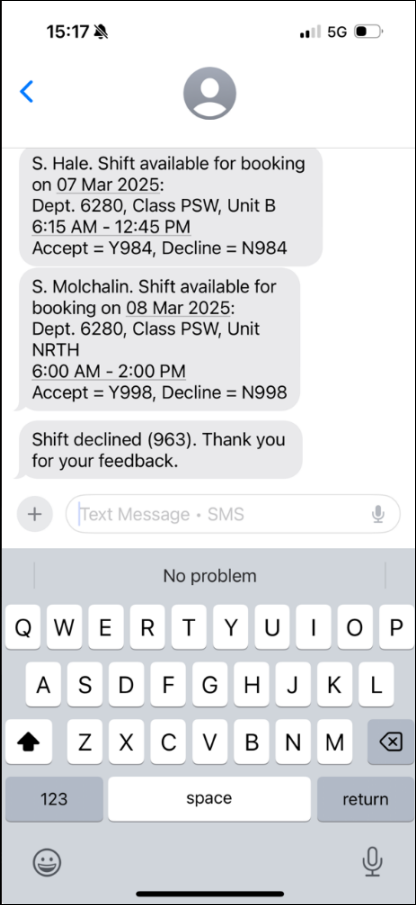
When a dispatch goes out, employees will receive texts similar to the examples below. Once the shift is filled, the dispatch will stop, but employees who have received notifications will still be able to respond. Employees should regularly check their schedules to stay updated on any recent changes.
Following a dispatch, the status of the shifts dispatched will change to the Active colour setting (blue below).
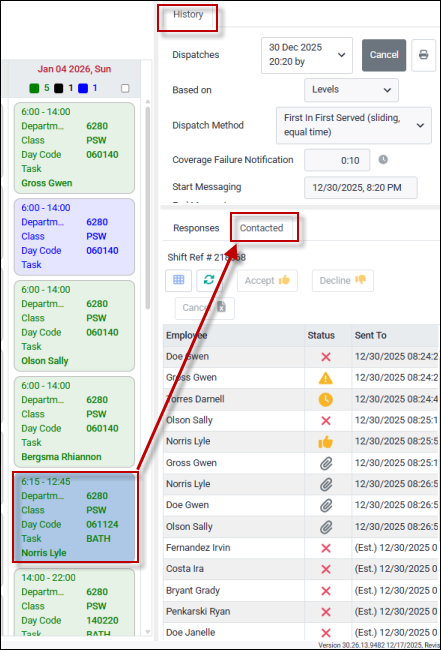
Dispatch History
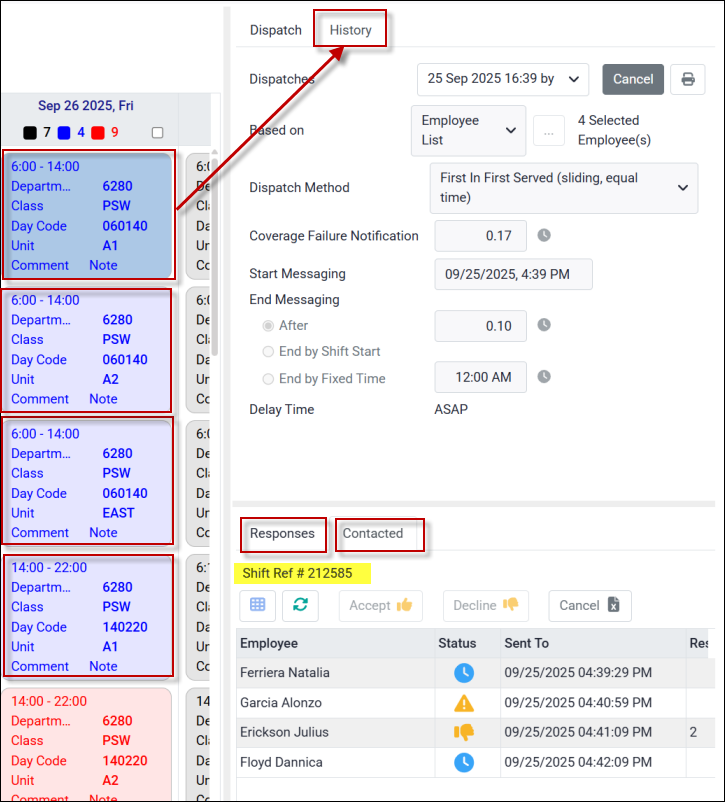
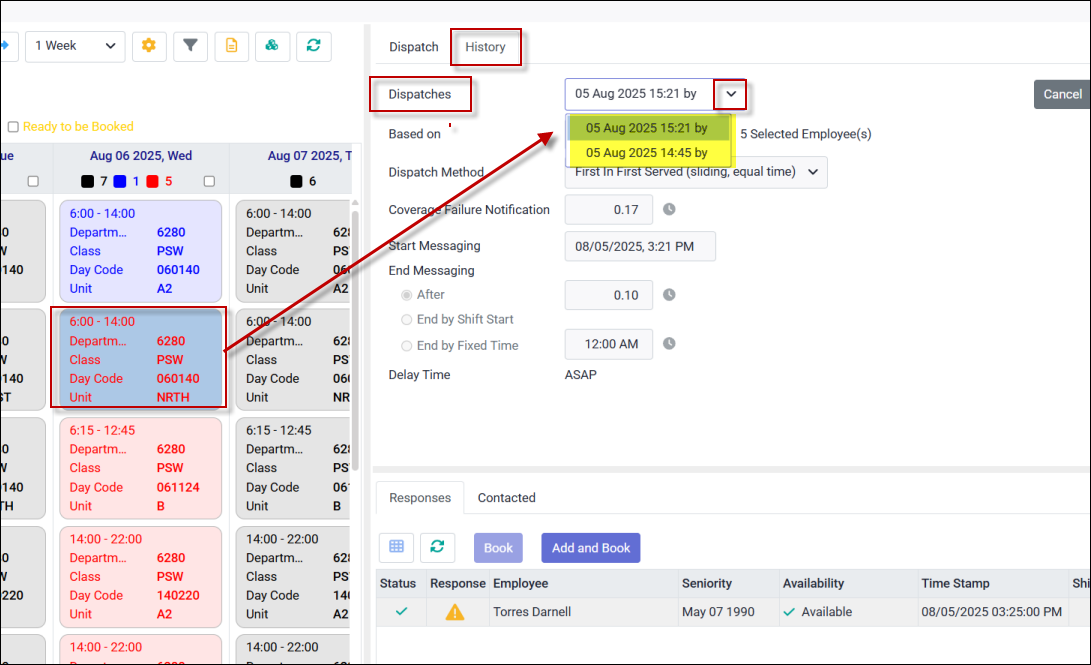
If you select one of the active shifts (darker blue), you will notice an additional tab called History will now appear as shown.
To track a shift’s dispatch history, open the Dispatches drop-down menu for a detailed breakdown. In the example below, the shift was dispatched twice on the same day. Each dispatch may have included this shift along with others.
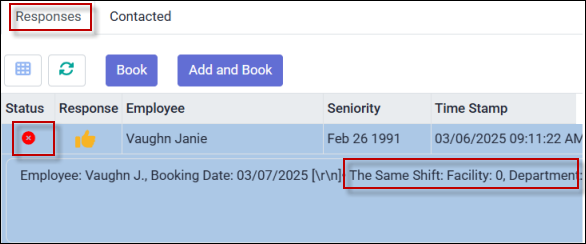
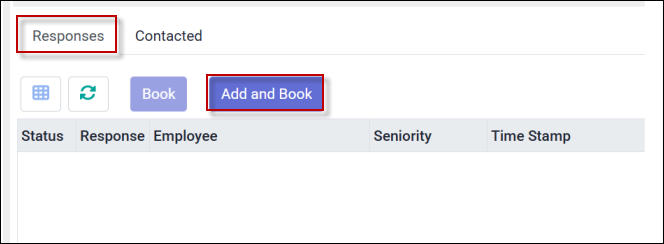
Employee Responses
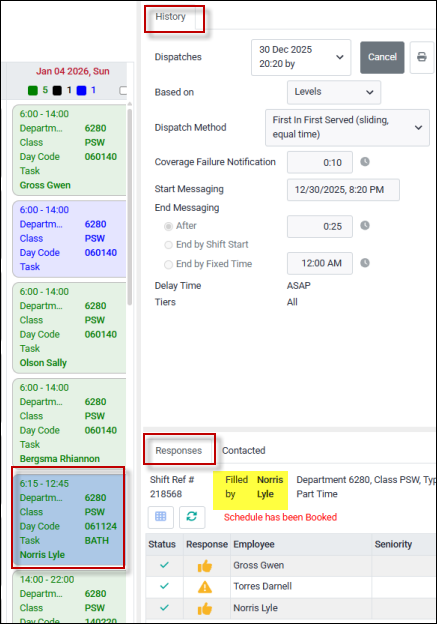
The shift acceptance replies will be pooled for the manager to process. The History tab lets you see who has been contacted and who has responded:
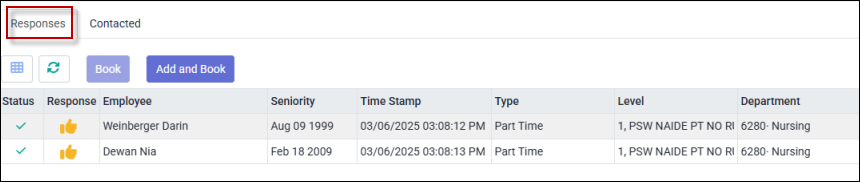
The Responses tab provides a list of employees who have accepted the shift: The employees will be displayed according to the order specified in the Dispatch Method Configuration. In this example, the Broadcast & Pool dispatch method lists employees in order or their hire date.
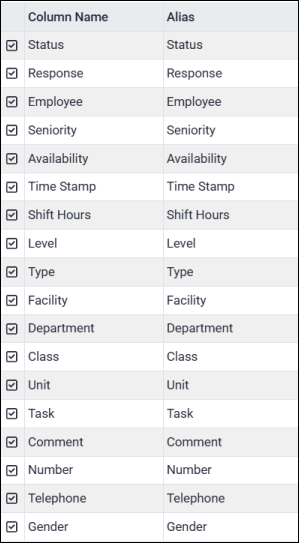
Please see Field Visibility for further information about customizing your column headings on this menu.
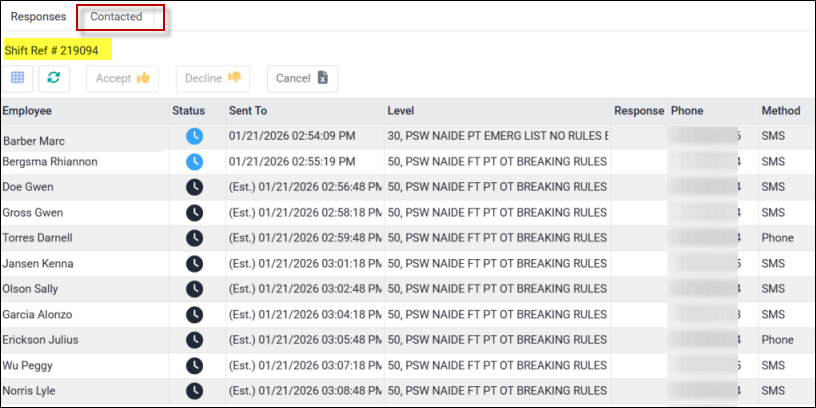
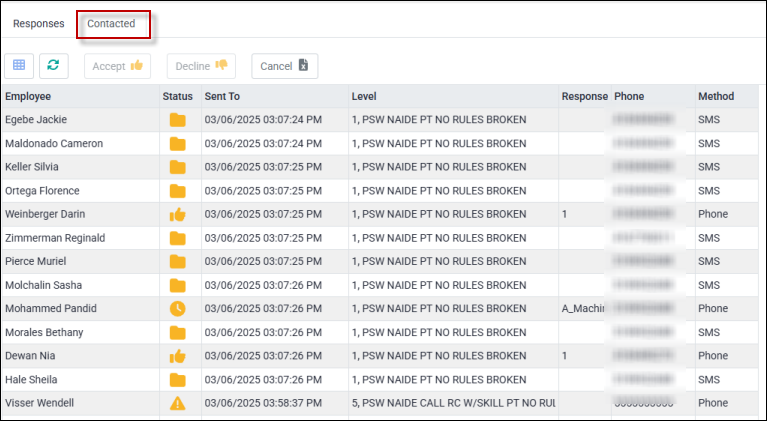
Employee Who Have Been Contacted
The Contacted tab displays all employees who have been contacted. It includes the date and time they were reached, the Sorting Level they were eligible for when notified of the unfilled shift (if applicable), the type of response from those who accepted the shift, the shift reference number for the selected dispatch, and the method used to contact employees (either text or phone call).
When Push Notification Only mode is used, employees who are eligible for a shift will still appear on the Contacted list even if they do not have Push Notifications enabled on the mobile application.
The Sent To column displays the time stamp when the notification was sent to the employee. For employees whose notifications have not yet been sent, an estimated send time will be shown.
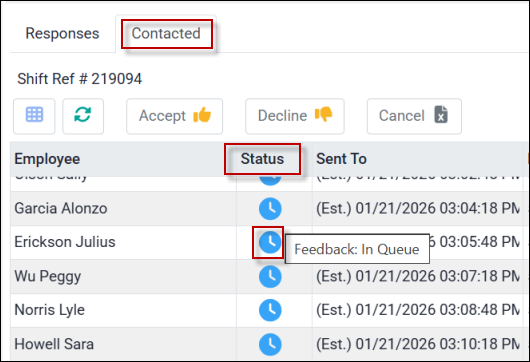
Hover over the Status icon for further information:
To sort the dispatch feedback by Status, click the column heading. Click once to sort in ascending order, and click again for descending order.
|
To cancel an active dispatch, click on the cancel icon.
|
| Booking Employees (Broadcast & Pool) |
The status will change to Ready to be Booked once the dispatch period has expired. This will happen if at least one employee has accepted the shift and if Auto Process Pooling List has not been activated.
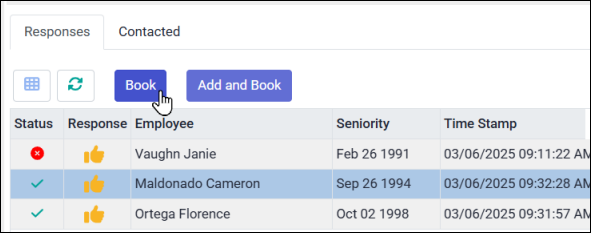
You may book employees to shifts from the Responses tab. Hover over the Status icon for details on shift conflicts or booking warnings. The red circle below indicates that this employee was already booked for the same shift at the time she accepted the new shift. The green check mark indicates a successful acceptance request.
Booking Employees
You can now assign an employee to the shift. Simply click on the employee’s line and choose Book.
The employee's schedule indicates that the shift was booked using Automated Call Outs / Mass Messaging.
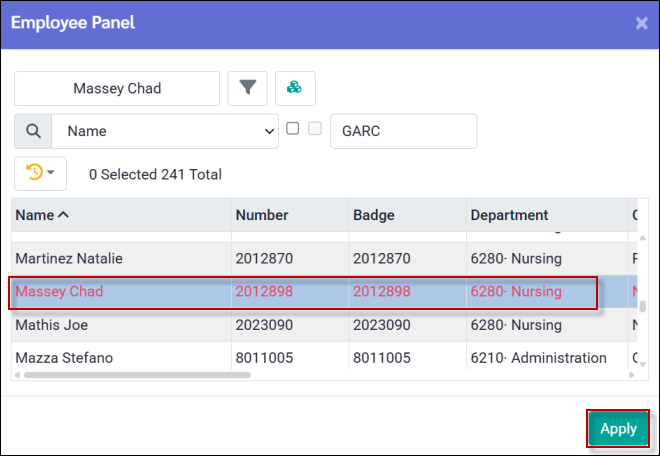
You can also click Add and Book to open the employee panel and select an employee to assign to the shift.
Select the employee by clicking the corresponding row, then click Apply to confirm your selection.
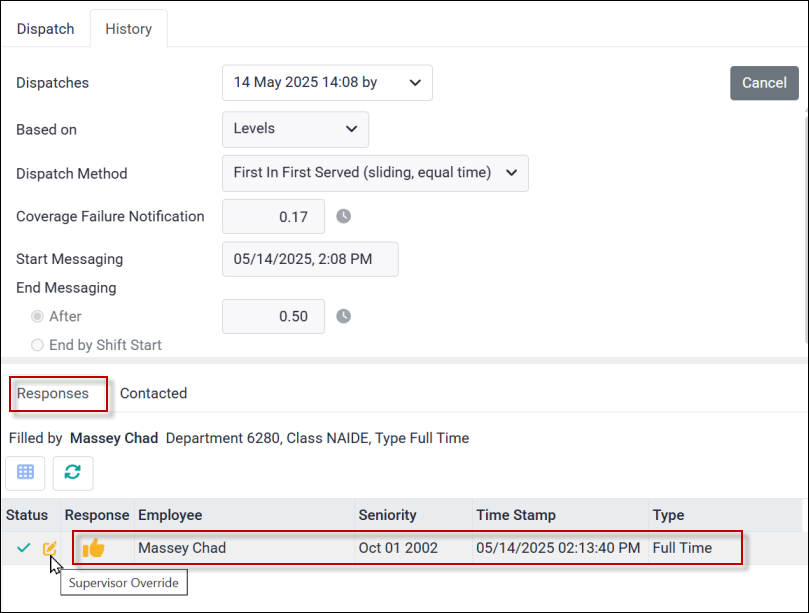
The selected employee will be assigned to the shift, with the status marked as Accepted (Supervisor Override). The time stamp will reflect the time the manager made the booking, the assignment level will be recorded as Manual, and the employee's phone number will be displayed.
|

All methods listed below, except for Broadcast and Pool, will automatically assign employees to shifts upon acceptance. Please see Dispatch Methods for a description of the options below:
Preparing your Dispatch
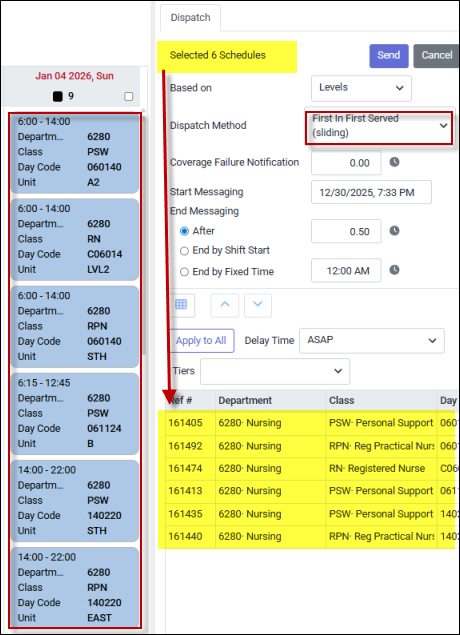
The example below demonstrates the First in First Served (sliding, equal time) option. Please see Filling Shifts with Broadcast & Pool for instructions on selecting shifts.
The following six shifts have been selected to dispatch. Below the dispatch details, the Schedules section lists the six selected shifts (yellow).
Please see Delaying & Filtering Your Dispatch for additional options.
Employee Responses
The Responses tab for this shift shows the employees who accepted the shift:
The Contacted tab shows all the employees who were contacted to fill the shift:
Using this dispatch method, there is no need for manager action once a shift has been accepted. In the example below, employee L. Norris has accepted the shifts and was booked upon acceptance.
|