The first step of StaffScheduleCare Payroll is to ensure that the Time Cards have all been corrected and approved.
Time Card
Follow these steps to ensure accurate Time Cards:
▪Make all necessary Time Card corrections.
▪Verify hours are correct i.e. Active Schedule and Time Cards should match.
▪Add any paid Attendance Codes i.e. payouts, vacations, sick time, etc. All payouts should be completed at the end of the pay period.
Reports
Once Time Cards are complete you will need to run the appropriate reports.
▪Select the Reports menu.
▪Select either the Time Earnings or Payroll Summary Report under the Time & Attendance Reports group.
Run and save the report for future reference. Audit hours and earnings.
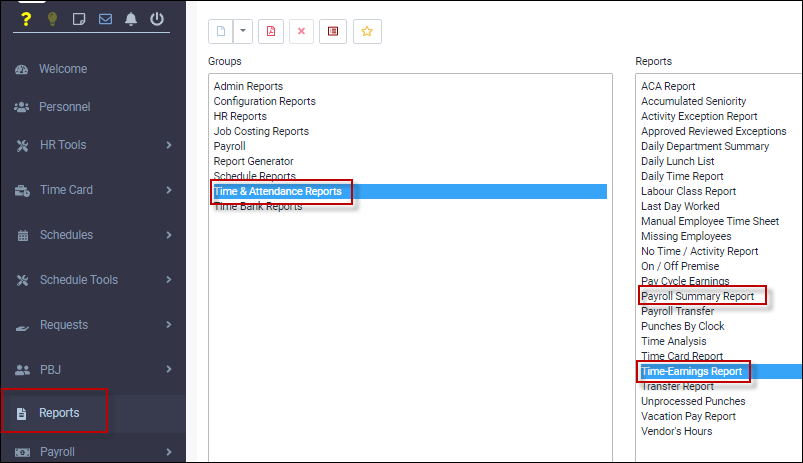
Payroll Summary Report
This report is a summary of the earnings made from the hours, premiums, paid codes, etc. The layout shows the totals for the pay period.
Time-Earnings Report
This is a detailed report for all paid codes and premiums selected in the setup. It will show you hours, rates, dollars, and total amounts.
Run Payroll
To start the Payroll Process:
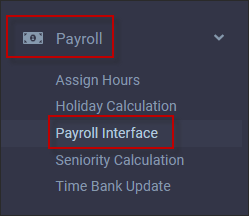
▪Select the Payroll menu.
▪Select Payroll Interface.
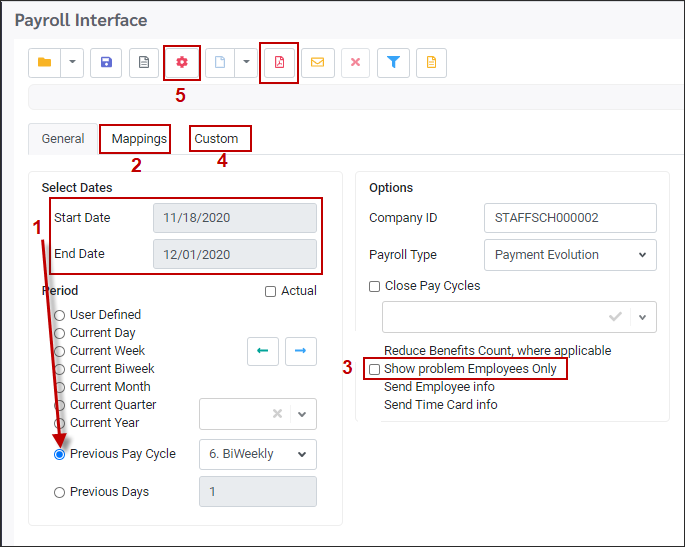
1.Select your payment dates. Use the Previous Pay Cycle option and green arrows to switch pay periods.
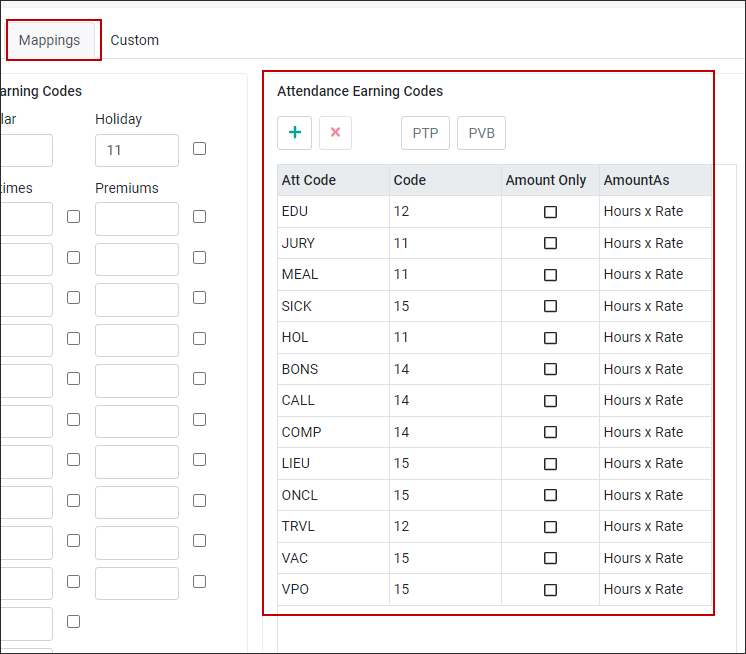
2.Verify that all your paid Attendance Codes are included under the Mappings column.
3.Click Show Problem Employees Only. This will run a report showing any discrepancies that would affect the payroll transfer. Common missing data includes birth date, SIN #, email and address. If information is missing you will need to add this to the employee’s personnel menu for a successful transfer.
4.Following the above task, once you have checked on the tick box, run the report by selecting the Preview icon.
5.Once no problems show in the Preview Report you can now process payroll by selecting the process icon.
Payment Evolution
Log into Payment Evolution with your account.
https://secure.paymentevolution.com/payroll/prMainLogin.aspx
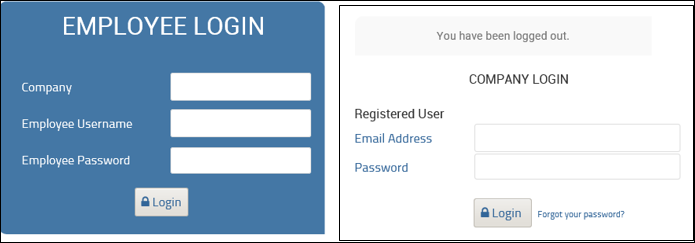
There are two types of logins: Employee or Main. The log in screen you use depends on the setup from the initial database implementation.
▪Select Run Payroll from top menu.
▪Click Select Pay Cycle from sub menu.
▪Change your payment date (will always default to present day).
▪Make sure Regular payroll type is selected (default setting).
▪Click Submit to transfer data to the Time sheets.

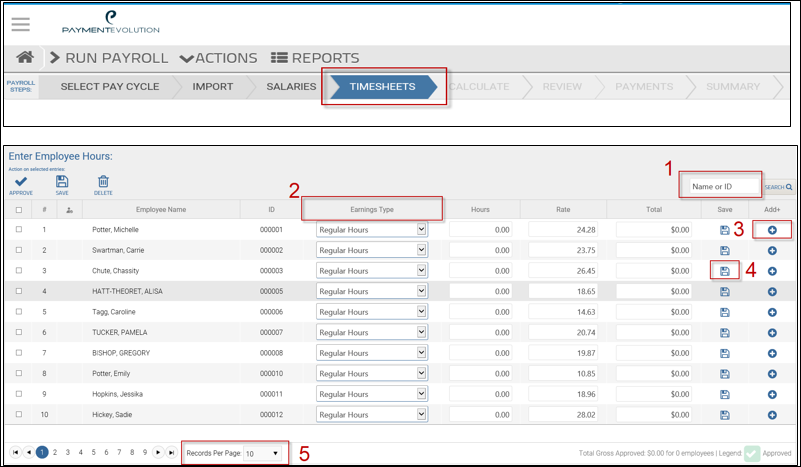
Select Timesheets from menu (skip Import and Salaries).
▪Search for employees using the search bar. (First, Last and Payment Evol. # all work)
▪Earnings Type will show all earnings and what type they are. To make adjustments click into the boxes, then make your changes.
▪To add a new earnings line select the plus symbol (+) and fill in the data.
▪After you have made any corrections to a line, click the Save icon to save your changes.
▪Change the number of records you can see per page.
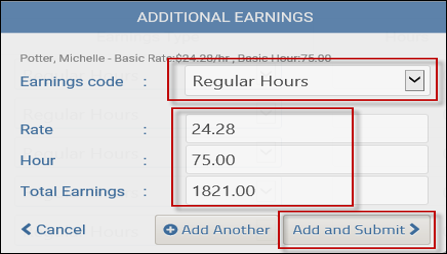
▪Fill out all fields to add additional earnings lines. Click Add and Submit once finished.

Once you have made all your earnings adjustments (if any) select Calculate in the sub menu to process your adjustments and payroll.

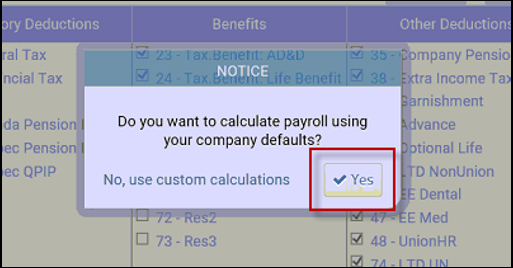
A pop-up message will appear and you may select ONE of the two options listed below:
▪Custom Calculations: Select which taxes, benefits and deductions you wish to process or not process.
▪Yes: Process default calculations (standard).
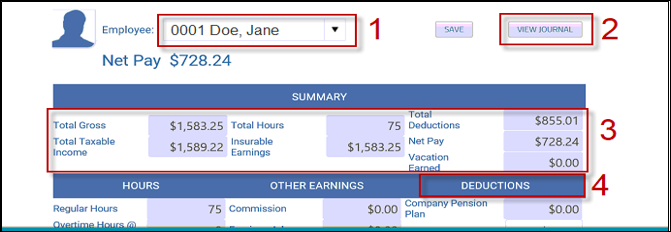
After the calculation has finished (may take several minutes) a new menu will appear with a list of all your employees. By selecting an employee on the list, the menu below will appear and you will be able to do the following:
1.Select which employee you wish to view.
2.View Journal will populate the journal report for all employees and give you a detailed report of all taxes, benefits, deductions and earnings.
3.This section shows you the totals for hours, gross, taxable income, insurable earnings, deductions, net, and vacation earned.
4.If an employee requires additional deductions they may be entered under the Deductions section (note: only deductions may be entered on this menu. NO additional earnings may be added).
▪Click Next on the bottom right to continue.
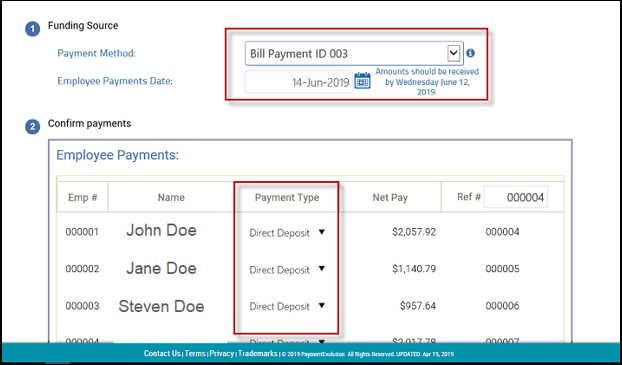
Once the Journal Report is saved a new menu will appear where you will verify the following:
▪The payment method is set to Bill Payment ID.
▪Employee payment date is set correctly.
▪Payment type is set to Direct Deposit.
▪You should scroll through all pages to verify that Direct Deposit is selected for all employees. Anything other than this option will result in the employee not getting funds deposited into their account automatically.
▪Click Finish this payrun when complete.
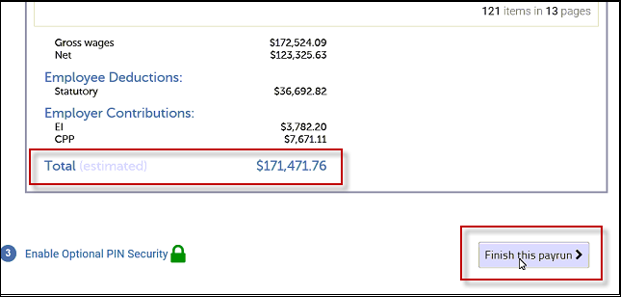
The total is an estimate and could change during finalizing.
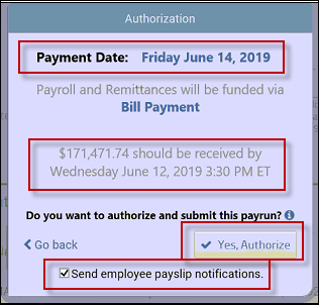
An authorization message will appear with information on your transfer. It will include the payment date and the amount to be received by Payment Evolution and when.
▪Click on the Send employee payslip notifications to notify employees their pay stubs can be reviewed via email. If all info is correct select Yes Authorize.
The last step of the pay run is the summary menu. This shows you the details of the pay run just completed. The left will show you Remittance, Payments and last pay run totals. The right will show you info on the cost of the pay run and number of employees.
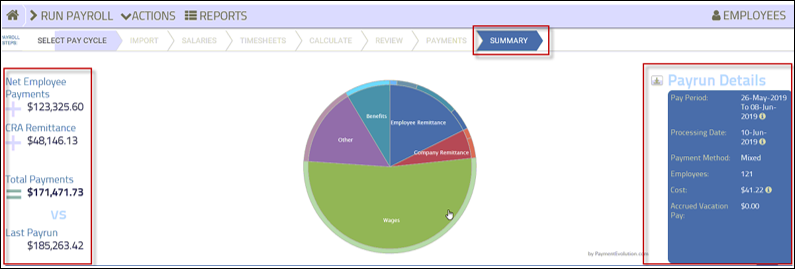
You will need to record the Total Payments amount and send those funds to be processed for payment.
Congratulations you have completed the payroll run!