From the client's website, job seekers can follow a link to the Applicant Centre to sign in and view current careers opportunities.
Using the Find window, applicants can search through the postings titles. The posting details may be viewed and forwarded to an email address.
Applicants are welcome to apply for a position by using an existing account or creating a new one.
Within the Applicant Centre they can build their profile with resumes, skill sets, experience and references followed by applying to a posting.
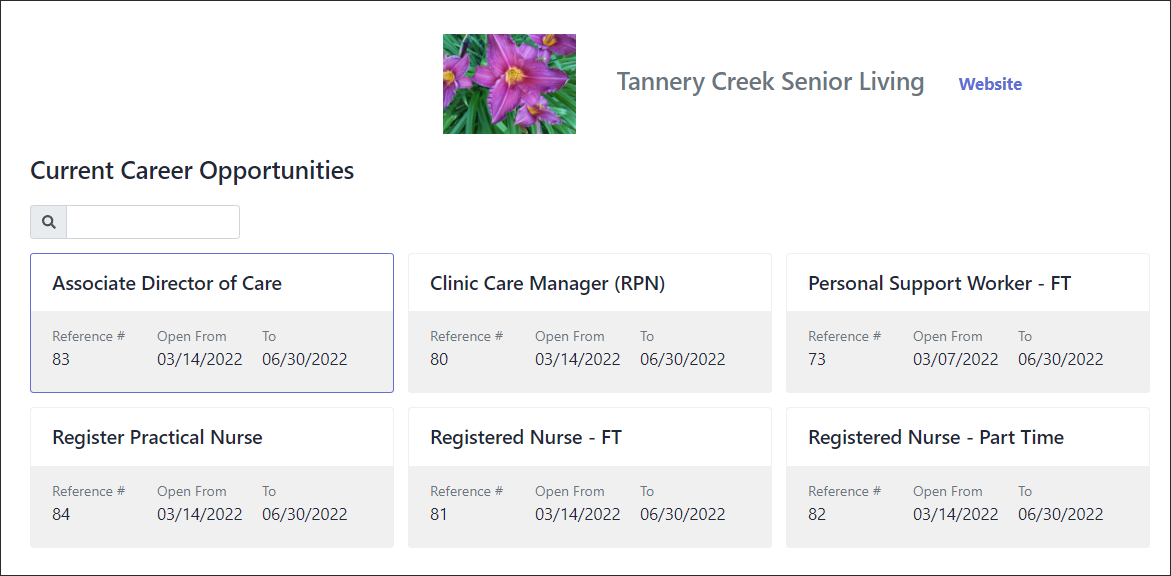
Clicking on a link from the company's website the job seeker will be directed to the Applicant Centre. The company's job postings are listed here for the applicant's convenience to review. A key-word search is provided to assist in finding posting the applicant would be interested in.
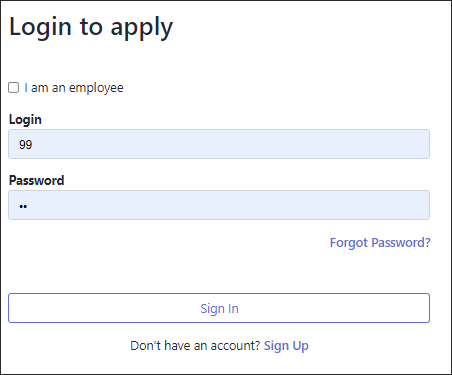
To apply for a position, an applicant must log into the Applicant Centre. If they do not have an existing account, click on Sign Up.
Once in the Applicant Centre they should complete the My Profile information to provide their contact information and qualifications.
|
Welcome Menu
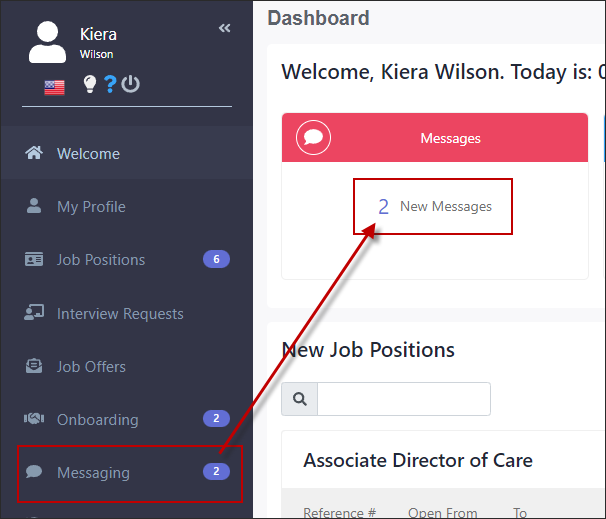
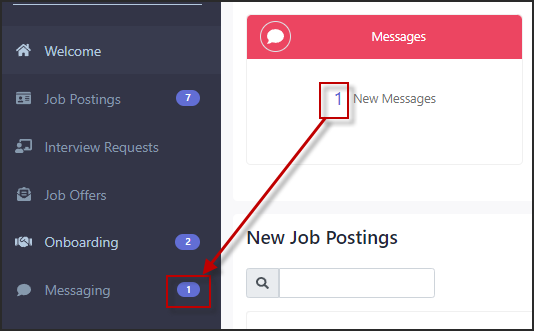
The Welcome screen displays four widgets to provide an at a glance dashboard of activity. All widgets will display their header in red if there has been activity in that area that requires responding. For these activities, an email alert will be sent to the email address you provided in your profile. If the number on the widget is greater the zero, indicating activity, click on the number to redirect you to the topic menu.
Example of activity.
The main menu will also provide alerts on the menu topic. In this example there is one new message. The Messaging topic also displays an alert. Once the message has been reviewed the alerts will return to zero.
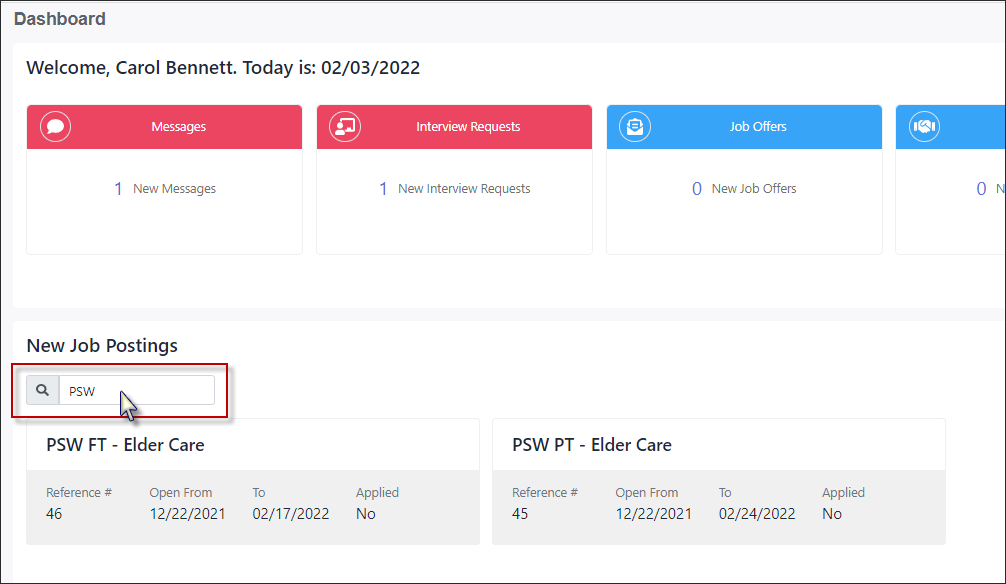
Posting Search To search for specific postings, click in the New Job Postings search window. Enter a key word. Any postings with this key word in their title will be displayed.
|
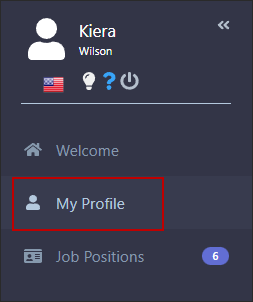
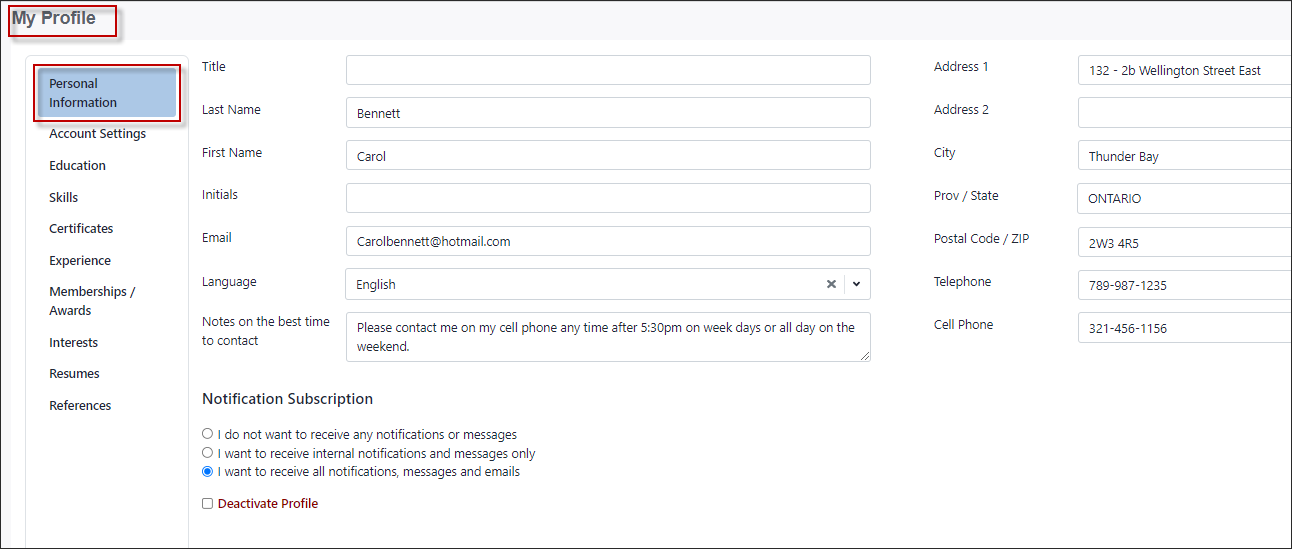
Applicants provide their information in the My Profile section. This information is key for applying to a position. ▪Click on the menu topic My Profile.
Personal Information
Your personal email address is important as you will receive alerts for Messages, Interview Requests, Job Offers and Onboarding.
▪Enter in the Notes on the best time to contact field you are availability for interviews or phone calls. ▪Include your cell phone and telephone phones to schedule telephone interviews. ▪In the Notification Subscription sections click on I want to receive all notifications, messages, and emails to allow managers to reach you.
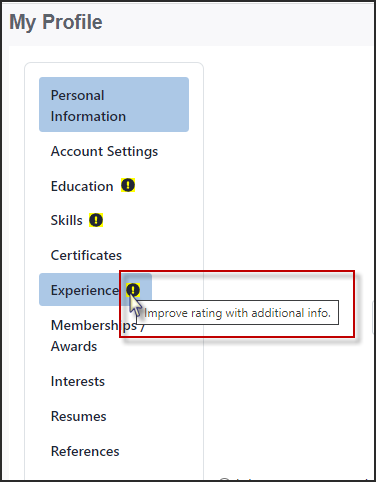
The exclamation marks will let applicants know if there is information missing on their profile. If a topic does not at least one entry, an exclamation mark alerts the applicant.
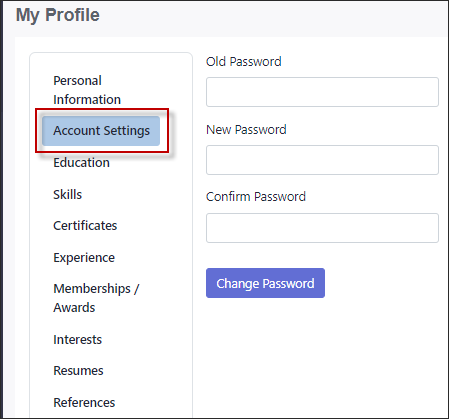
Account Settings
This section allows the applicant to change their own password.
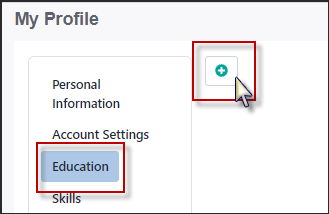
Education
▪Click on the Plus icon to add.
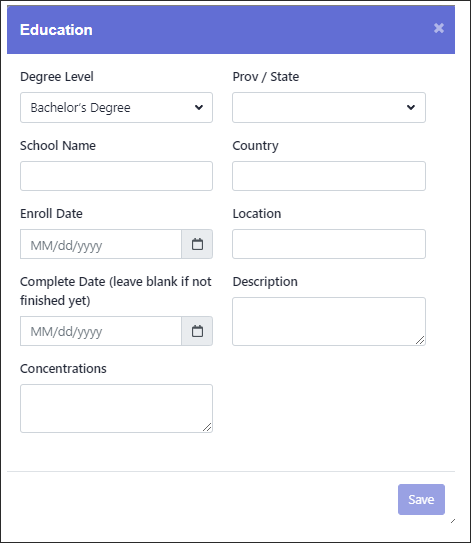
Populate the fields provided.
▪If additional room is required, click on the three horizontal lines at the bottom of the field. Hold and drag to stretch the field for more room. ▪To select a Level of Education or a Prov / State, click on the drown arrow and select from the drop-down list. ▪Click Save when done.
Skills
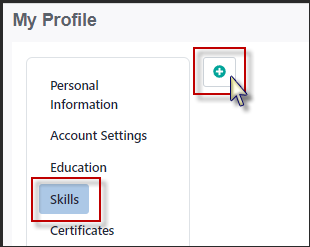
▪Click on the Plus icon to add.
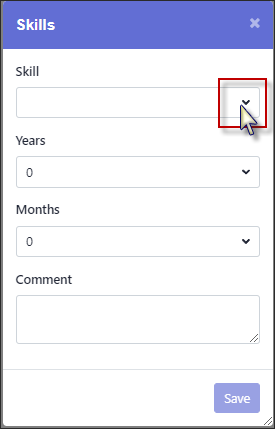
To select click on the drown arrow and select from the drop-down list.
▪Click Save when done.
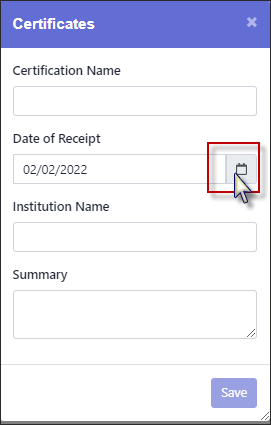
Certificates
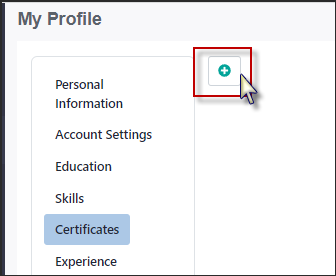
▪Click on the Plus icon to add.
▪Make sure to enter the exact name of the certificate. ▪To enter a Date of Receipt, click on the calendar and select from the calendar provided. ▪Click Save when done.
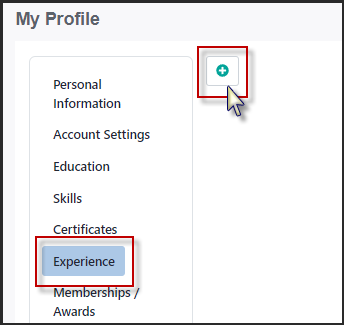
Experience
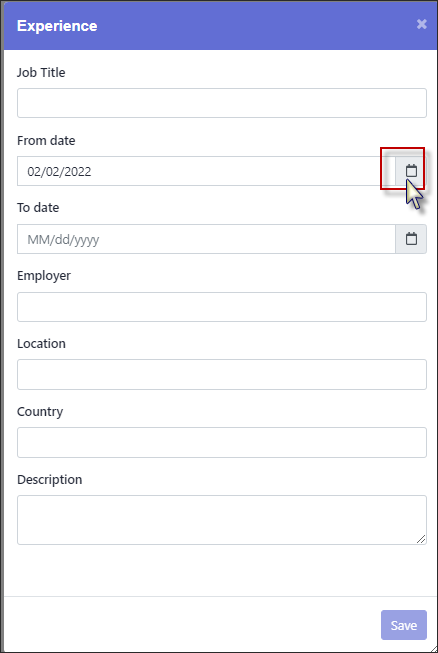
▪Click on the Plus icon to add.
If additional room is required, click on the three horizontal lines at the bottom of the field or window. Hold and drag to stretch the field for more room.
▪To enter from and to dates, click on the calendar and select from the calendar provided. ▪Click Save when done.
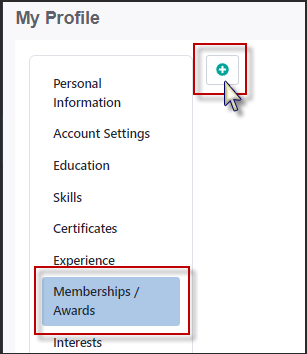
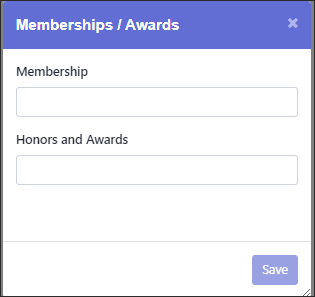
Memberships / Awards
▪Click on the Plus icon to add.
If additional room is required, click on the three horizontal lines at the bottom of the field or window. Hold and drag to stretch the field for more room.
▪To enter either Membership or Awards, click in the field a enter information. ▪Click Save when done.
Interests
Click inside the text box (outlined in red). Enter your interests separated by a coma.
Example: Archery, walking, music
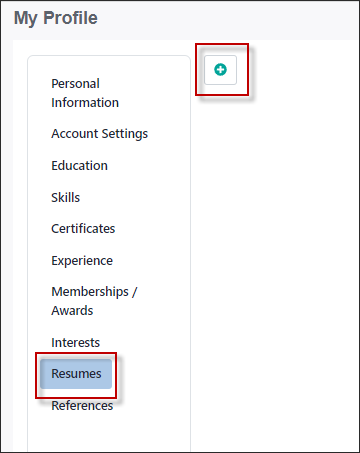
Resumes
You may upload as many resumes as you wish. When you are applying for a position, you will be able to attach the resume and cover letter to your application. You have the option to Publish, make available to managers to view without you applying or keep the resume Unpublished for your view only. When you are applying for a position, you may attach either published or unpublished resumes.
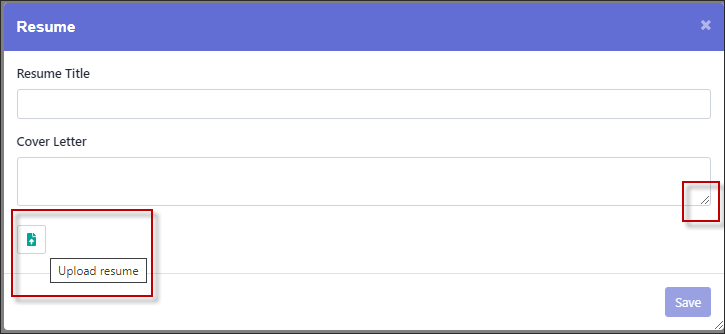
▪Click on the Plus icon to upload your resume(s).
If additional room is required, click on the three horizontal lines at the bottom of the field or window. Hold and drag to stretch the field for more room.
▪Click on the Upload icon. ▪From your computer's file directory, select the resume you would like to upload. ▪Click Save when done.
Once you have uploaded your resume(s) click on the Published link.
References
If you would like to make your references available to managers without having to access your resumes you may entered them in the Reference section.
▪Click on the Plus symbol to open a new line. ▪Populate the fields. ▪Click on the Upload symbol to attach a Reference Letter. ▪Click Save when done.
|
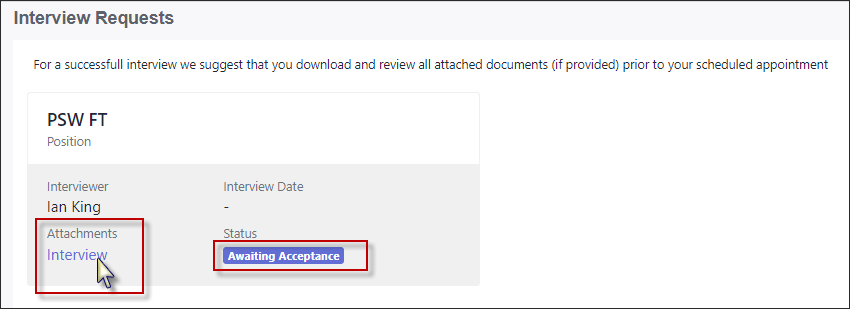
when an interview request has been sent to an applicant, they are alerted by email to the email address they provided in their My Profile. The Interview Request widget on the Welcome screen will turn red and display a one in the link. There will also be an alert on the Interview Requests main topic. Click on either the Interview widget link or the Interview Request main menu topic.
Should there be an attached document, the document title will be displayed as a link. Click on the link to open a PDF version for viewing. To open the request and view the details, click on the Awaiting Acceptance link.
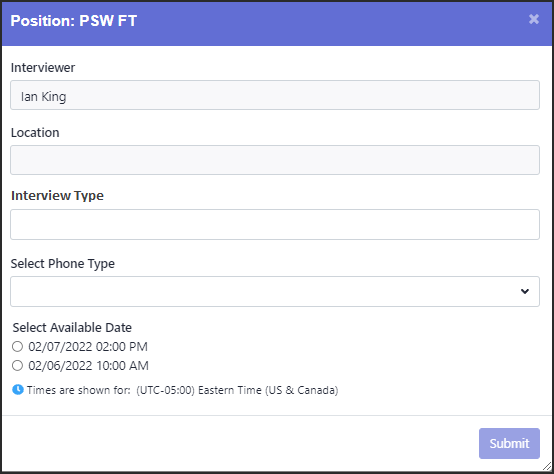
The Interview details will be displayed. The interview type will display either Telephone or In-Person. For telephones call you will be asked to select the phone you would to be called on. Example selecting Cell will send the interviewer your cell phone number entered on your profile.
▪If the interview is a Telephone interview, in the Select Phone Type you must click on the down arrow and select the phone you would like to be called at. ▪Click on the Interview date you would like to select. ▪Click Submit.
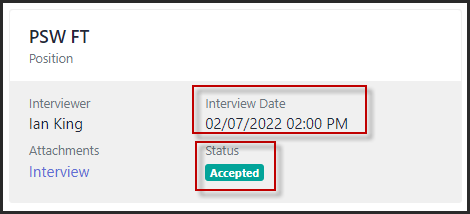
The screen will refresh displaying the accepted request. The date and time are now under the Interview date and the Status shows accepted.
You may cancel your interview by clicking on the Accepted link. This opens the detail window with a Cancel button. Click on Cancel Interview, when the screen refreshes, the status will return to Awaiting Acceptance.
|
when a Job Offer has been sent to an applicant, they are alerted by email to the email address they provided in their My Profile. The Job Offer widget on the Welcome screen will turn red and display a one in the link. There will also be an alert on the Job Offer main topic. Click on either the Job Offer widget link or the Job Offer main menu topic.
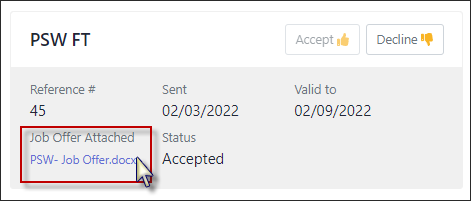
A number under the Job Offer Attached indicates a job offer is included. Click on the document link to open a PDF version for viewing.
The Valid to date indicates when the offer is for. After this date, the offer can no longer be accepted.
Once the offer has been either accepted or declined to status will change accordingly.
▪Click on Accept or Decline for the appropriate option.
|
After accepting a Job Offer, the manager will start the onboarding process. when the onboarding process has been started for an applicant, they are alerted by email to the email address they provided in their My Profile. The Onboarding widget on the Welcome screen will turn red and display a one in the link. There will also be an alert on the Onboarding main topic. Click on either the widget link or the main menu topic.
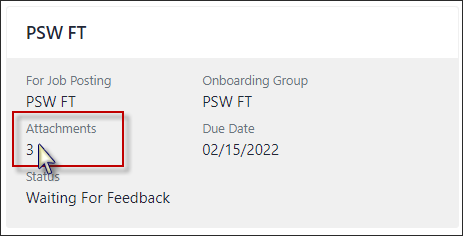
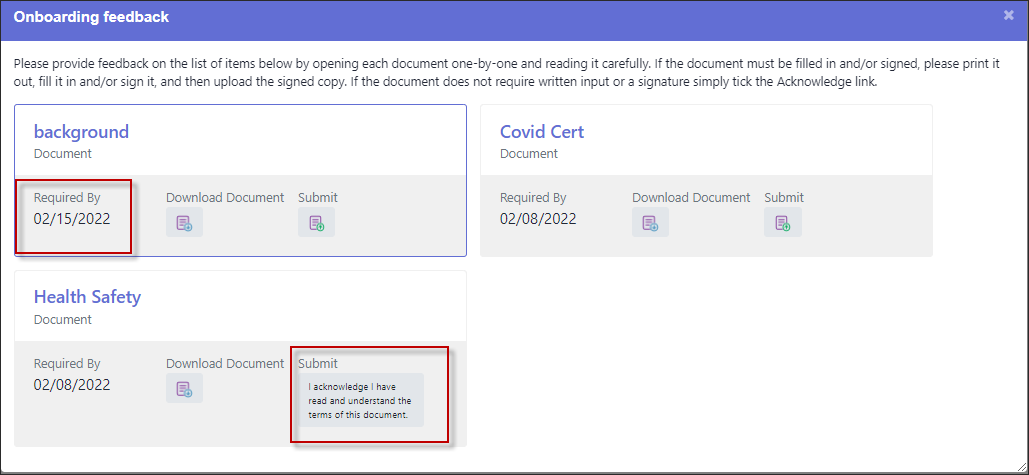
If there are documents to be managed, there will a number under the Attachment header. Click on the number to open the document page.
In this example there are three documents. Each document has its own response tile. There are two types of responses that may be asked for.
Response Types
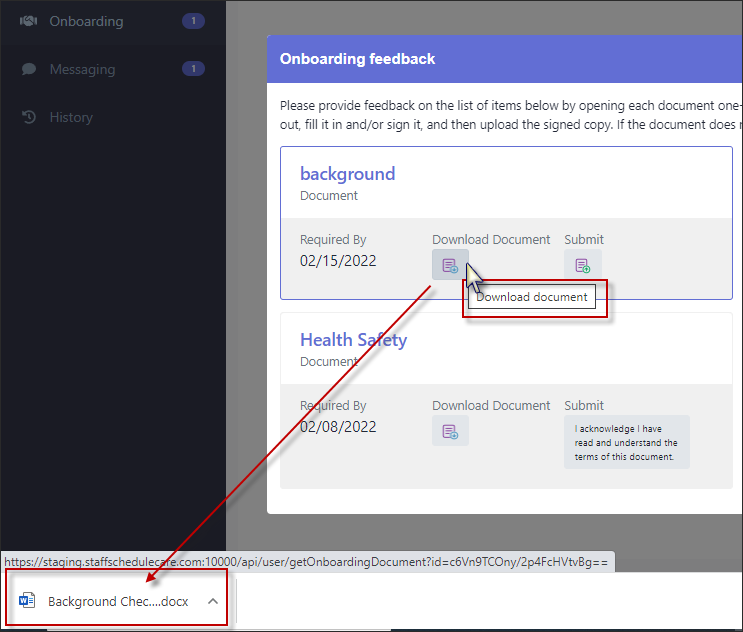
Return a Document In our example above, the Background and Covid Cert documents both require document feedback. The first step is to view he document. ▪Click on the Download Document icon.
The document will be provided in the lower left side on your screen. Click to open. Once opened, you may save it to your computer.
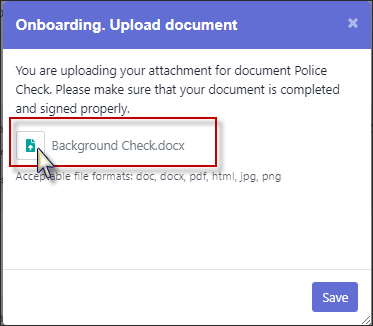
When you are ready to return the document, click on the Submit icon. On the Onboarding - Upload document window - click on the upload icon. A pop-up is opened that allows you to select a document from your computer and attach it. After attaching your document, click Save.
When the screen refreshes you will see the Uploaded status.
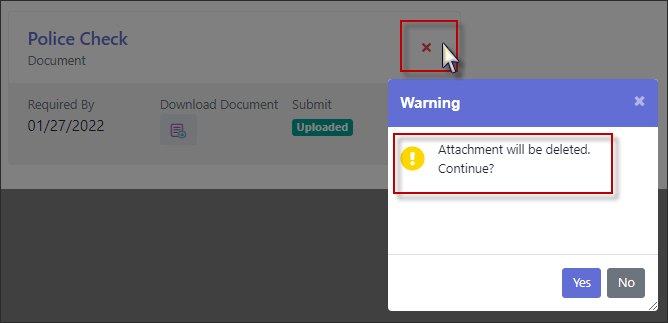
To delete an attachment, Click on the red X and select Yes. When the system refreshes, the Submit status will return to waiting.
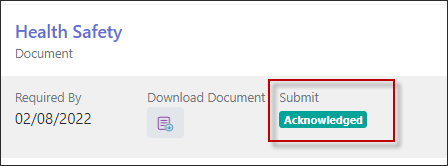
Acknowledge Review of Document To complete this, you must download the document and read it. Follow the download document instructions from the Return Document instructions. Once you have read the document and understand the content then you may indicate an acknowledge response.
▪Click on the Submit icon.
The Submit statement will refresh with Acknowledged.
|
There are occasions when messages will be sent. When a message is sent to an applicant, they are alerted by email to the email address they provided in their My Profile. The Message widget on the Welcome screen will turn red and display a one in the link. There will also be an alert on the Message main topic. Click on either the widget link or the main menu topic.
In the Message menu a white message tile will show message. Click on the tile to open the message thread. The Message will be displayed.
Click in the Reply window and type your response. Click on the arrow when done.
The screen will refresh, displaying your response below the original message.
|
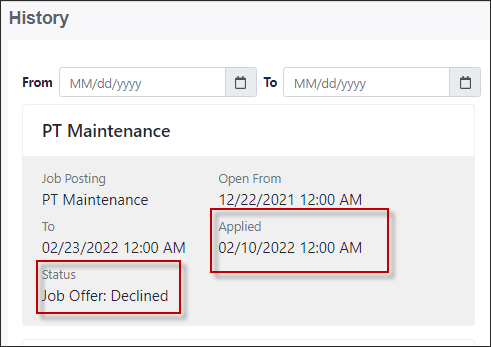
The system tracks the history for all job posting the applicant applies for. Click on the History main topic. Here you will find a tile for any position you applied for.
Check the Status field for the current state.
|
