The Import menu allows users to upload client data using a standardized import template. Uploaded data is processed and added to the relevant areas of the software, supporting efficient and consistent data entry.
▪Select the Config menu.
▪Select Setup.
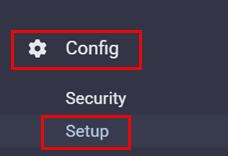
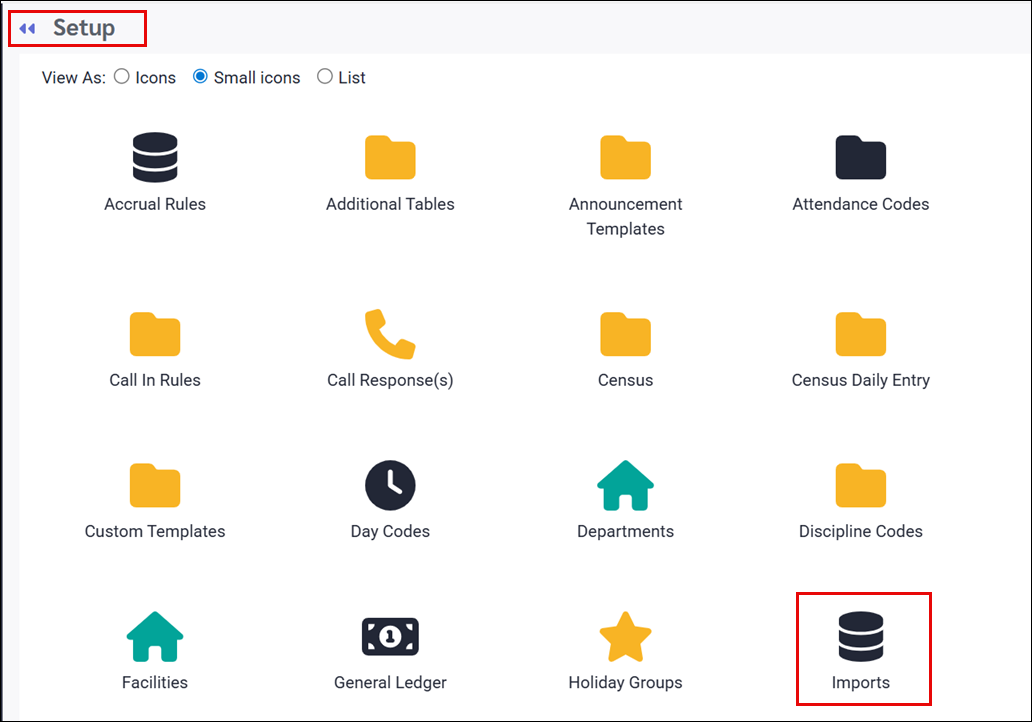
▪Select Imports.
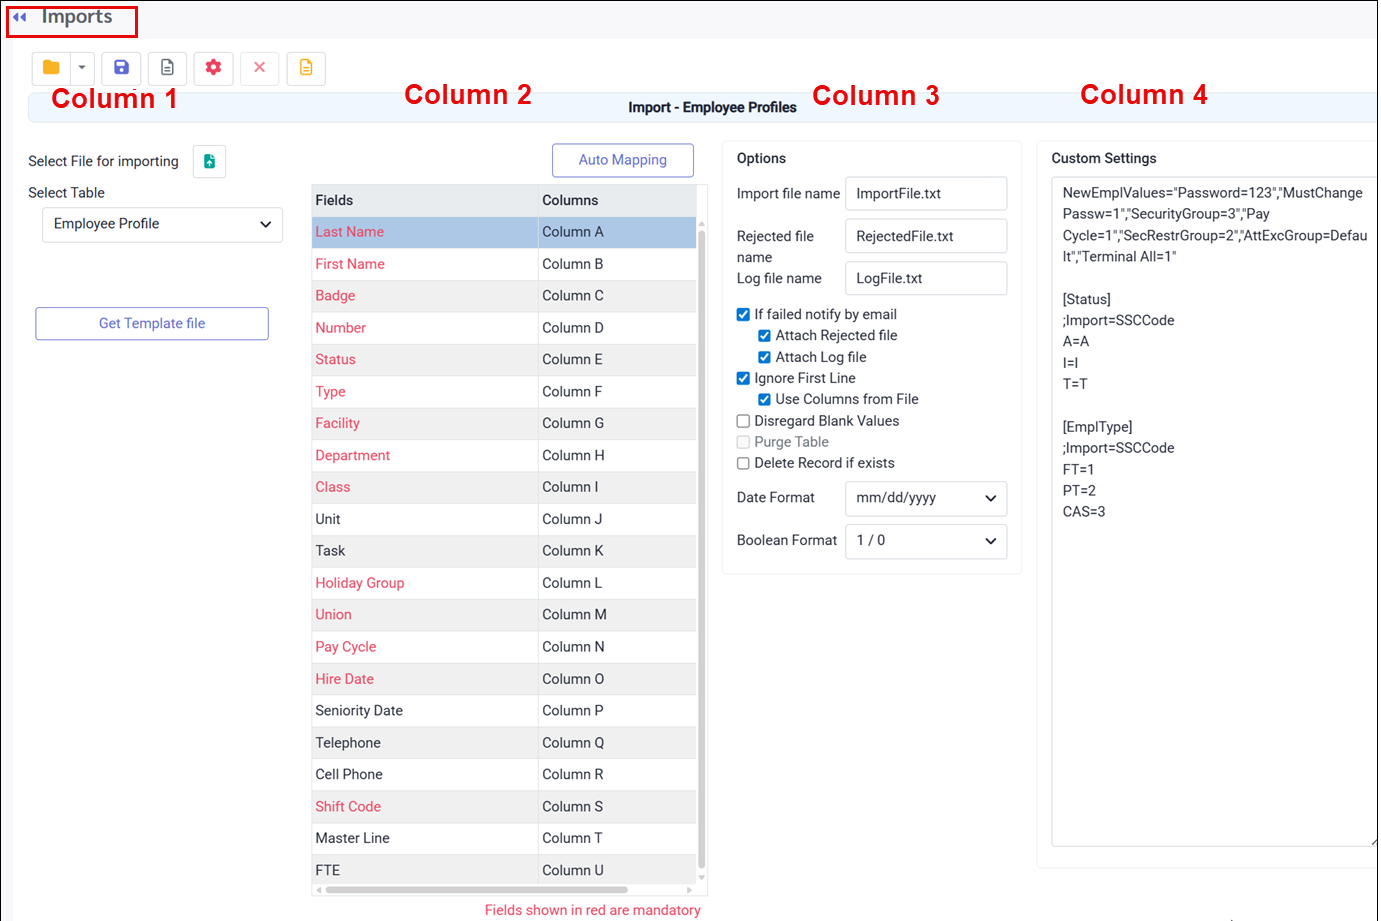
From this menu, the information is organized into four columns:
Column 1 Includes options to select the file for importing, choose the table for import, and download the import template. Column 2 Displays field names and corresponding columns from your Excel file. Mandatory fields are highlighted in red. Column 3 Contains import options, including file naming (Import File Name, Rejected File Name, and Log File Name), notification preferences (email notifications with optional log and / or rejected file attachments), and settings to ignore the first line or use column headers from the file.
Disregard Blank Values ignores empty cells in the Excel file.Applies only to: ▪Number and Date fields Does not apply to: ▪String/Text fields. These will be overwritten with blank values even when this option is enabled. Example (HR Information import): ▪Birth Date left blank results in no change. The existing value remains. ▪Address left blank results in the address being removed. The field must be populated even if no changes are intended. Rule of thumb: ▪If a field allows letters to be typed and saved such as Phone Number, it is a String/Text field and must be filled during import or it will be cleared. ▪If a column does not require changes and is not mandatory, do not map it during the import.
The following options should not be selected with Purge Table , as they will delete existing data: A. Employee Profile – Should not work with this option. B. HR Information – Should not work with this option. C. Time Bank – Deletes the Employee Bank table D. Class Wage Grid – Deletes the Class and Class Rate tables E. Master Lines – Deletes the Schedule Line and Schedule Weeks tables F. Seniority – Deletes the Service, Employee Class, and Employee Class Work tables G. Sorting Levels – Deletes the Sorting Level table Delete Record will delete the existing Pervasive record and insert a new entry into the database.Example: If an employee profile already exists and this option is selected, all employee profile data will be erased, including HR details, seniority, schedules, time banks etc. When used, the following options will modify the corresponding database tables: A. Employee Profile – Modifies Employee, Employee User Defined, Employee Department, Employee Class, and Employee Type tables B. HR Information – Modifies Employee Vehicles table C. Time Bank – Modifies Employee Bank table D. Class Wage Grid – Modifies Class and Class Rate tables E. Master Lines – Modifies Schedule Line and Schedule Weeks tables F. Seniority – Modifies Service, Employee Class, and Employee Class Work tables G. Sorting Levels – Modifies Sorting Level table Column 4 This section is for adding information like fixed required fields, or custom code, to ensure a successful import.
|
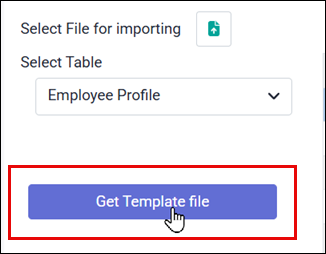
Clients must provide a template file that is ready for import. You can generate a template file by clicking on Get Template File as shown:
Template File Notes: ▪When generating a template file, existing data must be present. For example, at least one employee must exist in the database to create an HR import template. ▪Fields displayed in red are mandatory and must be completed in the template file for the import to succeed. ▪The completed template must be saved as a .CSV file in order to import successfully.
Auto Mapping You should enable Auto Mapping with the template file. When using Auto Mapping, use extra caution with HR Information, Employee Time Banks, Master Line, and Seniority imports. The exported template includes First Name and Last Name columns to help users identify records, but these columns are not used during the import process. To prevent Auto Mapping issues, the First Name and Last Name columns must either be removed or moved to the end of the CSV file. If left in place, Auto Mapping will be offset by two columns and the import will be incorrect. Once the client has completed the template file and it has been reviewed, the file is ready for import.
|
Instructions for importing to the Labour Class table:
1.Click Select file for importing (green icon) and choose the file you want to import. 2.Confirm the File Name field matches the file you selected. 3.Verify the column headers match the headers in your Excel file. 4.Ensure If failed, notify by email and Attach Log and Rejected File are turned on. 5.Turn on Ignore first line, Use Columns from File, and Disregard Blank Values. 6.Confirm your Date Format and Boolean Format match the format used in the Excel file (for example mm/dd/yyyy vs yyyy/mm/dd). 7.If needed, use Purge Table to delete all existing Labour Class Codes from the database. Please use caution as there is no undo. 8.If needed, use Delete Record if Exists to remove existing Labour Class Codes from the database. Please use caution as there is no undo. 9.Click the Process icon (red gear) at the top of the screen. 10.Review the generated report to ensure the import completed with zero errors. 11.Confirm all Labour Class setups imported successfully. Go to Config / Setup / Labour Classes and visually compare values against the Excel file. 12.Email the detailed configuration report to the client and ask them to confirm all information is accurate. Hints for Filling Out the Class Wage Table Template. Populate every column included in the import and do not remove any columns.▪Class – Class Code ▪Description – Text ▪Is Year Based – Boolean format (1 = YES for years wage progression, 0 = NO for hours) ▪Seniority Level 2 – Exact hours or years ▪Seniority Level 3 – Exact hours or years ▪Seniority Level 4 – Exact hours or years ▪Seniority Level 5 – Exact hours or years ▪Seniority Level 6 – Exact hours or years ▪Seniority Level 7 – Exact hours or years ▪Seniority Level 8 – Exact hours or years ▪Seniority Level 9 – Exact hours or years ▪Seniority Level 10 – Exact hours or years ▪Date – Date format ▪Rate Level 1 – Rate value (review number of decimals) ▪Rate Level 2 – Rate value ▪Rate Level 3 – Rate value ▪Rate Level 4 – Rate value ▪Rate Level 5 – Rate value ▪Rate Level 6 – Rate value ▪Rate Level 7 – Rate value ▪Rate Level 8 – Rate value ▪Rate Level 9 – Rate value ▪Rate Level 10 – Rate value This import is typically used for populating or updating Wage Grids, but it can also add new Classes. If new Classes are added, the Rules section will not be populated and must be configured after the import.
|
Instructions for importing employee data:
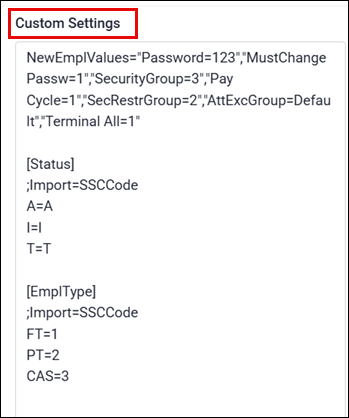
1)Click Select file for importing and choose the file you want to import (green icon). 2)Ensure the File Name field matches the name of the file you wish to import. 3)Verify the columns match the header names in your Excel file. If using Auto Mapping, be cautious with HR Information, Employee Time Banks, Master Line, and Seniority imports. The exported template includes First Name and Last Name columns for reference only. These columns are not used during import. The First Name and Last Name columns must be removed or moved to the end of the CSV file, otherwise Auto Mapping will be shifted by two columns and import incorrectly. 4.Ensure If failed, notify by email and Attach Log and Rejected File are turned on. 5.Turn on Ignore first line, Use Columns from File, and Disregard blank Values. 6.Ensure your Date Format and Boolean Format match the formats used in the Excel file (for example mm/dd/yyyy vs yyyy/mm/dd). 7.Review Custom Settings to confirm the following values are correct: Security Group Pervasive ID (may be different than 2), Shift Code (may be different than SCHED), SecRestrGroup (may be different than 2). 8.Click the Process icon at the top of the menu (red gear icon). 9.Review the generated report to verify the data was imported with no errors. 10.Once imported, check that all employees were imported successfully. Review the active count (in case the client went past their allowed number of active employees). Email the Employee Detail report to the client asking them to confirm if all information is accurate.
NewEmplValues="Password=123","MustChangePassw=1","SecurityGroup=2","Shift Code=SCHED","Pay Cycle=1","SecRestrGroup=2","AttExcGroup=Default","Terminal All=1" [Status] ;Import=SSCCode A=A I=I T=T
[EmplType] ;Import=SSCCode FT=1 PT=2 CAS=3
|
Instructions for importing HR information:
1.Click Select file for importing and choose the file you want to import (green icon). 2.Ensure the File Name field matches the name of the file you wish to import. 3.Verify the columns match the header names in your Excel file, and if using Auto Mapping, be careful with HR Information, Employee Time Banks, Master Line, and Seniority imports. The exported template includes First Name and Last Name columns for reference only, but the import does not use them. These columns must be deleted or moved to the end of the CSV file, otherwise Auto Mapping will shift by two columns and import incorrectly. 4.Ensure If failed, notify by email and Attach Log and Rejected File are turned on. 5.Turn on Ignore first line, Use Columns from File, and Disregard blank Values. 6.Ensure your Date Format and Boolean Format match the formats used in the Excel file (for example mm/dd/yyyy vs yyyy/mm/dd). 7.Click the Process icon at the top of the screen (red gear icon). 8.Review the generated report to confirm the import completed with zero errors. 9.Affter import, verify all Employee HR Information records imported successfully, including a visual scan of the Personnel screen to compare values against the Excel file. 10.Email an Employee Detail report to the client and ask them to confirm all information is accurate. Be sure the report includes all fields that were imported.
Hints when filling out the HR Information Excel template:Populate each column that will be included in import (do not remove any columns).
▪Number (Employee Number - value) ▪Last Name – (Text) ▪First Name – (Text) ▪Address – (Text) ▪Address 2 – (Text) ▪City – (Text) ▪Province – (2 Letters… EX: ON) ▪Postal – (Text) ▪Country – (Text) ▪Initials – (Text) ▪Middle Name – (Text) ▪Email – (Text) ▪Birth Date – (Date Format) ▪Seniority Date 1 – (Date Format) ▪Seniority Date 2 – (Date Format) ▪Emerg Name – (Text) ▪Emerg Relationship – (Text) ▪Emerg Home Phone – (10 digits format) ▪Emerg Work Phone – (10 digits format) ▪Emerg Cell Phones – (10 digits format) ▪Physician – (Text) ▪Physician Work Phone – (10 digits format) ▪Physician Cell Phone – (10 digits format) ▪Add Phone1 – (10 digits format) ▪Add Phone2 – (10 digits format) ▪Mass Messaging - (Boolean Format…0 = No MM, 1 = TEXT, 2 = PHONE CALL) ▪Auto Punch – (Boolean Format… 1 = YES, 0 = NO) ▪Bio Impaired – (Boolean Format… 1 = YES, 0 = NO) ▪UDF 1 – (Text) ▪UDF 2 – (Text) ▪UDF 6 – (Text) ▪UDF 7 – (Text) ▪UDF 11 – (Text) ▪UDF 12 – (Text) ▪Make – (Text) ▪Model – (Text) ▪Color – (Text) ▪Year – (Date Format) ▪License – (Text)
|
Instructions for importing Master Lines:
1.Click Select file for importing and choose the file you want to import (green icon). 2.Ensure the File Name field matches the name of the file you wish to import. 3.Verify the columns match the header names in your Excel file. If using Auto Mapping, be careful with HR Information, Employee Time Banks, Master Line, and Seniority imports. The exported template includes First Name and Last Name columns for reference only. The import does not use these columns.The First Name and Last Name columns must be removed or moved to the end of the CSV file, otherwise Auto Mapping will shift by two columns and import incorrectly. 4.Ensure If failed, notify by email and Attach Log and Rejected File are turned on. 5.Turn on Ignore first line, Use Columns from File, and Disregard blank Values. 6.Ensure your Date Format and Boolean Format match the formats used in the Excel file (for example mm/dd/yyyy vs yyyy/mm/dd). 7.If applicable, use Purge Table to delete all existing Master Lines in the NCC database. Please use caution as there is no undo. 8.Click the Process icon at the top of the screen (red gear icon). 9.Review the generated report to confirm the import completed with zero errors. 10.After import, verify all Master Lines imported successfully by reviewing the Master Schedule screen and visually comparing multiple lines and schedules to the Excel file. 11.Email a Schedule By Line Report to the client and ask them to confirm all information is accurate.
Hints when filling out the Master Line Excel template. Populate the following columns in the template: ▪Employee Number (only if the employee currently owns this master line) ▪Line Code used to identify the rotation created. Do not use special characters. ▪Line Description for additional text to better identify the rotation. ▪Group Name (for UFM) to ensure UFM groups are configured before importing. ▪Line Count for the number of employees required for this line. ▪Line Days is the length of the master line in days. Always ensure the value is a multiple of 7 to cover full weeks. ▪Week must separate each week of the master line as a separate row. ▪Facility, Department, Class, Position, Unit, Task codes entered must match the database exactly. ▪Day Codes (Monday through Sunday) must match the database exactly.
Important: Confirm the company’s week start date (Monday vs Sunday) in Company Profile before importing. If the week start date does not match, the day alignment will be incorrect.
If using Auto Mapping, be cautious with HR Information, Employee Time Banks, Master Line, and Seniority imports. The exported template includes First Name and Last Name columns for reference only, but the import does not use them. These columns must be removed or moved to the end of the CSV file, otherwise Auto Mapping will shift by two columns and import incorrectly.
|