Allows you to set up additional areas of tracking by setting up lists of anything specific to your facility and then assigning them to employees. You may run an Employee Tracking List to follow up on this configuration.
To create a Tracking List:
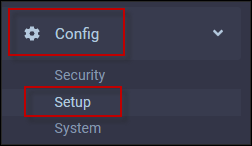
▪Select the Config menu.
▪Select the Setup menu.
▪Select Tracking Lists Settings.

▪Click on the plus symbol (+) to create a new Tracking List. A new empty row is displayed at the bottom of the grid.

Header Row
The column headings in the header row define how the columns are formatted. i.e., Hours1 and Hours2 will format any entry into HH:MM.

Columns
In the fields you enter the column headers you will be using for this field. If you leave a field blank that column will not be part of the Tracking List.
Name
Tracking List name
Code1
Enter the caption for the UDtable1 field if you are going use the one of the five tables.
UDtable1
Click in the UDTable1 and select a table from the drop-down list.
Code2
Enter the caption for the UDtable2 field if you are going use the one of the five tables.
UDTable2
Click in the UDTable2 and select a table from the drop-down list.

Hours1 and Hours2
The field format is for hours. i.e., 11:22.
Float1 and Float2
The field format is for numbers with decimals. i.e., 12.1234
Interger1 and Interger2
The field format is for whole numbers. i.e., 2021
String_1 and String_2
The field format is text. i.e.., Done Nov 2021
Sample Setup
Sample Configuration
The new Tracking List is named Evac Coverage. the columns used are:
1.Code1 - This area is the caption for the column UDTable1.
2.UDTable1 - selected UDTable1
3.Interger1 for the Year
4.String1 for Training Y/N
5.String2 for the assigned backup.

Sample Tracking List Created Above
We can see the four columns we defined. Remember, Code1 is the caption for the UDTable1 column. The manager can select the tracking list Evac Coverage from the Select List for Tracking drop-down list.

In the Area column, clicking in the field opens the UDTable1 as a drop-down to select from. For the remaining fields follow the data entry formatting defined by the columns used in the setup.
