The Seniority Calculation feature is used to update both the current home class Seniority (year-to-date), Posted Seniority (usually done twice a year), and Worked Class Seniority (a breakdown by ALL classes worked).
For description of toolbar functions see Payroll Processes.

To access the Seniority Calculation menu:
▪Select the Payroll menu. ▪Select Seniority Calculation menu.
The following menu will appear:
The options of the Seniority Update menu include:
Life Update Date If you run the Seniority Calculation after every pay period, this should be the end date of the LAST pay period processed. Minimum Start Date This field is only relevant for Seniority that is being updated for the FIRST TIME and should reflect the date corresponding to when you want the calculation to begin. Using the drop-down arrow, select which option you would like to use as the Start Date. Process Choose the item that you need to calculate: Standard Seniority (current), Post Standard Seniority, Work Class Seniority or Post Worked Class Seniority. You may choose to run multiple processes at once, for example updating Standard Seniority and posting Standard Seniority at the same time.
Note: Please ensure that you are updating BOTH the Standard Seniority AND the Worked Class Seniority each time you run the Seniority Calculation process.
Recalculate If ticked, the employee’s seniority hours will be recalculated from the user definable From Date to the Life Update Date (as defined above). The system will add all the hours between these dates that are configured to contribute to seniority. Any hours that were imported or manually adjusted, and therefore not visible in the hours table will be excluded. Please see Key Information below.
Recalculate YTD Only If ticked, the employee's YTD hours and years will be correctly adjusted either up or down based on the hours found in the system from the life date to the start of the current year. The current year start date is determined by the Year Start Date set during the seniority configuration. The From Date field in the lower portion of this menu, does not apply to the YTD recalculation option. Please see Key Information below.
|

Filtering your Seniority Update
You may filter the process to specific employees, department or classes using the Filter.
Processing Seniority
▪Define your settings (or chose from the saved settings). ▪Set your Life Update Date. This date will normally be the last date of the most recent pay period you are updating seniority for. ▪Click the Preview icon to review before processing. ▪Click the Process icon to complete the calculation.
Report Output Once the system has finished processing the calculation a report will preview to screen.
We can see from the example below, that the employee's Standard Seniority was updated in their Employee Profile. Her Active Seniority now shows as 828 Calendar Days.
If we look at the History field, we can see that the seniority was updated but not yet posted.
|


| Reprocessing Seniority when Changing Unions |
When an employee changes unions, for example a Personal Support Worker (PSW) who becomes a Registered Nurse (RN), you may want to retain a record of total accumulated seniority hours in the previous role before resetting the counter for the new one. This is typically required when seniority hours do not carry over between unions.
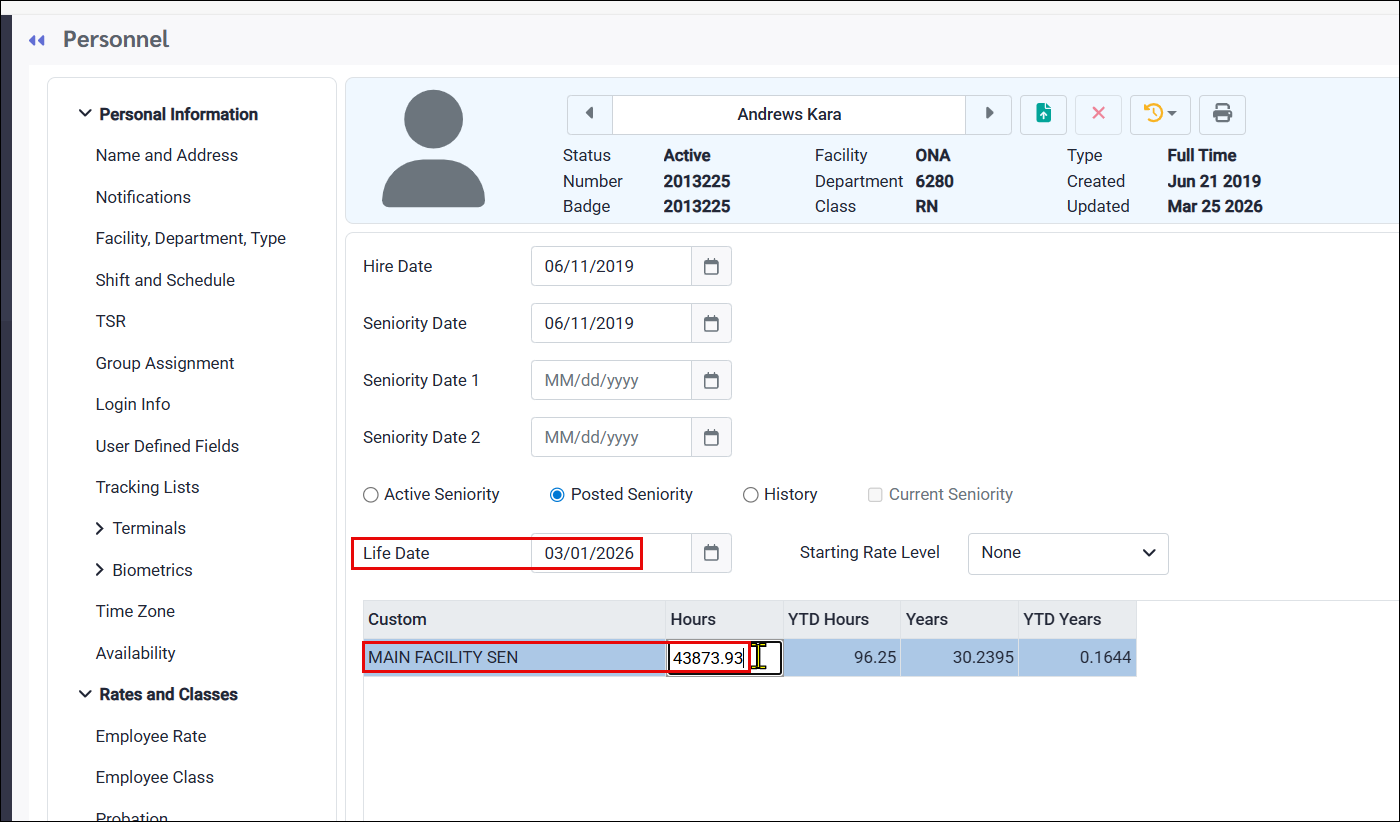
In the following example, an employee transitioned from PSW to RN on March 1st. By March 22nd, the seniority hours had already been updated, combining both PSW and RN hours into a single cumulative total. The process below will:
1. Save the PSW hours as a historical record in the History menu 2. Clear the hours as of the start date of the new position (March 1st). 3. Resume accumulation from zero going forward.
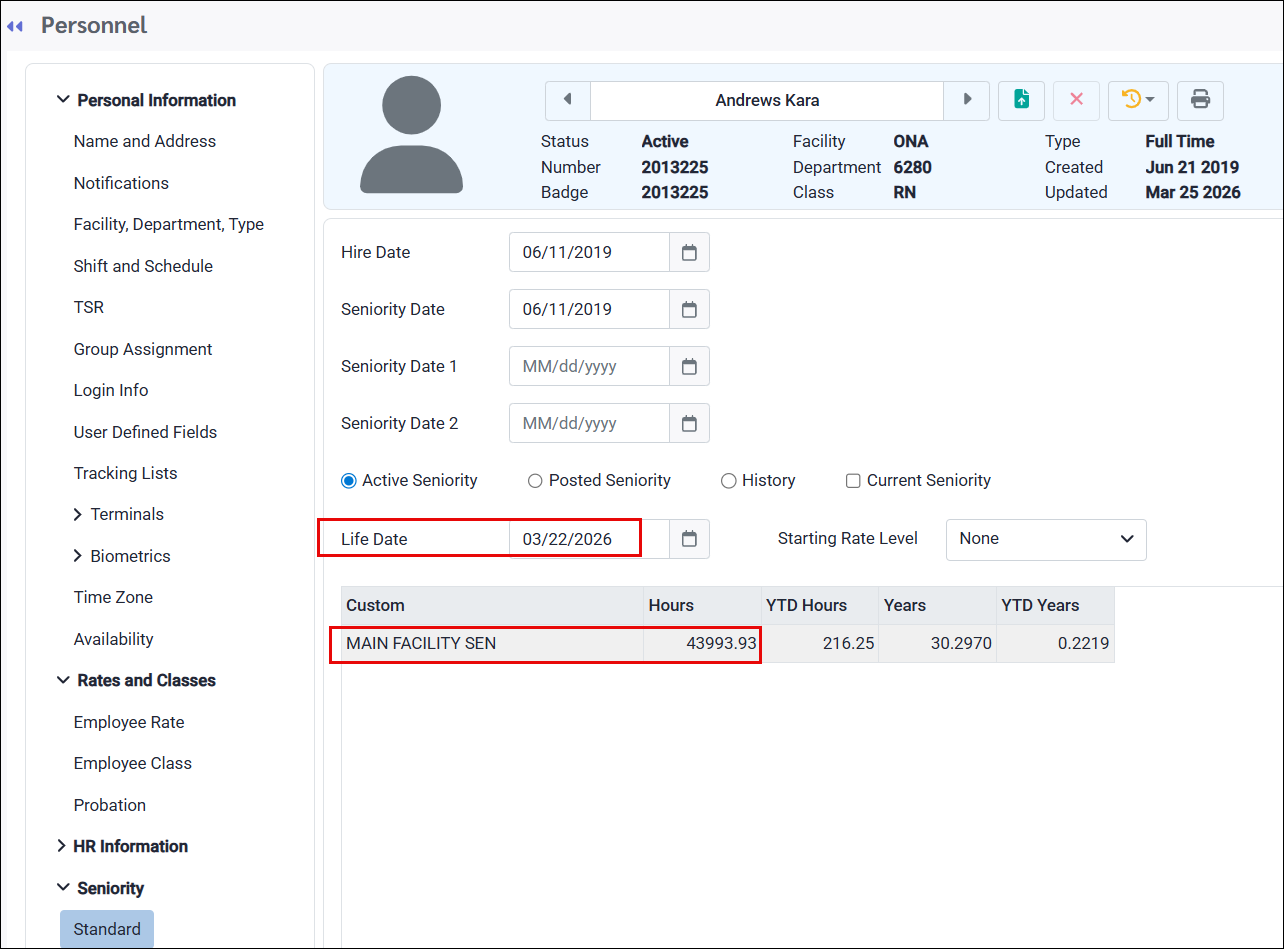
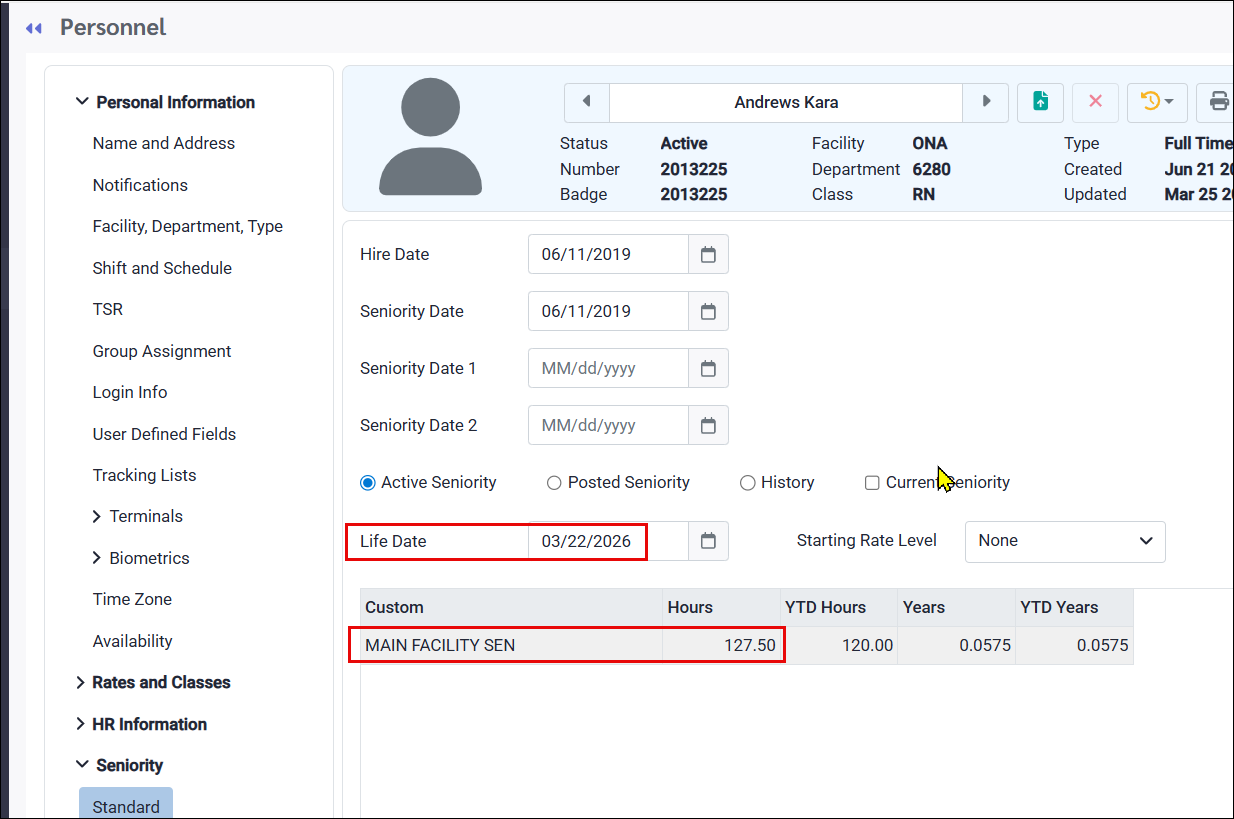
The employee's seniority was updated to March 22nd, as shown in the following screenshot:
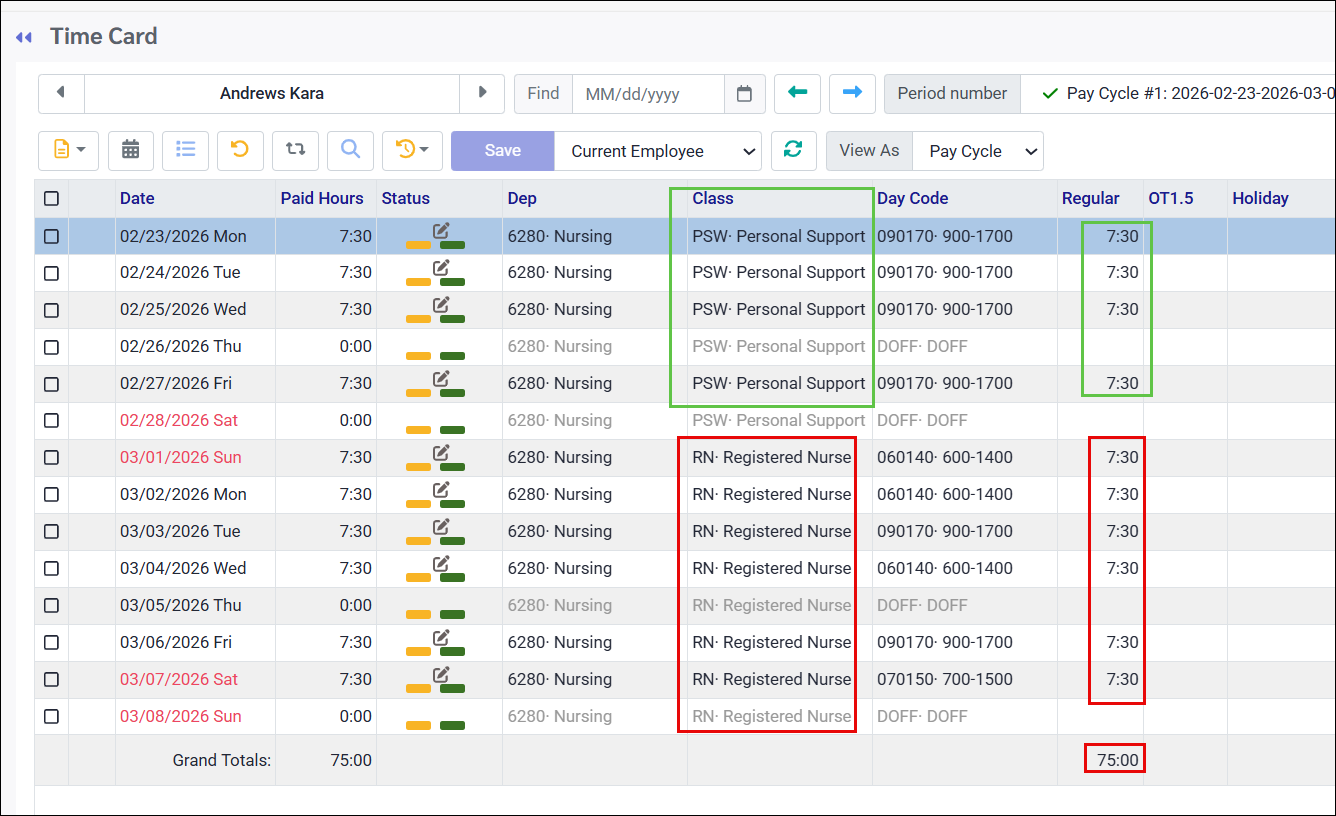
The employee's hours as an RN are shown below, from March 1st to March 22nd, totaling 127.50 hours (red):
To create a historical record as of February 28th and clear hours from March 1st forward, follow the steps below:
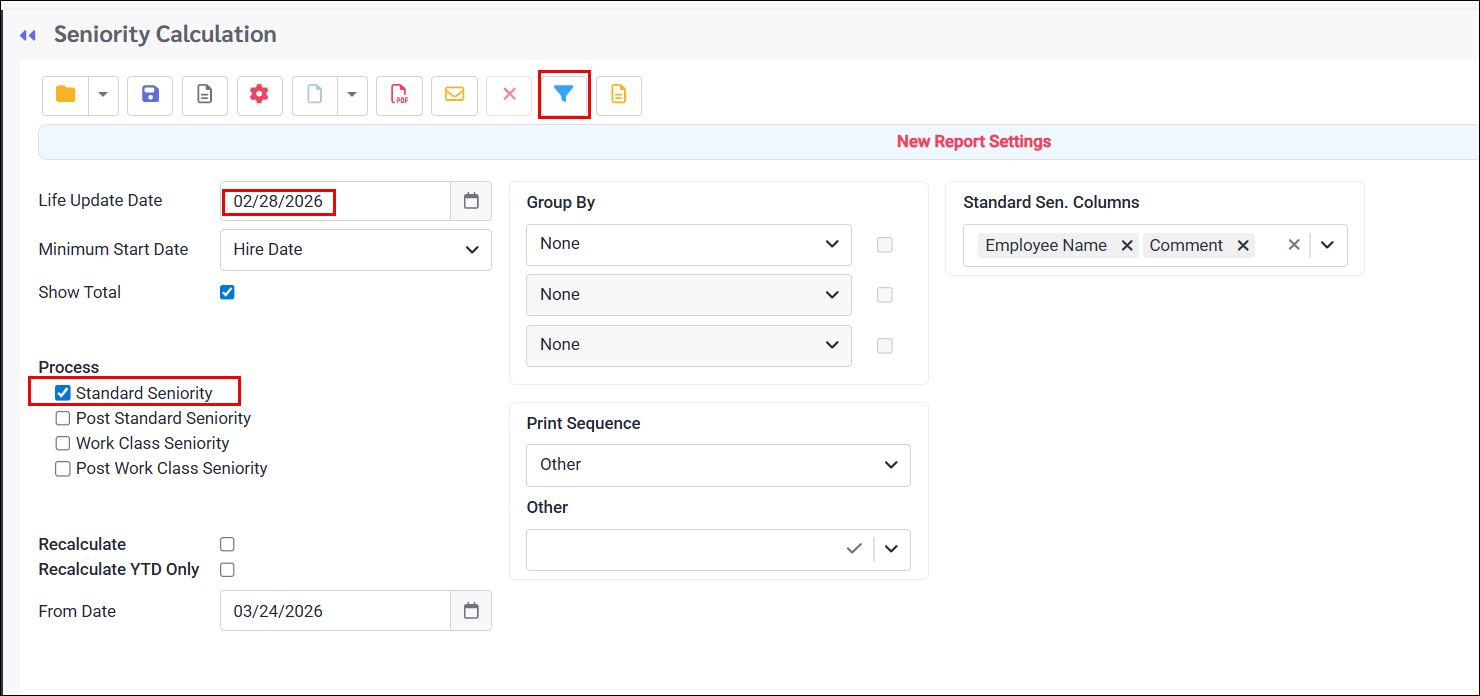
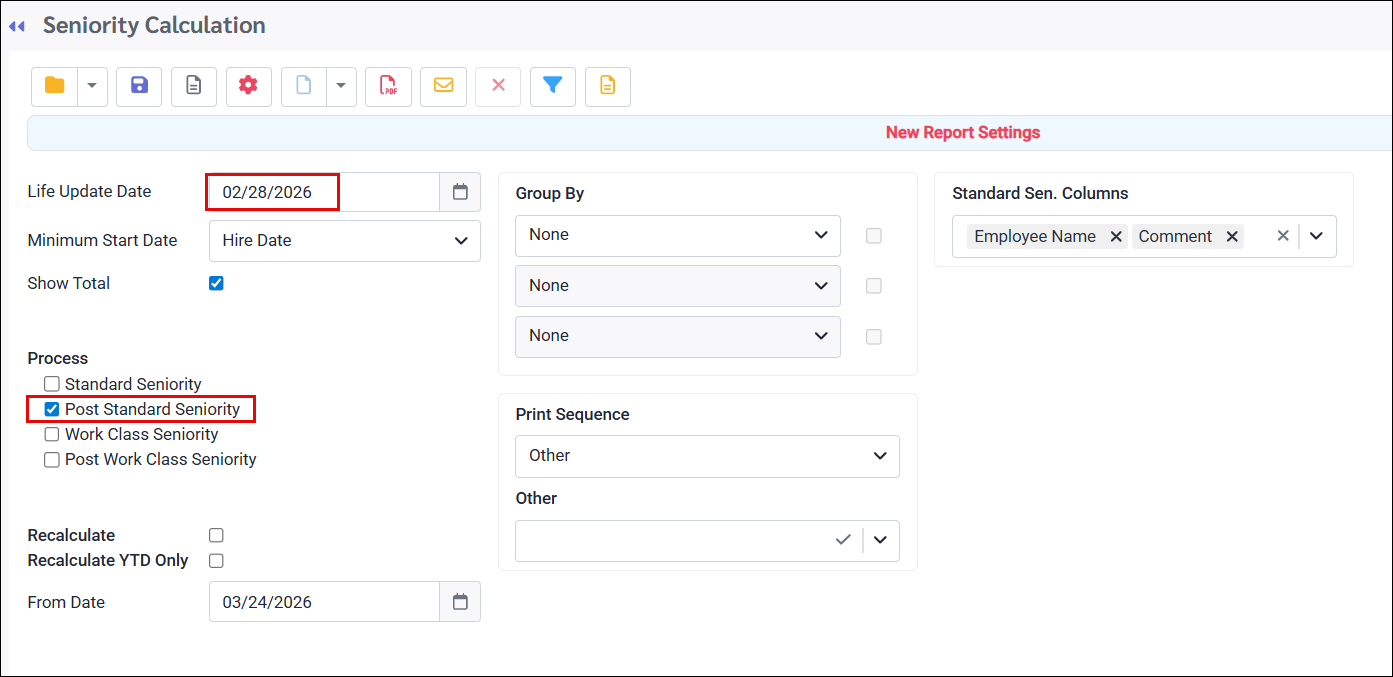
1.Navigate to Payroll / Seniority Calculation. 2.Filter the seniority process for the relevant employee (filter icon will be blue). 3.Run the Standard Seniority process using the last date of the employee's previous position (February 28th in this example). 4.Repeat this process selecting only Post Standard Seniority, still using the February 28th date (lower screenshot). This will create the required historical record. 5.Repeat steps three (3) and four (4), this time using March 1st as the date, for both the Standard and Post Standard Seniority processes.
Back in the Personnel menu, make the following adjustments:
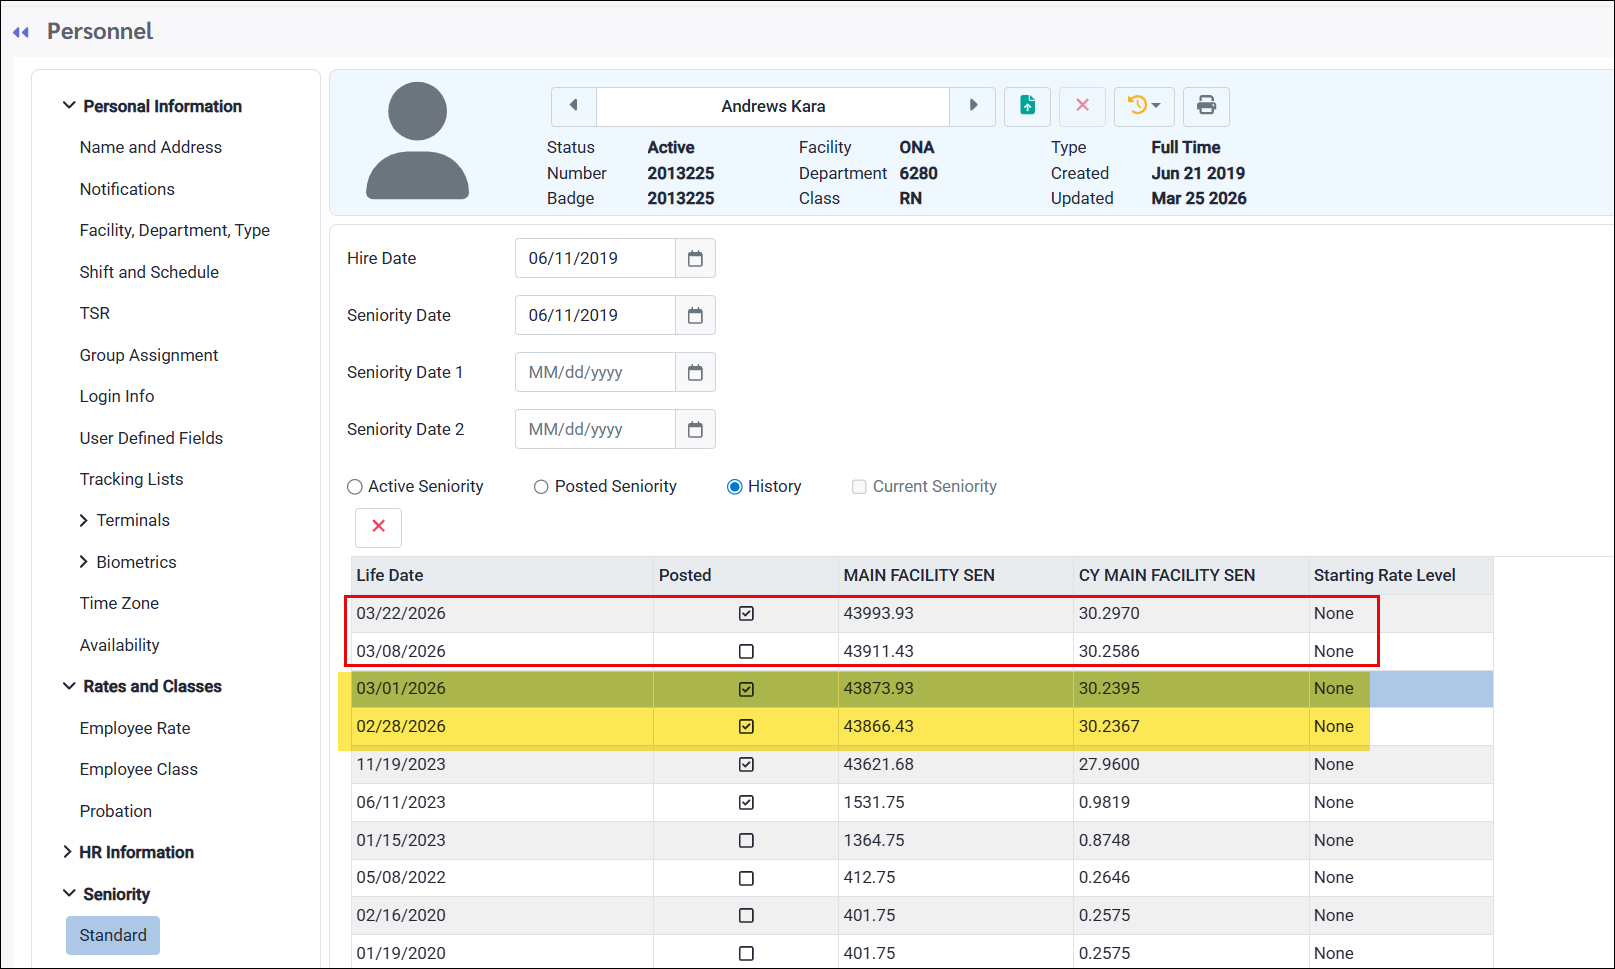
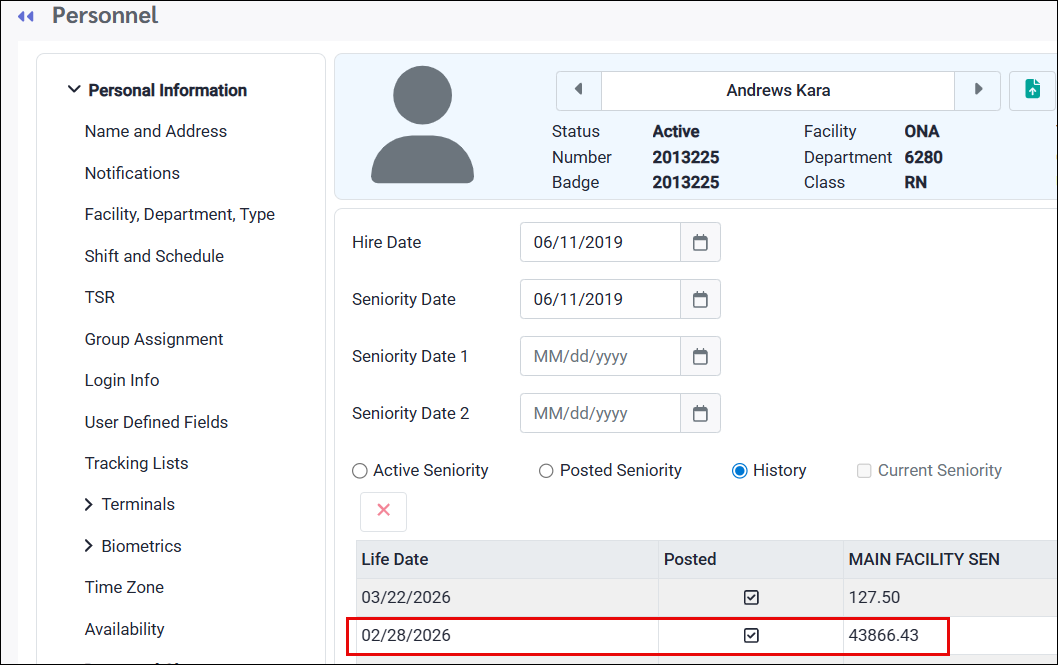
1.Click the History radio button in the Seniority menu. You will see two new records for February 28th and March 1st (highlighted in yellow below). 2.Delete any pre-existing records above the two new entries (March 8th and March 22nd, boxed in red below) by clicking on the line to highlight it and selecting the red X above it. 3.The most recent record, which should now be March 1st, will be visible on the main menu.
4.You will get a message notifying you that the Active Seniority will be overridden with the posted value because the date is the same. Click OK. You will now have cleared the seniority for the new class (RN) to start tracking from zero. 5.When you reset the hours to zero for the date the new position starts, remember to manually add the hours for that day. In this case, we will need to add 7.5 hours for March 1st since the employee worked a shift that day. 6.The process is now complete. The employee (below) now has a record on Feb 28th for the cumulative hours in her previous role and a clean slate to start tracking hours in her new role. 7.Remember to run any required reports.
|