The StaffScheduleCare reports use the standard reports toolbar. This section will cover how to access Reports and how to use the toolbar.
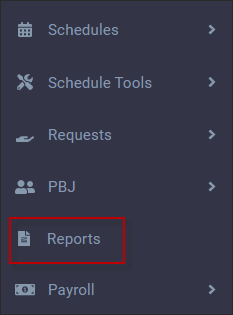
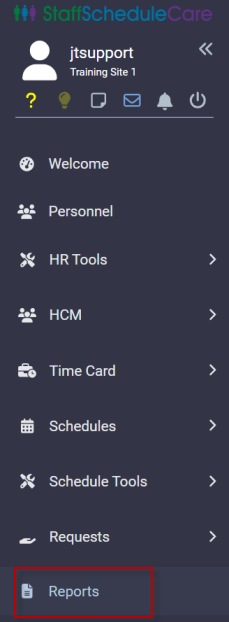
To access reports, select the Reports option.
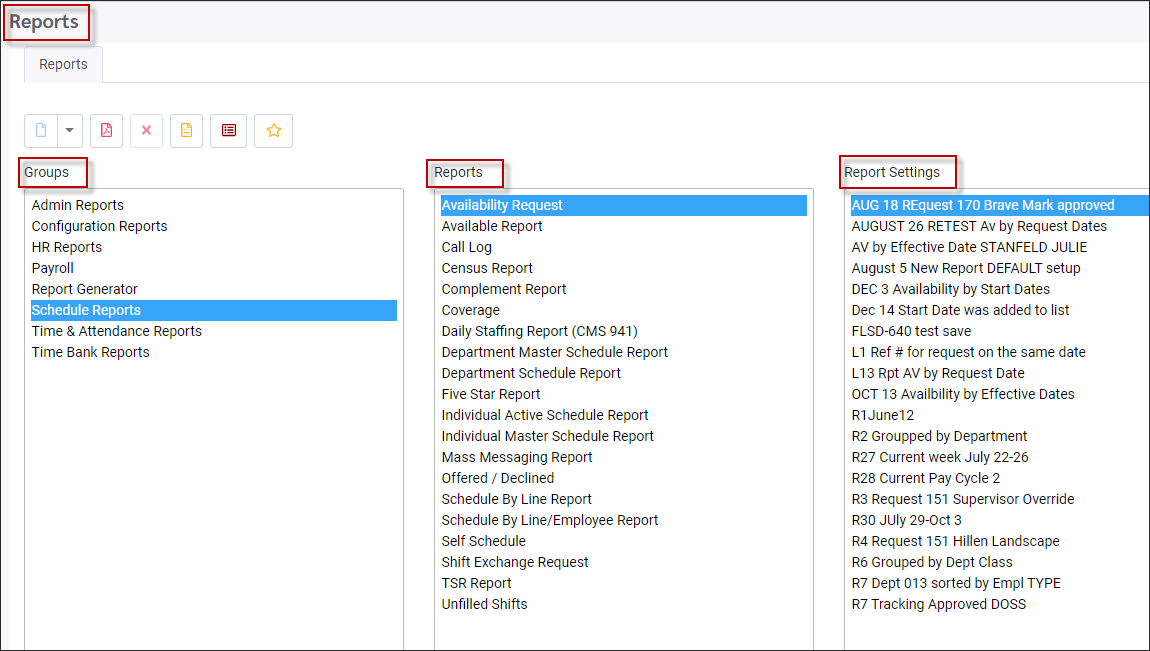
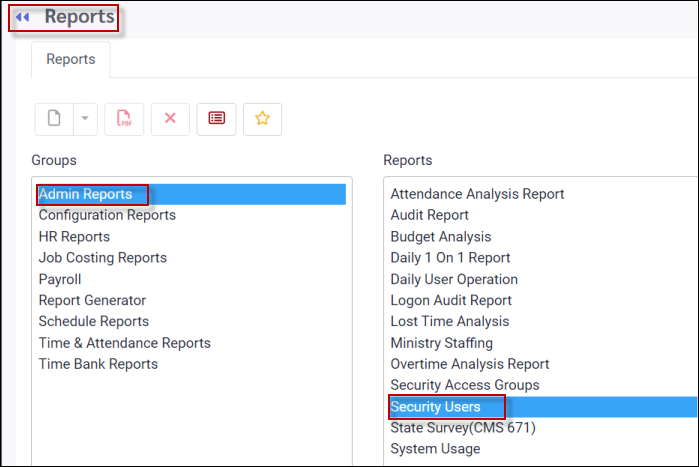
StaffScheduleCare report types are listed under Groups. The individual reports for the selected group are shown in the Reports section. Any saved settings for the report are shown in the Report Settings column when the report is highlighted.
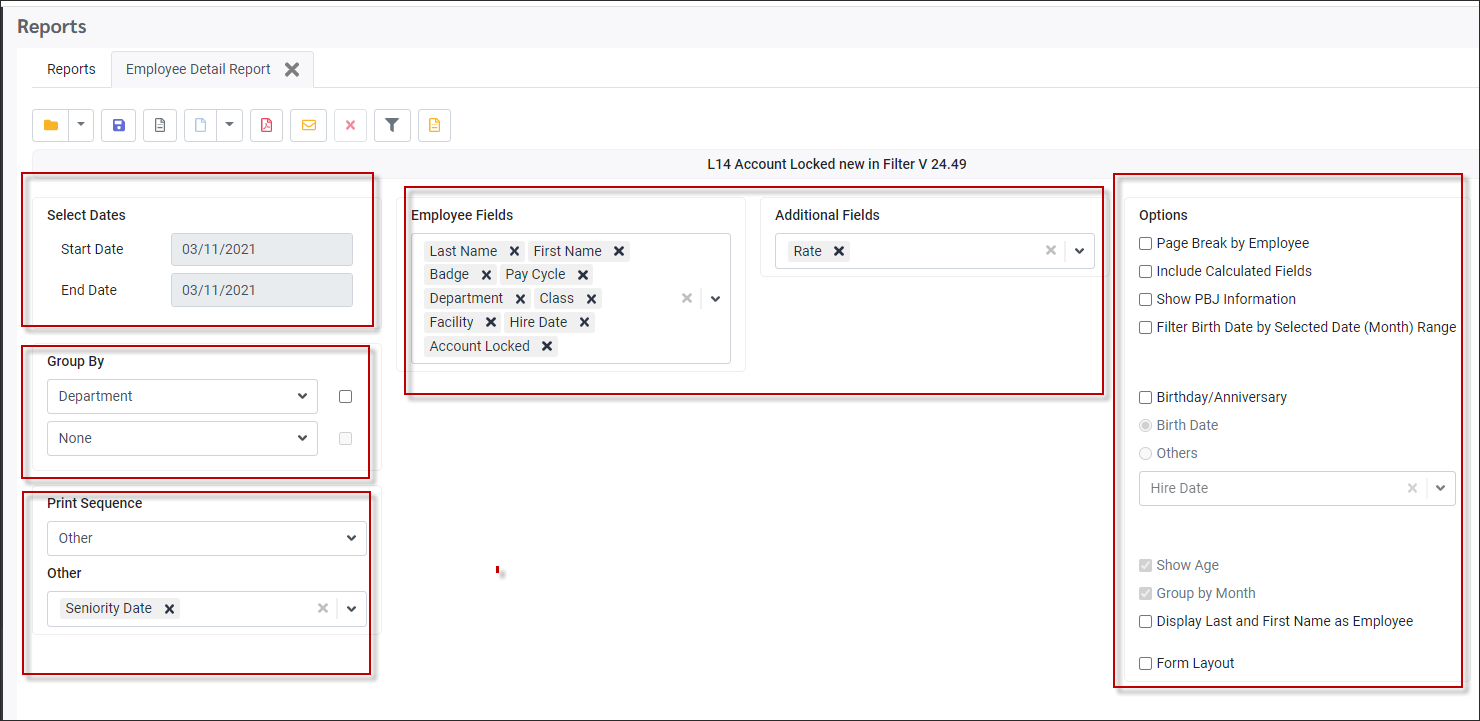
Each report has a Report Detail menu where you may select different options to create your report and save it for future use.
Sample Detail menu:
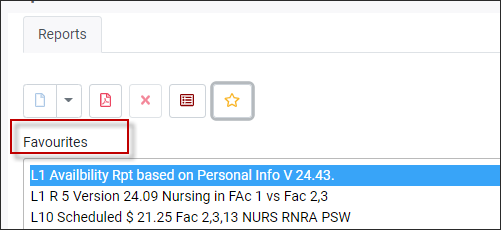
If reports have been saved as Favourites, clicking on the Star icon from the Reports main menu would provide a list of these reports. To close the list, click on the star icon again.
|
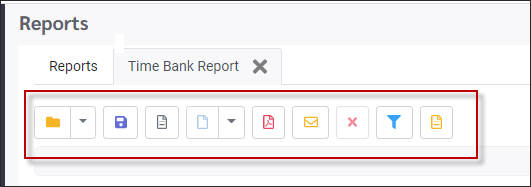
The toolbar options below will vary depending on the selected report group or report. Hover over any of the following options to see the tool tip.
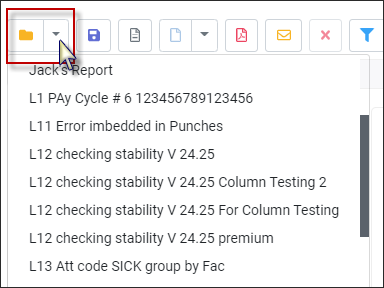
Icon Descriptions Open Report Settings This option allows you to select from saved reports. Click the arrow to view the list, which is the same as the one shown in the main Report Settings menu.
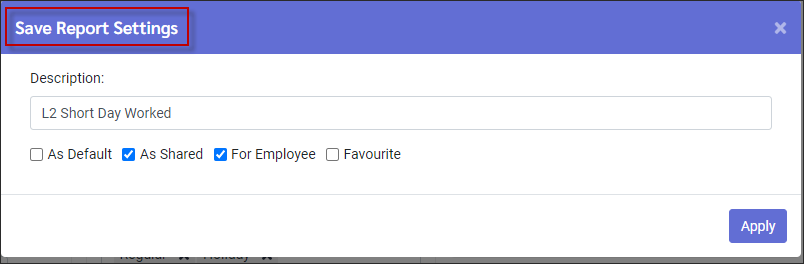
Save Report Settings Click this option to save a new or modified report.
On the Save Report Settings window you may change the Description field to save the report under a different name.
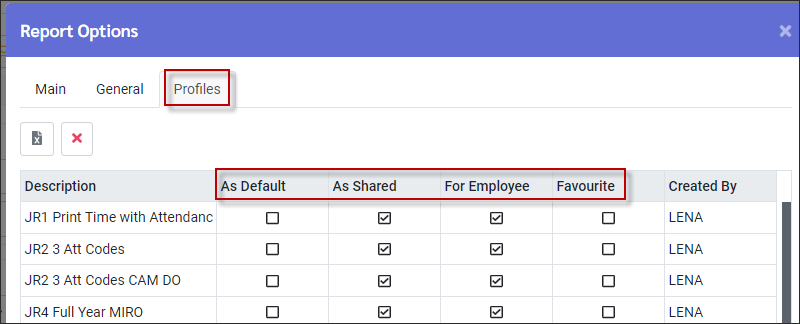
As Default Tick this box to select this setting as your default for this Group / Report.
As Shared If ticked, this report may be shared (accessed by) other users (managers).
For Employee If ticked, this report may be accessed by employees.
Favourite Tick to include this report in your Favourites list.
New Report Settings Click this option to clear your report settings and access the default setup menu.
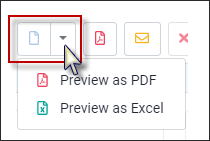
Preview Click on the drop-down arrow for the different options to have the report displayed by.
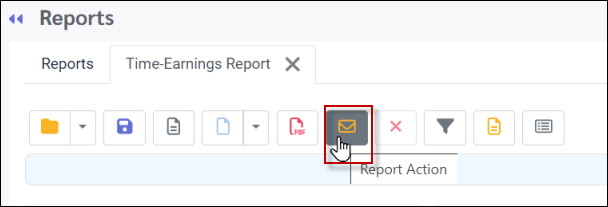
Report Action Click this option to email your report. Remember that the receiver's email address must be set up under the Options / General tab.
Cancel Running Report Click on the X to cancel a report that is running.
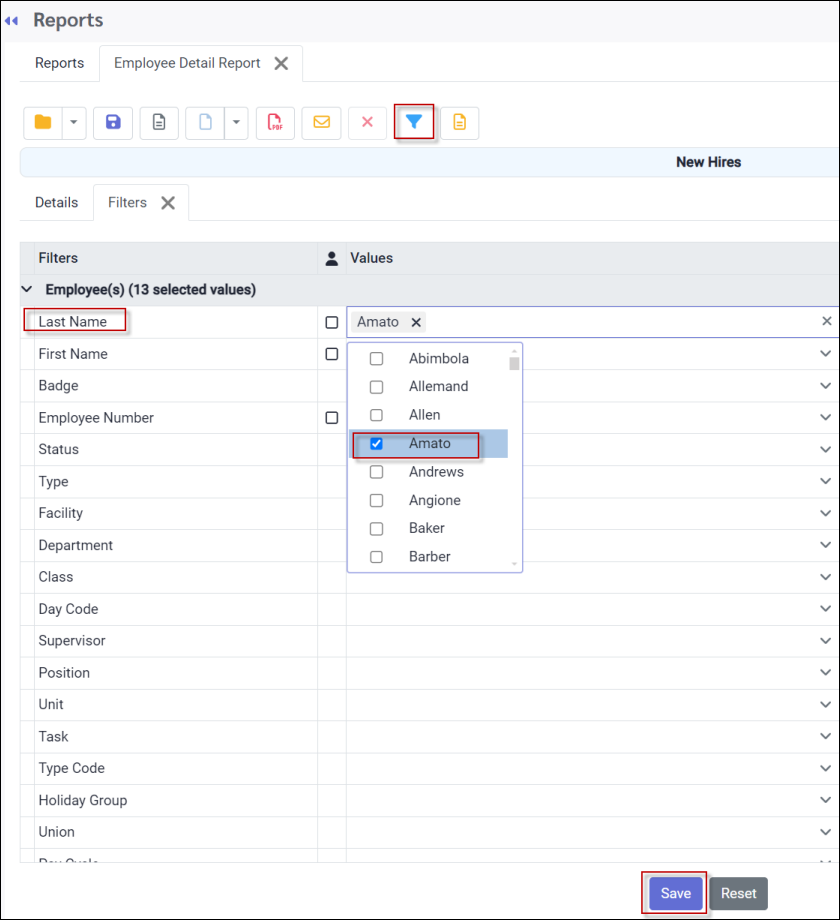
Filter Click on the filter icon (funnel) to open the Filter tab. The report may be filtered by the options available for the Group and report type you are using. Most reports will have the standard options, however, there are additional options for specific reports. The filter icon will appear blue if a filter has been set.
Example 1 To run the report for one employee click on Last Name field and select the employee in the value section (shown below).
Example 2 To run for one department click on the Departments field and select the department in the value section (setting not shown below).
When filter(s) is complete click Save.
Processing
The Process icon is not part of the regular Reports toolbar; however, it appears on the report toolbar of the calculation menus such as Holiday Calculation, Assigned Hours or Time Bank update. Before clicking this icon be sure to run a report preview to see the changes that will occur based on the options configured. See Holiday Calculation menu below:
|


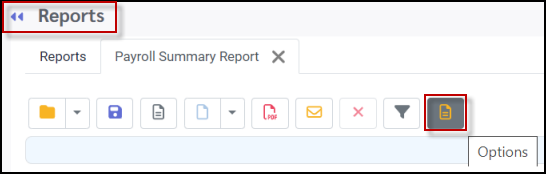
Select the Options menu as shown:
The following menu will appear:
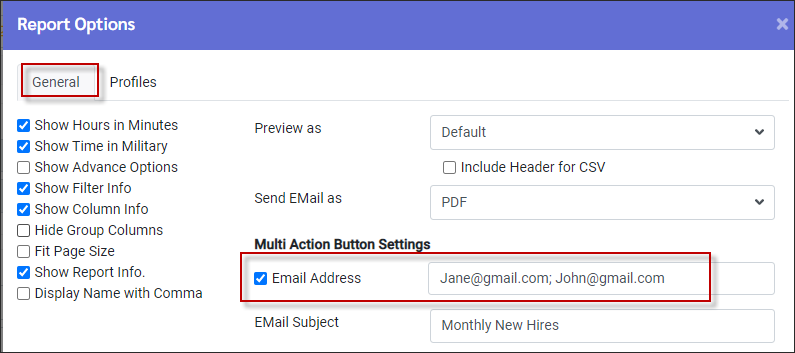
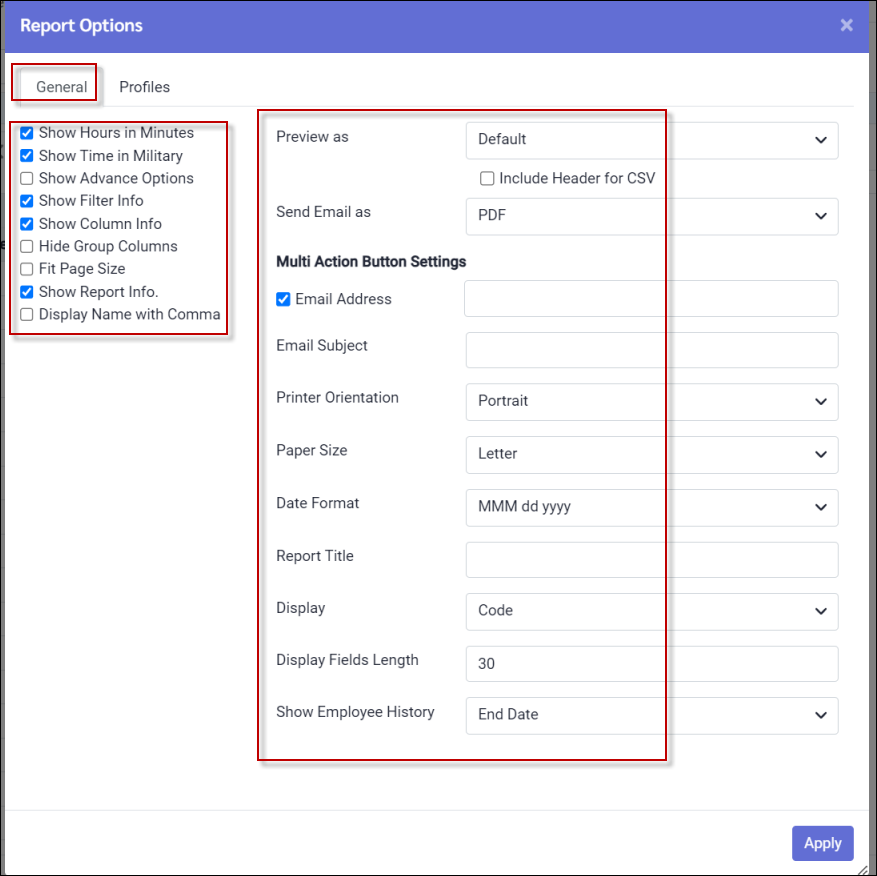
General Tab
Under the Multi Action Button Settings (above) are the fields for email address(es) and subject line. If you would like the Task Scheduler to email reports, the Email Address field must be populated and saved with the Report Setting.
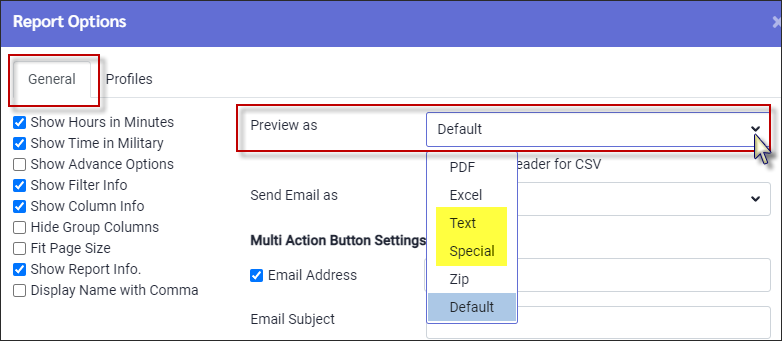
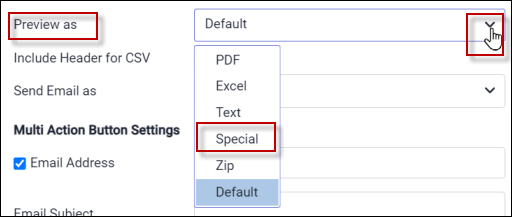
When exporting data, the Preview as must be set to Special to create a CSV file. Click on the Include Header for CSV if headers are available on your export. On the Detail menu click on the blue Preview icon.
If you would like the report in Text format; select Text from the Preview as drop-down menu.
Show Hours in Minutes and Show Time in Military This option will override the time / hour representation set in the Company Profile. When creating a New Report Setting, these two options will default to the Company Profile setting unless changed.
Display Name with Comma To display first and last names in separate columns, include both fields in the Columns selection. In Excel and CSV formats, the names will appear in separate columns, while in PDF format, they will be combined and separated by a comma.
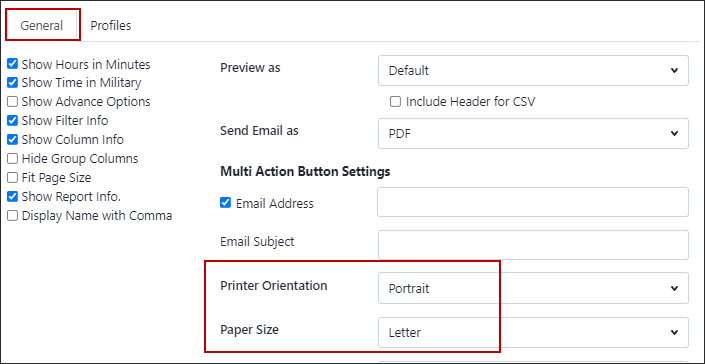
Report Sizing You may increase the number of columns on your report by changing the Printer Orientation to Landscape. This will allow for more columns than using the Portrait setting. To increase the length select Legal from the Paper Size drop-down.
Profiles Tab
This section will display your saved reports and the access status. Report settings may be deleted by clicking on the report and then clicking the X icon. If a report is to be viewed by only the person who created it, do not select the shared option.
|
Certain reports in the system may be exported as a CSV file.
Navigate to the Reports menu:
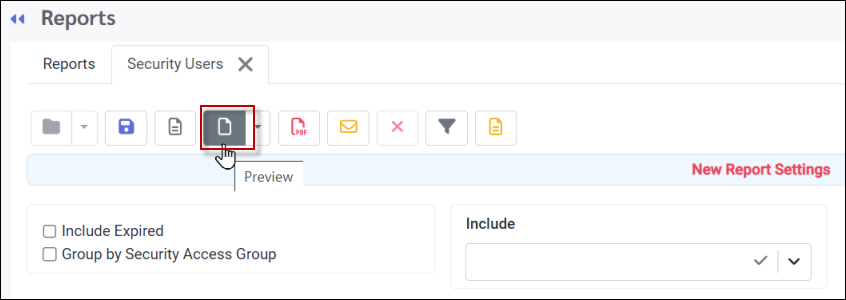
For this example, we will review the Admin Reports / Security Users report:
Once the report is open, click on Options as shown:
The following menu will appear:
Under Preview As, select Special.
Tick the box beside Include Header for CSV if you wish to have column headings appear in your export file.
Click Apply to save your settings (not shown). Back on the main Security User report menu, select Preview to view your report:
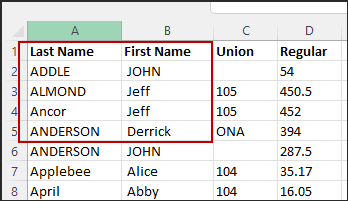
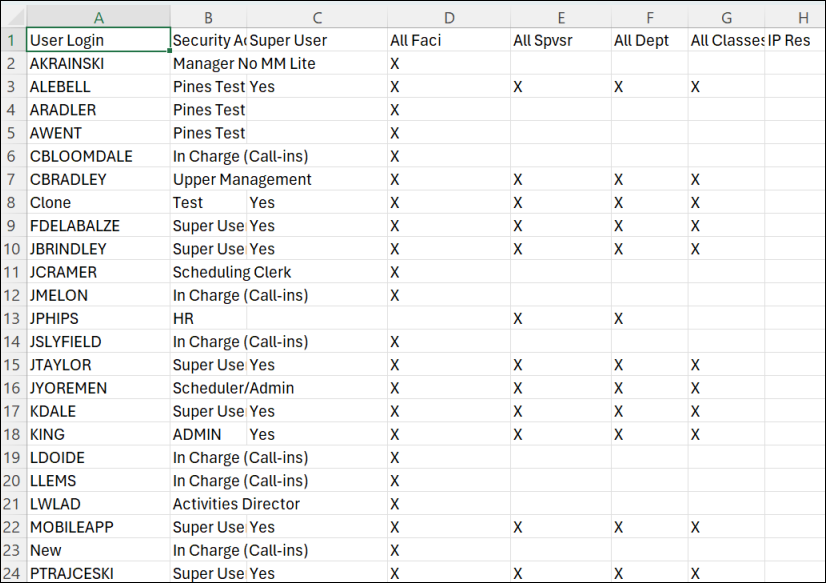
Example of report output:
|


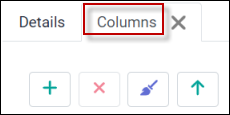
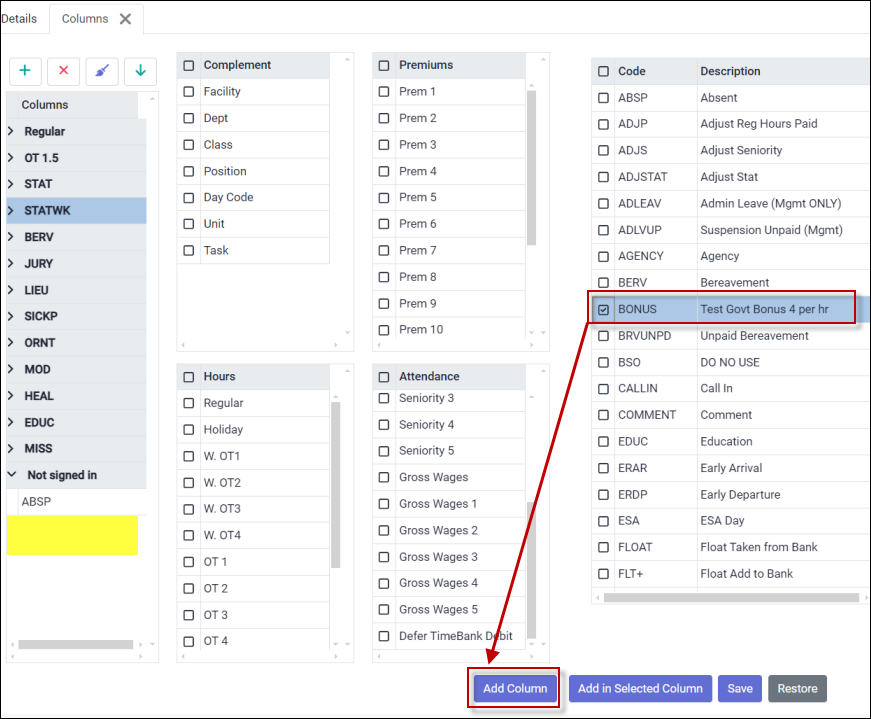
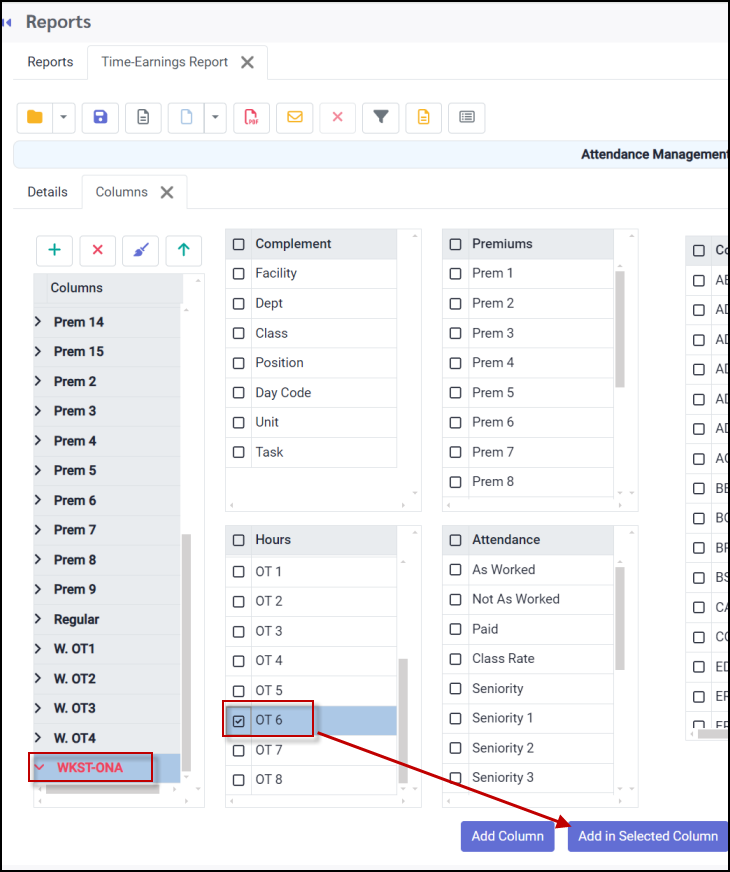
Only certain reports have an additional column heading to configure which columns will appear in your report. The Time Earnings Report contains this option. Click this option to open the column settings menu.
Column Tab Toolbar To Columns tab has four toolbar icons to assist with managing the columns.
The left column is used to configure the column headings for your report. The three (3) columns on the right display the headings and fields that complete your column setup.
Clearing Columns Click on the paint brush the clear the selections from the column panel.
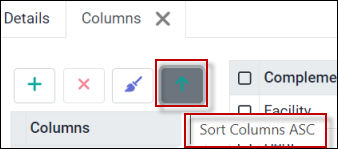
Sorting Columns Click on the green arrow to sort your column configuration in ascending or descending order.
Adding a Column To add a column to your report, on the right, click in the box beside the data item you wish to include (Bonus below):
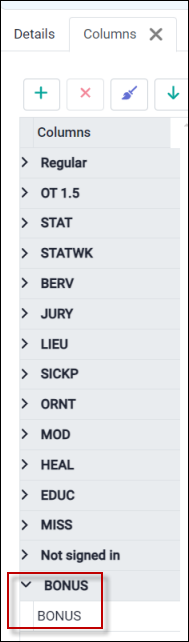
Select Add Column and the new column and heading will appear under your existing column configuration:
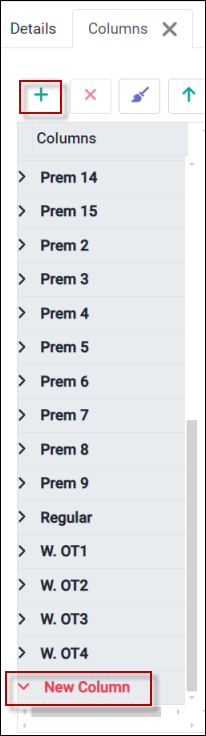
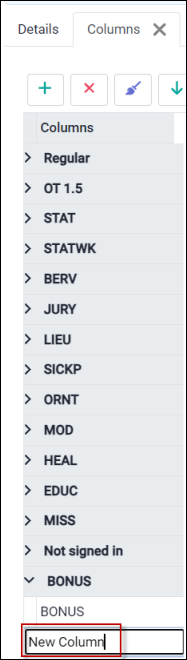
Adding New Columns (Custom) The plus symbol (+) allows you to add a new column to the report. The system first creates a New Column header.
▪Rename your column by double clicking in the New Column heading and typing the new name (WKST-ONA below). ▪On the right, select the data field that should apply to your new column heading (OT6 below). ▪Tick Add in Selected Column.
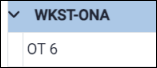
Your new custom column will now appear. Click Save to save your column changes.
|

Once you have entered the recipient(s) email address in the Options / General tab you are ready to email the reports. Select the Report Action icon. When the report has been emailed, the system will display a completion message.
Multiple recipients To enter more than one address, separate each address with a semicolon and a space. Example Jane@gmail.com; John@gmail.com
Enter the subject or report name in the Email Subject field. Click Apply.
To email the report, click the Report Action icon (below). After the report is sent, a 'Complete' pop-up will appear. The email will be sent from the default 'Do Not Reply' StaffScheduleCare sender ID. Once email addresses are saved under the General tab, the report will be emailed automatically when the Report Action icon is clicked
|