|
»Click here to display Table of Contents«
|


Menu Setup Options |

|

|

|
|
Menu Setup Options |
|
|

|
|
»Click here to display Table of Contents«
|
Menu Setup Options |
|
|
|
|
Menu Setup Options |
|
|
|
There are a number of menu options available in StaffScheduleCare which will allow you to customize your screen display.
Use the back arrows displayed beside the menu title to quickly return to your previous menu. The navigation is tracked from the moment of logging in at the Welcome menu.
|
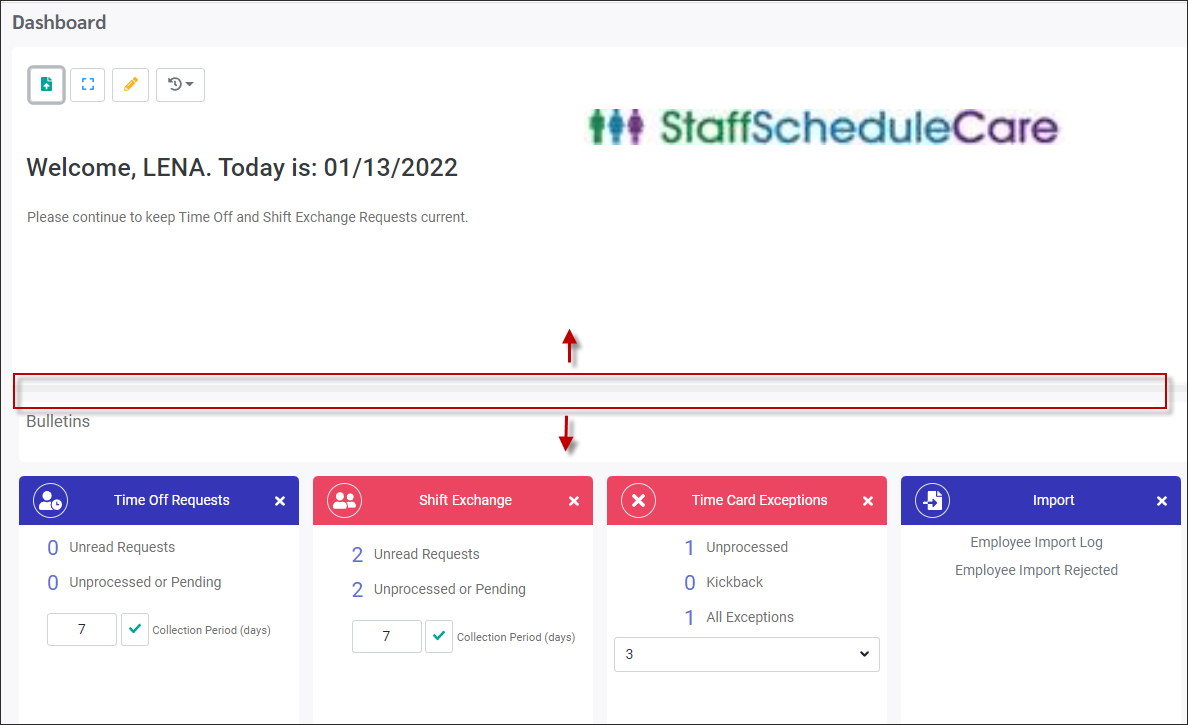
Many menus have a divider bar that may be moved either up or down to change the size of the sections on the screen. Examples of this can be found on the Welcome menu and the Time Card screens. Click and hold on the grey divider bar to drag it up or down. Position the divider bar the first time you log in. The system will keep your settings until you move it again.
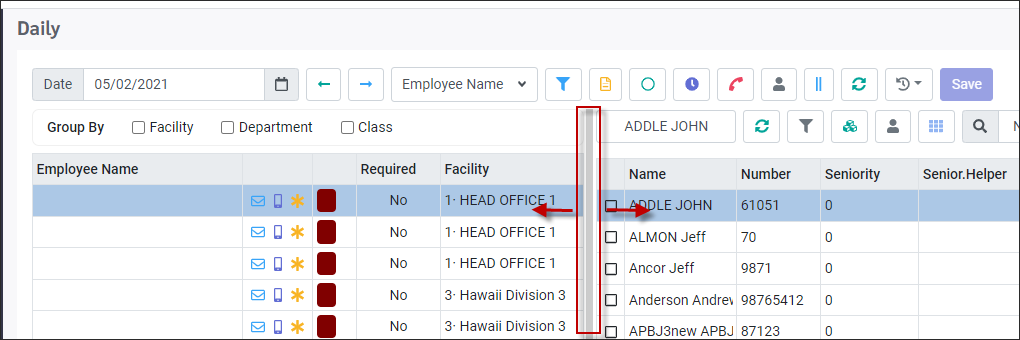
Other menus have a divider bar that may be moved either left or right to change the size of the sections on the screen. Examples of this can be found on the Daily menu. Click and hold on the grey divider bar to drag it left or right.
|
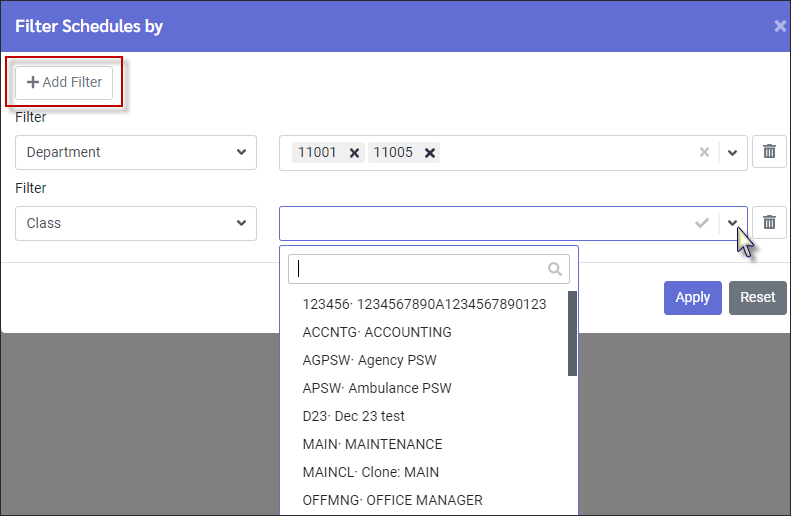
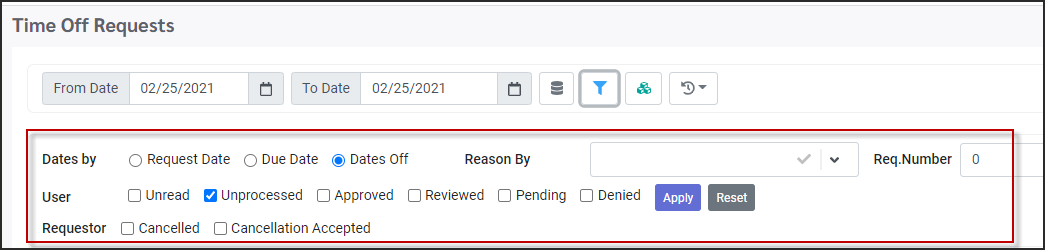
The Schedule Filter (funnel) icon is located on the screen's tool bar. When the filter has been set the icon will be blue.
Click on the icon to open filtering options available to filter what will be displayed.
Drop-down Filter
These are used to allow a selection from drop-down list. In the example below the filter is set to filter by the department 11001 and 11005. To delete a selection, click on the X.
▪Click on the Add Filter button. ▪From the drop-down list select. ▪Repeat the above until the filtering is complete. ▪Click Apply to save.
Selections can be removed from the window by clicking on the X. To delete a filter row, click on the Trash can. To restore your filter after making changes, click Reset. The window will return to filter setup that was there when the filter window was opened.
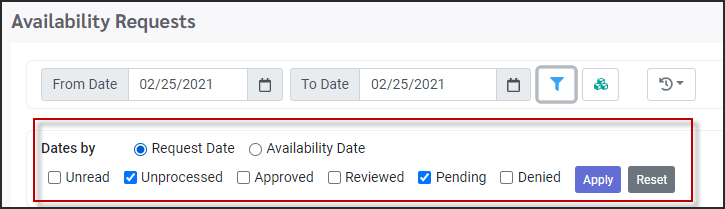
On/Off Filter
This type of filter is mostly used for Requests since requests go through a process of submit, review, approved or denied status. When a status is ticked on it will be included in the filter. I.e. if Approved is NOT ticked then Approved requests will not be shown.
▪Click on the Filter icon to open the filter options. The options will appear just under the tool bar. ▪Click Apply to save the settings.
There are slight differences in the filters shown below. Using these filters will customize what is displayed based on your need.
|
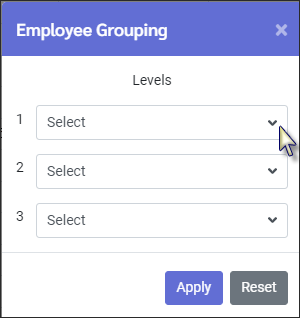
The Group (three blocks) icon is located on the screen's tool bar. Click on the icon to open filtering options available to filter what will be displayed.
Drop-down Filter
▪Click on the drop-down arrows and make a select. In most cases up to three levels of grouping can be set. ▪Click on Apply to save.
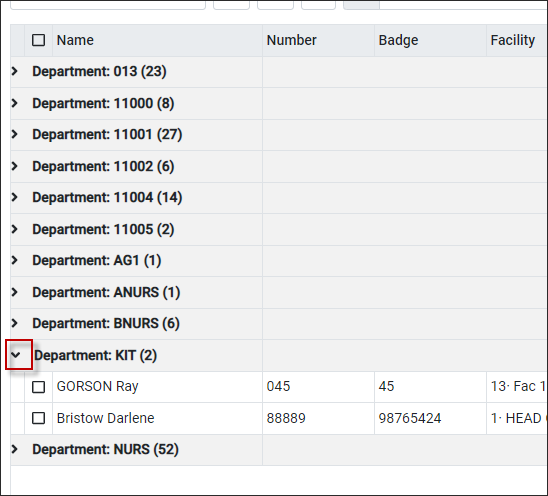
In this example we have grouped by department. The group header information includes the department name and how many employees are in this group.
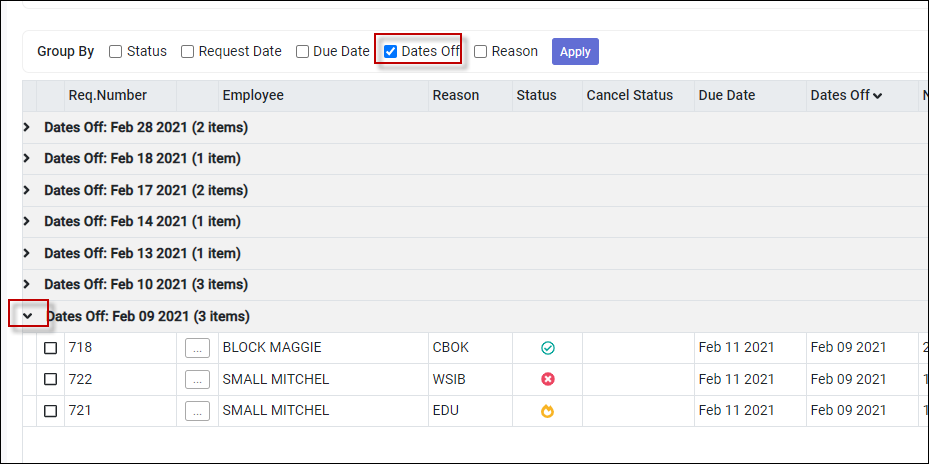
On/Off Filter
Click on the Group icon and the grouping options will appear just below the tool bar. Click in the check box to select how the lines should be grouped.
The screen will refresh with the data grouped. The group header will include the number of employees within each group.
To expand a group, click on the arrow. To collapse, click the arrow again.
|