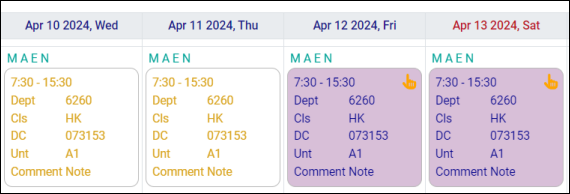
The Active Schedule is populated by running an update from the Master Schedule, which contains all the daily shift information for all the weeks of each schedule rotation. The Active Schedule should be used for temporary changes only. Permanent changes should be made to the Master Schedule line the employee is assigned to.
Edits to the Active Schedule may include:
▪Editing shifts, e.g. change of Day Code, department, unit, etc.
▪Manually adding shifts.
▪Removing shifts.
▪Attendance entries e.g. for sick days, vacation days, etc.
▪Shift exchanges.
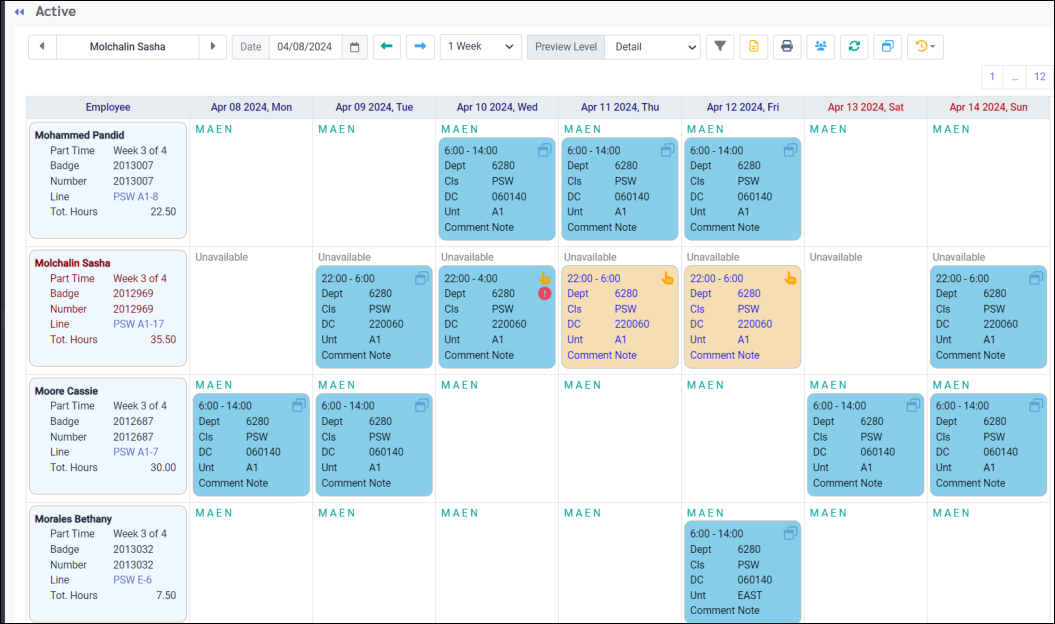
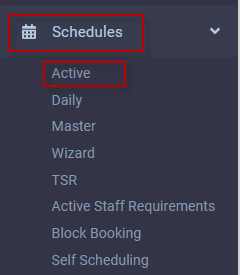
▪Select the Schedules menu. ▪Select the Active menu.
Modifying a Schedule
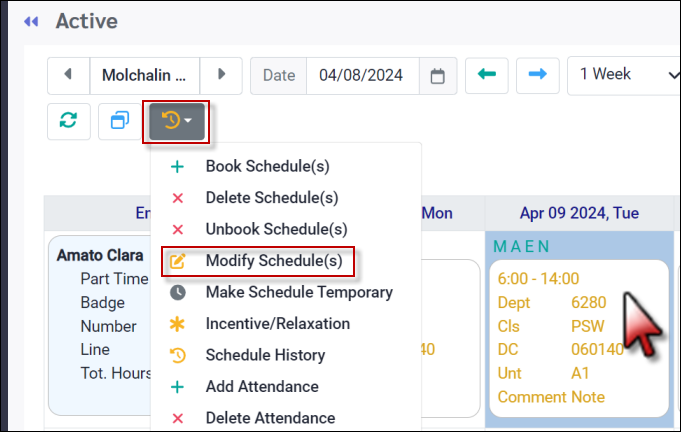
▪Select the date to modify by clicking anywhere within that date to outline it in blue. ▪Click on the Actions icon and select Modify Schedule(s).
The following menu will appear displaying all the details of the shift. Use the scroll bar to view all details.
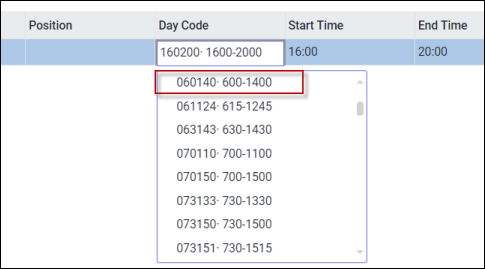
You may edit most fields by double clicking in the field or by selecting the desired option from the drop-down list as shown.
In this example the Day Code is being modified.
▪Double click in the Day Code window. ▪Click on the new Day Code. ▪Click Save.
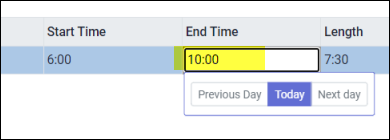
You may also edit certain fields that do not contain a predefined drop-down list. For example, the start or end time of the shift may be modified at the Active Schedule level. ▪Double click in the field so the window is highlighted with a blue box. ▪Enter the new end time. ▪Click Save.
The modified shift now appears. Please note the hand icon will also appear indicating the manual change. Time changes will also be clearly defined with the exclamation mark icon (see image below):
Make Schedule Temporary
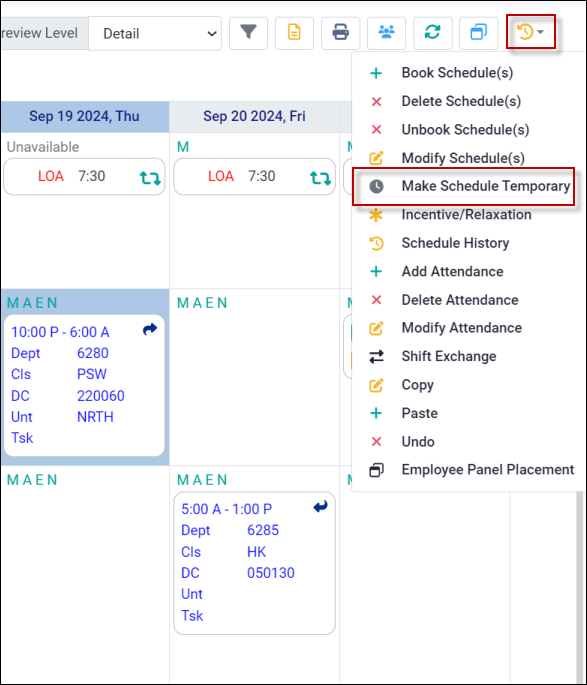
You may select Make Schedule Temporary to assign the predefined temporary colour setting to a shift or multiple shifts. The only function of this feature is to adjust the colour to visually recognize the shift(s) as temporary. Temporary colour settings on the Active Schedule will not apply to the Master Schedule and vice versa.
|
Adding a Shift
To manually add a shift to an existing Active Schedule:
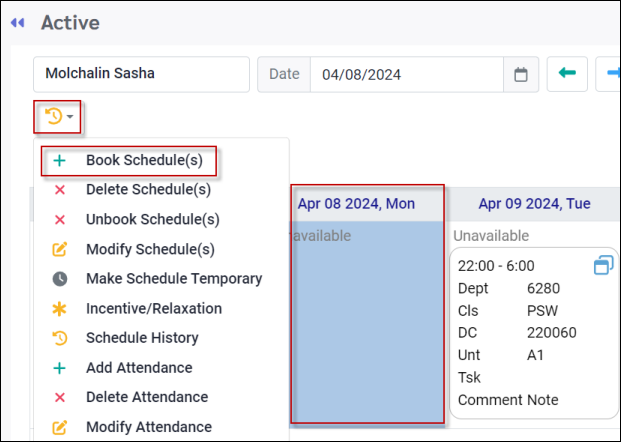
▪Click on the date to highlight it in blue. ▪Click on the Actions icon and select Book Schedule from the drop-down list.
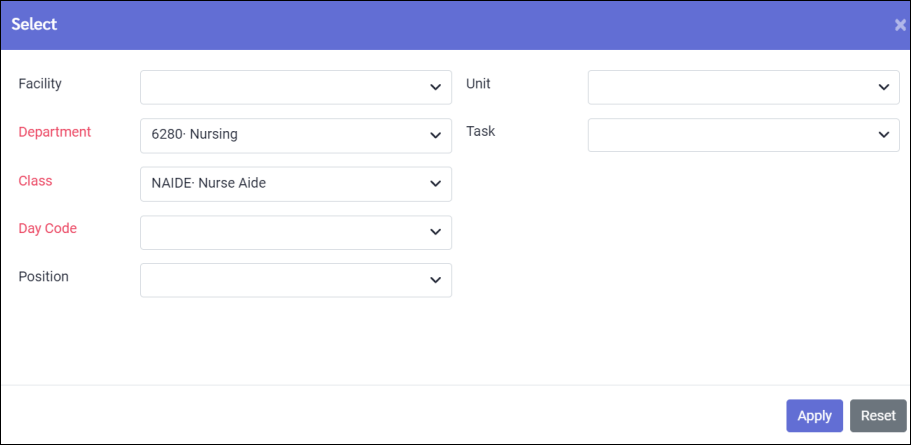
The following menu will appear. The required fields for your facility are indicated in red. If a required field is empty and Apply is clicked, a warning message will appear.
▪Use the drop-down arrows in each field to select the shift information. ▪Select each of the fields you require. ▪To start your selection again, click Reset. ▪Once all your shift requirements have been selected, click Apply.
Removing a Shift
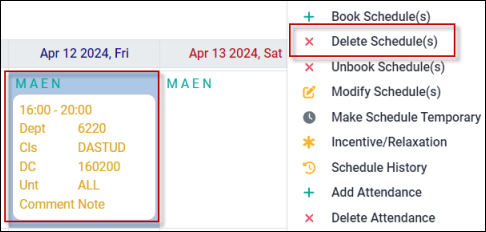
A shift may be removed from an employee's Active Schedule by either selecting Delete Schedule(s) to remove it permanently, or Unbook Schedule(s) to remove from the schedule but leave an unfilled shift to be filled by another employee using one of the Filling Shift methods available in StaffScheduleCare.
▪Click on the shift to be deleted so it is highlighted. ▪Select Delete Schedule option from the Action Menu.
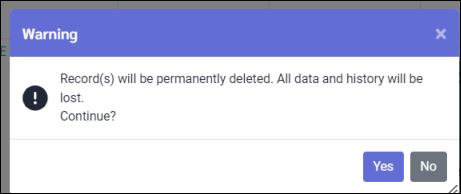
A warning message will appear:
▪Click Yes to delete the shift.
The Active Schedule will refresh and the shift will no longer appear.
|
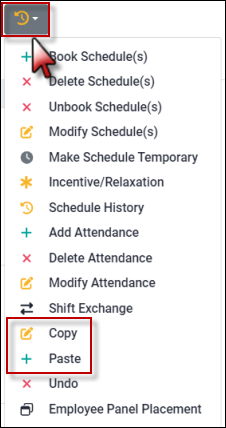
Shifts may be copied and pasted either by using the CTRL C / CTRL V keyboard functions or by selecting Copy and Paste from the Actions menu. The Copy, Paste and Undo functions only apply to Shifts. These functions may not be used for Attendance Codes.
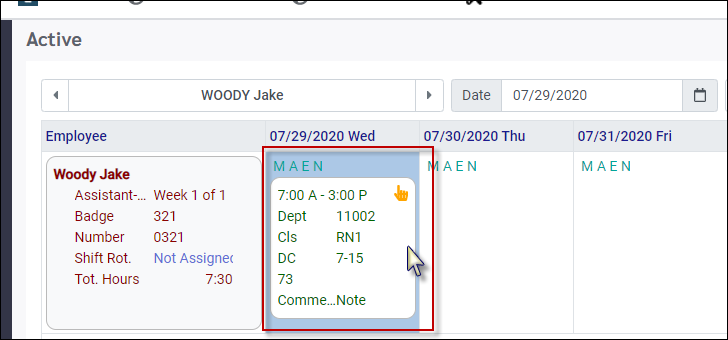
▪Click on the shift(s) you wish to copy. This will outline it in blue.
▪Select Copy from the Action menu. ▪Click on the date to copy the shift to. ▪Select Paste from the Action menu .
The shift will appear with the manual icon (hand) visible.
Copying Multiple Shifts
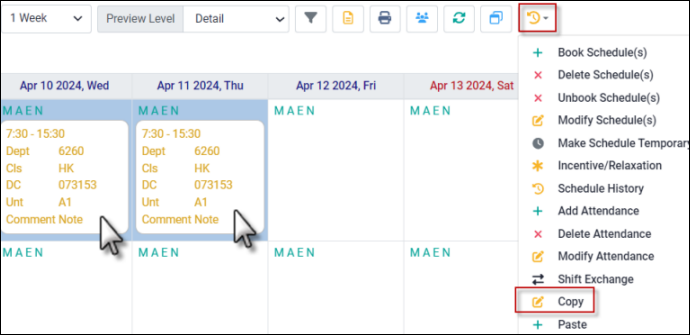
▪Click on the first day, then holding down Control on your keyboard while clicking the remaining days. ▪Select Copy from the Action menu to copy.
▪Click on the first day, then holding down Control on your keyboard while clicking the remaining days. ▪Select Paste from the Action menu to paste.
You will now see the copied shifts appear on the schedule.
When shifts are copied and pasted, they will become manual shifts and will therefore take the colour setting for manual shifts (below).
|
See Also:
