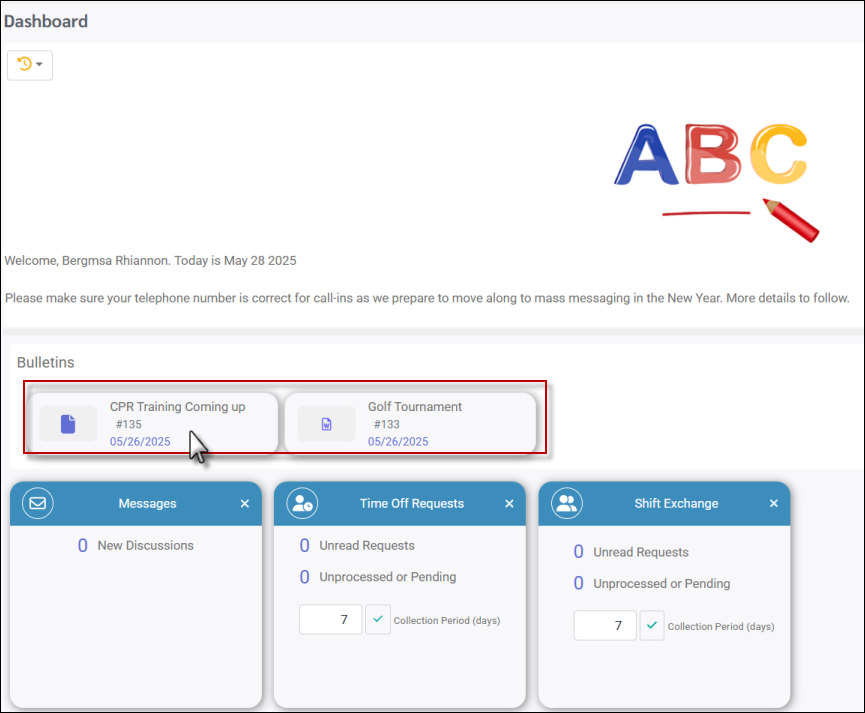
The Welcome menu was designed to keep you the employee, up to date on company news and allow you to follow the progress of your time off and shift exchange requests.
After logging in to the software with your user name and password you will be launched direectly to the Welcome menu (default setting).
The Welcome menu will appear with the employee’s name in the centre, next to the date. You must activate the default set of widgets as shown below:

▪To view your Unread Messages, click on the number beside it which will take you to the Discussions page.
▪To follow-up on your Time Off Requests, click the number beside it.
▪To view your Shift Exchange request, read the Unprocessed or Pending by clicking on the corresponding number.
The Welcome menu is broken down into three sections and is user definable. 1.In this example the lower portion displays the Messages, Time Off Requests, and Shift Exchanges widgets. 2.The top of the screen may include the company logo and a general welcome message to the staff. 3.The middle of the screen is the bulletin board which may include notices for upcoming events or company news, i.e., training schedule reminder. Divider Bar You may adjust the size of the panels by moving the grey divider bar up or down. Click and hold on the bar, then drag it up or down until you have the view you would like. This setting will be saved for the next time you log in.
|
Shift Exchanges & Time Off Requests
Each time you make a time off or shift exchange request it is posted to your Welcome menu so you may follow its approval progress. The number beside the Unprocessed or Pending options indicates how many shift exchanges or time off requests you have that you have not read yet.
The history of Shift Exchange Requests may be seen by clicking on the number beside Unprocessed or Pending.
Clicking on the number beside the Unprocessed or Pending requests will take you to the corresponding requests screen.
In our example below, clicking on the 1 Unprocessed or Pending in the Shift Exchange widget, took this employee to the Shift Exchange Requests menu. From here, the employee may view the details of the Shift Exchange Request and either Accept or Deny the request.
|
You may follow the status of your time banks and availability requests from the Welcome menu.
The image on the left displays an employee's availability request which is unread and unprocessed. The image on the right captures this employee's time bank balances. Availability requests in this database must be approved by a manager (optional). When no manager approval is required for availability, this widget does not need to be enabled.
|
In the centre left section of the Welcome menu, you may find corporate bulletins. Click anywhere on the bulletin to open it.
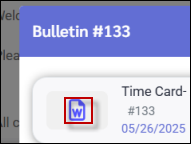
Bulletins may have attachments which you may open by clicking on them.
|
Tool Bar Options Menu
The Welcome menu provides different functions by means of icons found under the employee header on the left side panel.
Question Mark (Help Manual) When you click on the question mark you will be redirected to the StaffScheduleCare online help manual. Depending on where you are in the software, once clicked the manual will be opened to that section. In the example below we are on the Welcome menu when we clicked the help manual which then opened to the Welcome menu section of the help manual.
Bell (Report Processing) When reports are being generated or a process is running, the bell icon will rock side to side with a red circle to indicate that an action is in progress.
Power (Log out) Click this icon to log out of the system.
Profile Options To change such options as localization and password, click on the Profile icon. The menu options available will depend on your security access level.
Flag (Localization) This indicates the user settings preference. This user is set to Canada. Click on the flag to change your localization for your language selection.
Time Representation Allows you to set how the time and hours will be represented in the system.
Drop Down Display Configuration Here you may select how the drop-down lists appear. The Display by options determines how you see the code configuration. You may see the Code only, Description only, Both or Combined. Selecting Both will always show Code and Description. Selecting Combined will only show the Code, but if the drop down menu is opened, both Code and Description will be displayed.
The Sort by options allow you to select in what order the information is displayed. Click Apply to save your settings.
Change Password Should the need arise that you would like to change your password, you may do so using the Change Password option. ▪In the pop-up menu enter your new password. ▪Click Save.
The Password Strength validates against the password requirements set by your facility.
Change Theme You may change how the menus within StaffScheduleCare are displayed. You have the choice of either a light or dark background. Click on the circle icon to make your selection.
|


