Employees may access the Request module to enter a time off request. Depending on the company rules the requests may be auto approved or require a manager's approval.
▪Select the Requests menu.
▪Select Time Off Requests.
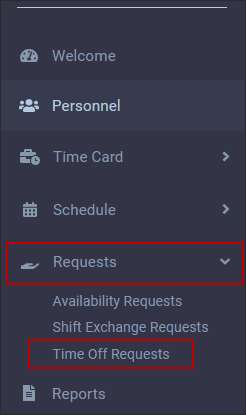
Time off requests are made from the Time Off Request menu.
▪Select the Requests menu. ▪Select Time Off Requests.
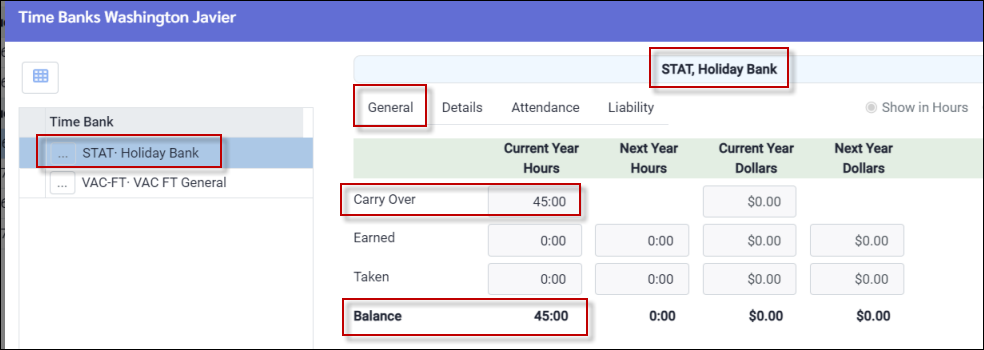
You may view your Time Banks at any time by clicking on the Time Bank icon.
The Time Off Request menu is designed with two sides.
Left Side Shows the employee’s requests.
Right Side Shows the details of the request in focus.
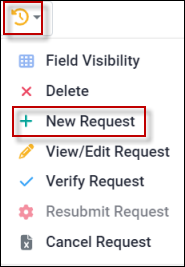
▪Click on the Actions icon found in the top left toolbar and select New Request.
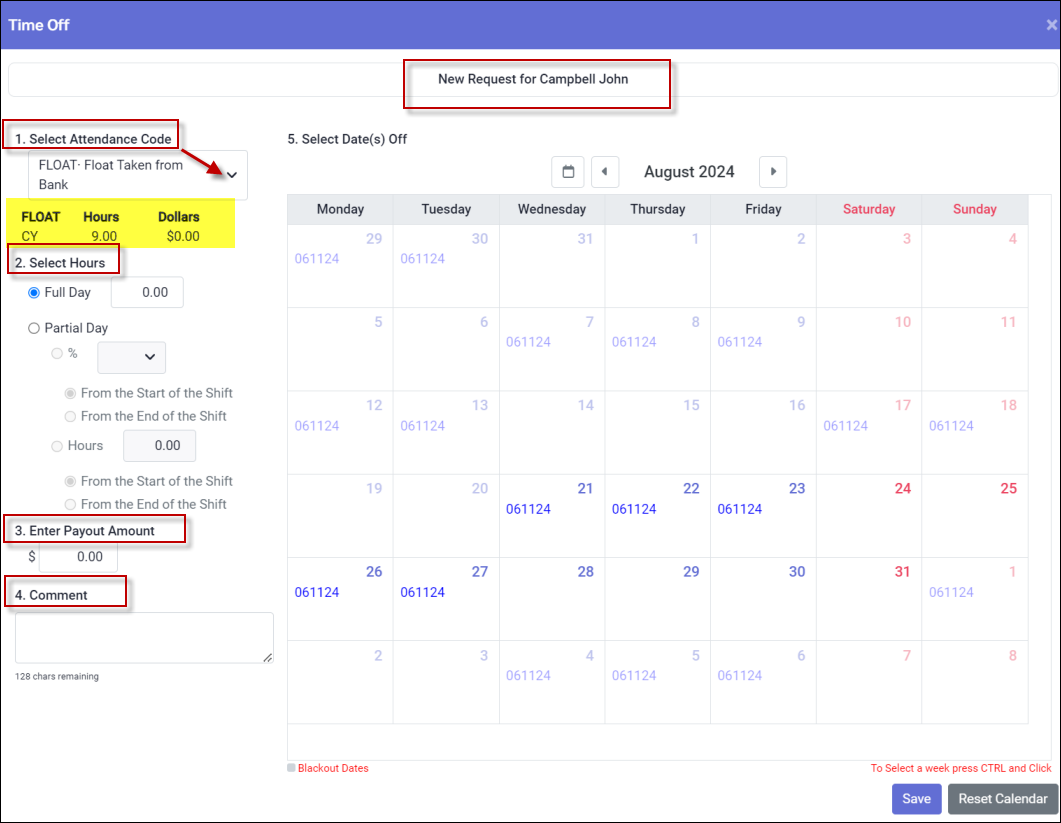
The following menu will appear. To create a request, follow the steps outlined below.
1.Select the applicable Attendance Code from the drop-down list by clicking on the down arrow. If the code you select is configured to draw time from a bank, the bank balance will appear once the code is selected (yellow above).
2.Select Full Day or Partial Day.
Full Day If you select Full Day, the system will automatically unbook the full length of the shift for the scheduled date(s) selected and will remove the time from the bank if applicable. You do not need to enter the hours.
If you select a range of dates, some scheduled and some not, the system will be configured to add the Attendance Code with Zero Hours on the days that are not scheduled so that the employee will not be called to fill in for someone else during that period .
If you select Full Day and complete the Hours section as well, the system will add the requested number of hours to each day you select, whether scheduled or not, and will remove the time from the bank if applicable. Regardless of the number of hours selected, the system will unbook the full length of the shift. For example, if you select four hours off an eight-hour shift, the system will unbook your shift, create and unfilled shift for eight hours and add the Attendance Code with four hours to the schedule.
Partial Day If you would like to request a partial day off, you have the option of selecting a percentage of the day or a specified number of hours, from either the start or the end of the shift. The system will then create an unfilled shift for the remaining hours that need filling. For example, if you are scheduled from 7am to 3pm and request five hours off from the start of your shift, the system will create an unfilled shift from 12pm - 3pm and will add the Attendance Code for five hours to the employee's scheduled date. Time off configuration is required to determine the number of hours off that will generate an unfilled shift.
3.A Payout Amount should only be used if your system is configured to use dollar and hour options for the Time Banks. Please see your manager for the best method to use for your facility.
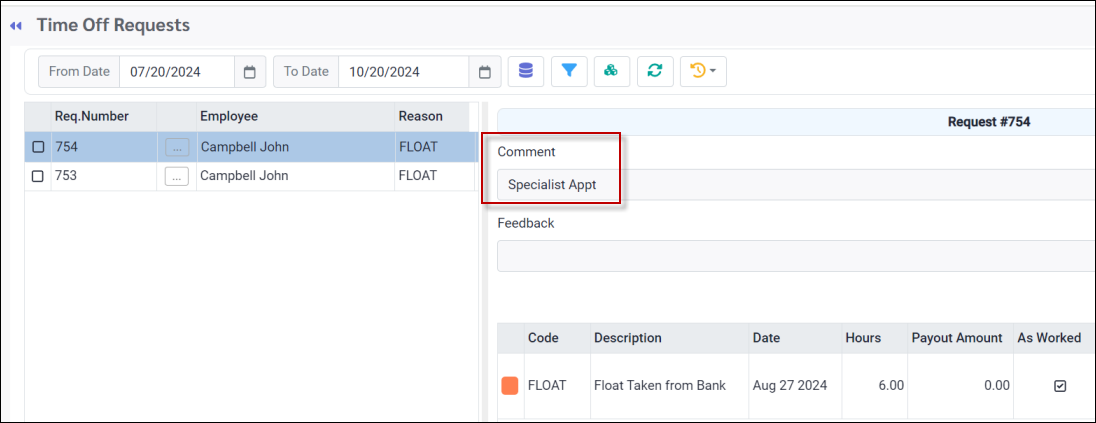
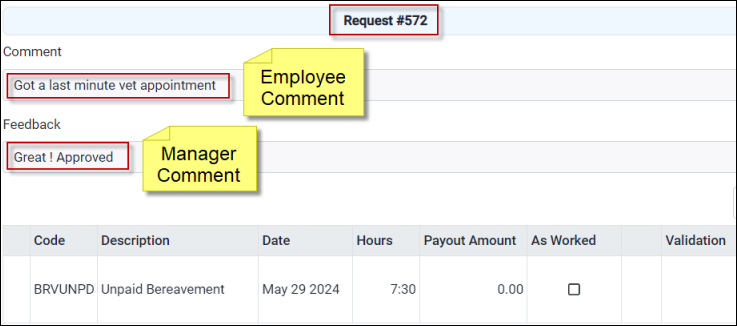
4.The addition of a comment is optional and can be used to communicate further details of your Time Off Request to your manager. If added, the comment will appear as follows when viewing the request:
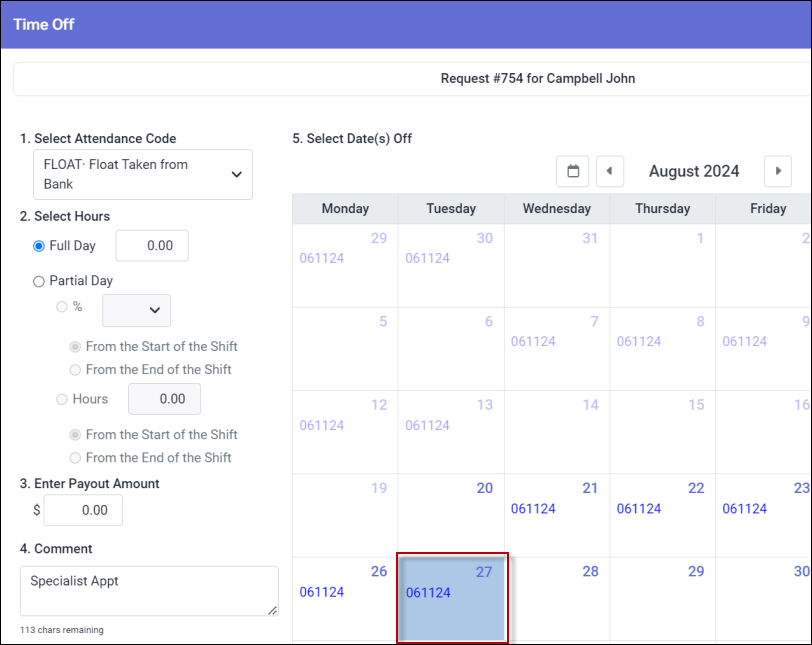
5.The selection of date(s) is done in the calendar window. See Selecting Dates section.
|
In the calendar section you select the date(s) for your time off. Only the current day and remaining days of the selected month will be bold. Use the previous / next arrows beside the month / year field to change the month.
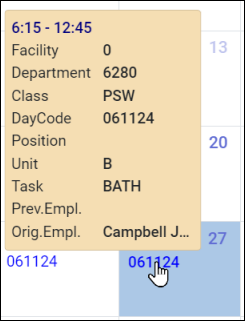
Your Active Schedule is shown on the calendar using the Day Codes. Hover over the Day Code to see the shift details.
▪Click Submit (bottom of calendar menu) to process your request. The following menu will appear:
▪Click Apply anyway to process the request or Cancel to return to the request you are working on.
|
To view previous requests:
▪Select the Requests menu. ▪Select Time Off Requests.
Date Range Selection
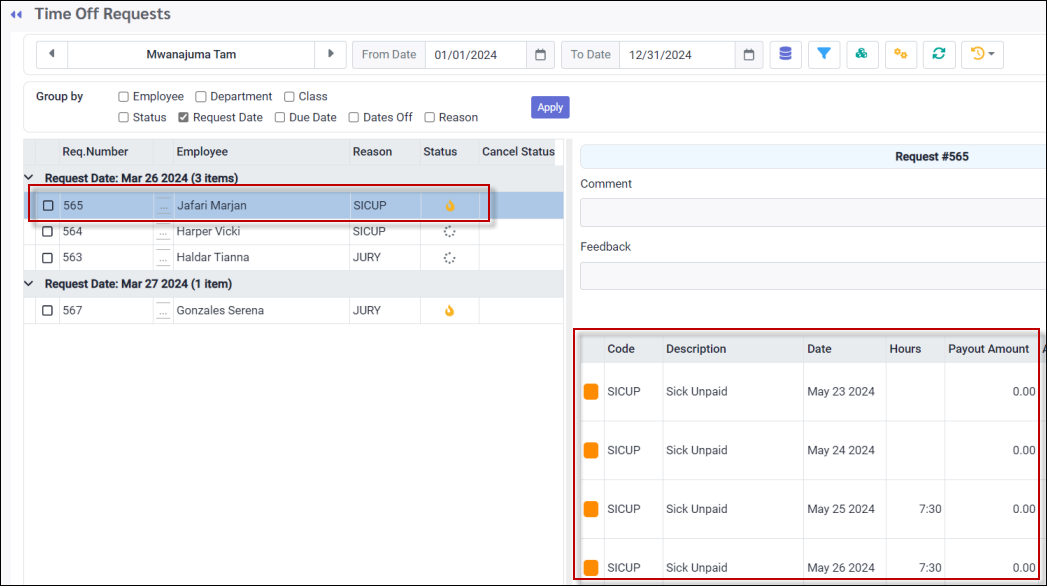
On the top left side of the Time Off Requests menu, set the date range to view your requests:
Show Filter
Use this option to select which type of request status you wish to see, Unprocessed, Approved etc.
▪Click on the Filter icon to open the options. If the Filter icon will be blue if there is a filter applied. ▪Make your selection (Unprocessed and Approved) and click Apply to save it.
Show Groups
Click the Show Groups icon and the Group By option box will appear as shown below. Use this option to group your requests by any of the choices shown.
▪Make your selection by clicking the applicable box(es). Click Apply.
Request Details
Click anywhere on any request row and the details of this request can be seen on the right (below).
Request Comments
The Comments tab displays your comment when the Time Off Request was made, and the manager's feedback when the request was processed iIf applicable. See example below:
|
Many Attendance Codes used for Time Off Requests are attached to your banked time. You can see your bank details from this menu.
▪Click on the Time Bank icon as shown.
The following menu will appear displaying all your Time Bank totals on the General tab and the Attendance Code history on the Attendance tab.
The time can be expressed in hours or days. Please note that hours to days configuration is required to provide access to this option. The Time Bank configuration will also determine the number of hours that comprise a day.
|
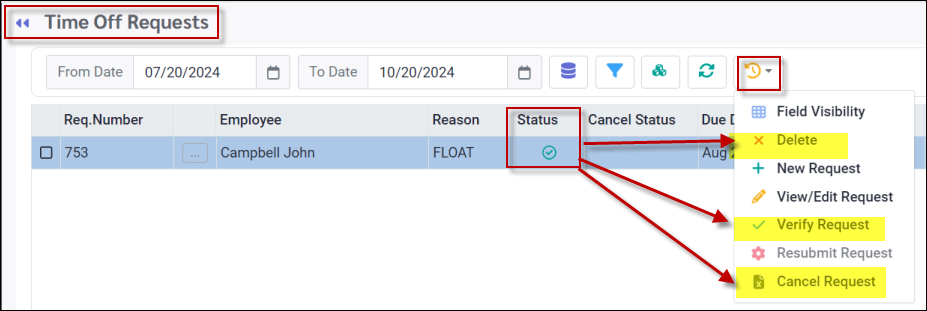
An employee can cancel or delete a Time Off Request if the status of the request is anything other than approved. To delete a request navigate to the Time Off Request screen.
▪Click on the request to be deleted. ▪Click on Actions icon and select Delete.
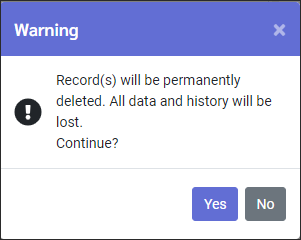
▪Select Yes to delete the request.
The request below has already been approved. Note the options below that are not available to the employee in this case. The employee may still view the details of the request using the View / Edit Request option, but editing will also be disabled.
To cancel a request that has not been approved:
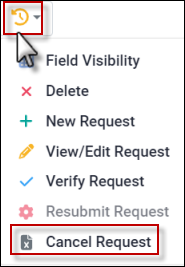
▪Click anywhere on the line with the request you wish to cancel. ▪Click on the Actions icon and select Cancel.
▪Click and select Cancel Request. The cancellation menu will appear. ▪To save the cancellation, you must populate the Feedback field with the reason for the cancellation. ▪Click Save.
Canceled requests will appear with the following icon under the Cancel Status column.
Welcome Menu
If the employee has configured the Welcome menu have to display the Time Off Request widget they will be able to see any unprocessed or pending requests.
Click on the number beside Unprocessed or Pending (1) to go to the View Time Off Requests menu to see all your requests.
|
See Also:
Employee Self Service & Manager Self Service


